
The latest version of Raspbian, the operating system for the Raspberry Pi, was released in August. It’s called Raspbian Stretch and you can read more about it from the official launch blog post, Raspbian Stretch has arrived.
Of course, Xojo apps work just fine on Raspbian Stretch.
The blog post does have this caveat about the upgrade:
Upgrading an existing Jessie image is possible, but is not guaranteed to work in every circumstance.
This scared me a bit, so I decided I would rebuild my SD card with Stretch so I could have a clean install. Here is how you can set up a new SD card and tweak some settings to make it easier to access the Pi remotely:
- Download the Raspbian image from the official download page: Raspberry Pi Downloads
- Download Etcher, which is a tool that can set up the SD card with the image.
- Shut down your Raspberry Pi and removed its SD card. Be sure to first copy off any data you want to retain as this process will wipe the card and any data on it.
- Plug the SD card into your computer. I used a USB micro SD card adapter for my Mac.
- Run Etcher and select the Raspbian image you downloaded earlier.
- Select the SD card in Etcher and click Flash. This wipes the card and installs Raspbian on it.
- When it finishes, put the SD card back into the Raspberry Pi and power it up. You’ll also want to connect the Pi to a keyboard, mouse and display so you can do some initial configuration.
- After the Pi boots and you are at the desktop, connect to your WiFi network.
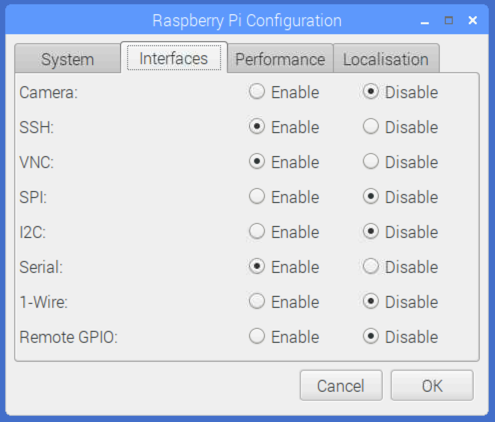
- Click the Pi icon in the menu and select Preferences->Raspberry Pi Configuration.
- On the Interfaces tab, enable SSH and enable VNC.
- You may also want to go to the Localisation tab and set the timezone.
- Click OK.
- Make a note of the Pi’s IP address if you do not know it. You can see the IP address by hovering the mouse over the WiFi icon in the menu.
- Back on your computer, download RealVNC Viewer.
- Install and run RealVNC Viewer.
- Add a new connection and enter the IP address of your Raspberry Pi. You’ll be prompted for the username/password with is pi/raspberry unless you changed it.
- You’ll now be remotely connected to the Pi and can use it without it being connected to a keyboard, mouse and display. This means you can also disconnect the keyboard, mouse and display if you want.
- With this setup you can also use an FTP app to transfer files to the Pi. Just use the IP address and username/password for the Pi.
- Lastly, refer to these steps to set up the Remote Debugger on the Pi so you can easily run and test your Xojo apps directly on the Pi.
To learn more about using the Raspberry Pi and Xojo together, refer to our free Programming the Raspberry Pi with Xojo book and the Raspberry Pi section of the User Guide.