
In a previous post we saw how to implement the Singleton Design Pattern in our Xojo apps. Now, it is time to look at another useful Design Pattern you can use in your apps: the Observer Design Pattern. This one solves the kind of question “How can the ‘x’ controls be automatically notified every time there are changes on ‘y’?” Sound interesting? Let’s see how!
In fact, this is the first of a two part series regarding the Observer Design Pattern. This one will focus on how easy is to implement using the interfaces already available in Xojo for UI controls like the PushButton, the BevelButton, and also for the Timer class. In Part 2, we will see how to implement the Observer Design Pattern from scratch, using our own Classes and Interfaces, so it will be easier to understand the mechanisms behind this Pattern and how to use it.
Why to use the Observer Design Pattern?
Let’s suppose we want to create an app where several Canvas controls have to randomly change their color every time we push a button. Of course, we can approach this from several angles. For instance, we can put the code in charge of iterating every window control into the “Action” event of the PushButton control, changing the color only if the iterated item is an instance of our Canvas based subclass (let’s call this class the ColorPatch class).
That will work, but undoubtedly is not the most elegant, flexible and decoupled of the possible solutions.
A better way of approaching this problem is using the Observer Design Pattern. This one consists on the ability for any class instance to register itself into other instance, in order to receive a message every time there is an action in the object we have registered on.
Sounds weird? Ok, it’s like a group of people interested in one event saying the organizer: “hey, notify me once the tickets are available for purchase”. Best of all, you already can do this kind of things via the ActionSource and ActionNotificationReceiver Class Interfaces.
In fact, the ActionSource and ActionNotificationReceiver work together, because an ActionSource instance (PushButton, BevelButton or Timer) will call the PerformAction method of every ActionNotificationReceiver object registered with it (i.e. the event organizer will notify every registered person about the availability of the tickets).
ActionSource and ActionNotificationReceiver at Work
So let’s use these Class Interfaces to see how they apply on our example app. Go ahead and create a new Desktop Project using the Xojo IDE. Then, drag the Canvas icon from the Library panel and drop it into the Project Browser (the leftmost column of the IDE). This action will create a new Canvas based subclass with the name “CustomCanvas”.
Select the CustomCanvas item and push the Interfaces button on the Inspector panel. This action will show a sheet window where we will be able to choose any of the already available Class Interfaces in the Xojo Framework for our subclass. In this case we are only interested on the actionNotificationReceiver Class Interface, so select the associated checkbox control and confirm the selection, clicking the “OK” button to dismiss the window. Now, our CustomCanvas class IsA Canvas and also IsA actionNotificationReceiver.
As result of the Class Interface selection, you will see that the PerformAction method has been automatically added to the CustomCanvas class; and, in fact, this is the method that will be invoked by the object acting as the source of notifications. Write the following sentence in the PerformAction Code Editor:
me.Refresh
Simple, isn’t? The truth is that the Paint event of our Canvas subclass (triggered with the Refresh method) will be in charge of executing the code needed to randomly change the control color. For that to happen, add the Paint Event to the CustomClass (Insert > Event) and write the following code inside:
Dim r as new Random
g.ForeColor = rgb(r.InRange(0,255),r.InRange(0,255),r.InRange(0,255))
g.FillRect(0,0,g.Width,g.Height)
We have finished the work on our CustomCanvas Class, so it’s time to create a mere functional user interface. Select the Window1 item on the Project Browser, then drag the CustomCanvas item from the Project Browser to the Window Editor. That action will create a new instance from our Canvas based class.
To reproduce several color patches, the easiest is to define a Control Set. Let’s think about it as a group of controls of the same type that share the same behaviour and that we can refer from code using their index, as the “position” they have inside the group.
To define a new Control Set, select the CustomCanvas instance on the Window1 control and select the Attributes tab of the Inspector Panel, as shown in the following image:
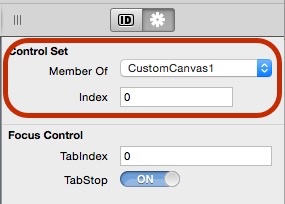
Select the popup menu “Member of” and choose the “New Control Set” option. When done, the Xojo IDE will create the “CustomCanvas1” group assigning the index “0” to the current selected instance.
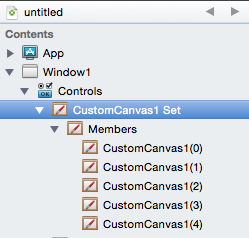
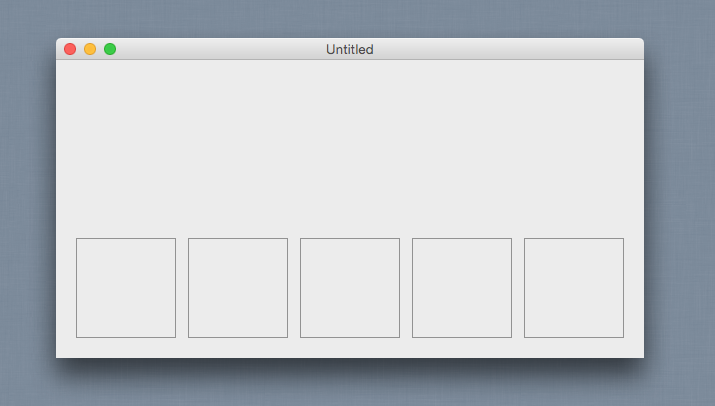
Now, duplicate the control four times and align them side by side. You will notice that each control has its own index on the control group they belong to. In fact, this is shown in the Project Browser as a hierarchy.
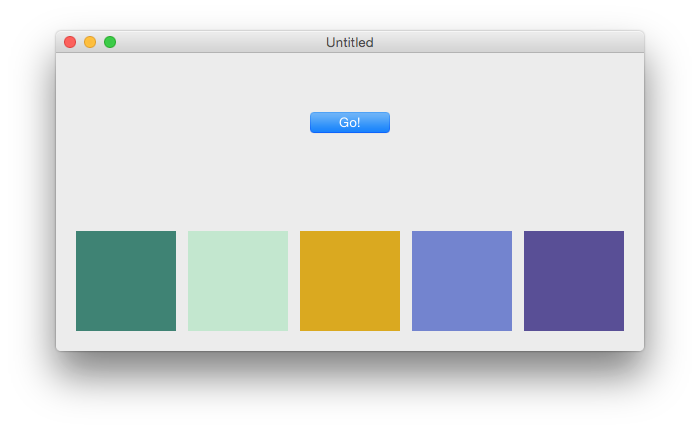
The user interface should look like this:
To finish our user interface, just need to add a trigger control, and for that we will add a PushButton to the window. Remember that this control implements by default the “ActionSource-ActionNotificationReceiver” paradigm.
Observer Pattern Design into action
Now, we have to register all the objects that we want to be notified as result of the PushButton action (that is, the ActionSource control), so they can execute their associated action. For that, we will celebrate having grouped them in a Control Set!
Choose the item labeled “CustomCanvas1 Set” on the Project Browser; that is, the item that groups all the members, instead of selecting any one of its members.
Add the Open event to the selected item (Insert > Event) and write the following code on the associated Code Editor:
PushButton1.addActionNotificationReceiver me
This way we will have registered all the members of the group as objects interested on receiving the notification from the PushButton.
Run the app and push the PushButton control, you’ll see that every time you push the button⦠all the canvas will radomly change their color!
You can watch the video (in Spanish only) that talks you though this example.
NEXT: Design Patterns in Xojo: Observer, Part II
Javier RodrÃguez has been the Xojo Spanish Evangelist since 2008, he’s also a Developer, Consultant and Trainer who has used Xojo since 1998. He is in charge of AprendeXojo.com and the developer behind the GuancheMOS plug-in for Xojo Developers and the Snippery app, among others.