
Now that Xojo Lite includes support for saving projects in version control format, it seems like a good time to revisit how you can use Xojo with GitHub, the popular online Git hosting service.
What are Git and GitHub?
Git is an open-source version control system, also known as a source control system. Created by Linus Torvalds in 2005, it is now the most popular version control system, supplanting Subversion a while ago.
GitHub is an online Git hosting service, now owned by Microsoft. GitHub provides additional features beyond just Git hosting, but for this post we will focus on its Git hosting. GitHub is free to use for both public and private repositories.
A repository is essentially a place to store a project. Public repositories are great ways to share open-source projects. Others can view and download the source code. Private repositories are only visible to you and are great for your own internal projects.
Git is a distributed version control system, which just means that the source code can be versioned locally and on the server, only synchronizing when necessary. For simplicity it is common to keep both in sync, however. Older version control systems such as Subversion were server-based and versions were only ever kept on the server. A distributed version control system is slightly more complex, but it does have the advantage of making it easier to work offline.
A version control system tracks changes made to text files, something that is incredibly useful when it comes to source code. Tracking changes is a very common task that is needed while programming. You may have seen people save their projects as MyProject1, MyProject2, MyProjectNewVersion, etc. That is a rudimentary way of trying to ensure you don’t lose changes as you update your code. With version control and the Xojo version control project file format you get a much more flexible technique.
When you save your project using the Xojo version control project file format (called Xojo Project) in the file selector, each project item is saved as its own file on the drive. And each of these files is plain text — you could view them using a text editor if you wanted.
You might be thinking: “I’m just a single developer, I don’t need this extra complexity.” But version control systems are not just for multi-person teams. Sure, version control is a great way to make sure that different team members don’t make different changes to the same code. But version tracking is useful to everyone. Even as a single developer, being able to review previous changes, and revert changes if they don’t work out can be a lifesaver. It removes any “fear of breaking things” from your workflow. Plus, having your source code on a remote server (GitHub) can also function as one of your source code backups.
A Quick Example
To give you an example of how this works, consider a single text file that exists in Git: ReadMe.txt
Initially it contains just this text:
Hello!You pull down the file to your computer (I’ll define Git terms like these below) to work on it. Opening the file in a text editor, you change its text to this and save:
Hello, Xojo!Now the file on your computer contains that text. This is called the working copy. The file in the repository still has the text “Hello!”. Now you can do a couple useful things.
You can ask to see the differences between the file in the repository and the one in the working copy. When doing so, most tools will highlight the line that changed, showing the repository contents on the left and the working copy contents on the right. This is a wonderful way to review changes made to code.
The other thing you can do is commit the change to the repository. This adds this file to the repository and makes it the latest version. In Git you’ll then be able to see that this file has two versions and you’ll be able to see what the file looked like for each version.
These two things mean that you will never again lose any work. Anytime you make a change to your code that you want to save as a version in the repository, you commit it. You don’t want to commit after every change as that is too granular and will be hard to manage, but it means you can safely make a bunch of big changes to something and still be able to go back and review what the code looked like previously.
The other useful thing you can do is revert changes. If, after saving the file with “Hello, Xojo!” you realize that was a mistake, you can go back to the previous version by choosing to revert the file. This discards the local working copy and pulls down the most recent revision from the repository.
I realize that this might all seem rather different and confusing, but once you do this on a couple small projects you’ll get the hang of it and you will never want to go back to using MyProject1, MyProject2 again!
Terminology
Repository: This is essentially a place to store a group of files, which for our purposes will be a Xojo project saved in the version control file format (Xojo Project).
Clone: Copies the repository to your computer so you can work on it
Fetch: Updates the local repository with any changes that are stored on the server
Pull: Similar to fetch, except that it also copies the changes into the working copy
Commit: Add the changed file to the repository as a new version
Push: Pushes the committed file to the server (GitHub). Often this is done as a single step: Commit and Push.
Working Copy: Your local copy of the repository and the file
General GitHub Usage
With Xojo, the general workflow you will use is:
- Create repository on GitHub for the project.
- Pull it down to a folder on your computer.
- Create a Xojo project.
- Save it in Xojo Project (text) format into the above folder.
- Commit and Push it to GitHub.
- Make additional changes to the Xojo project.
- Commit and Push to GitHub as necessary.
Create a GitHub Account
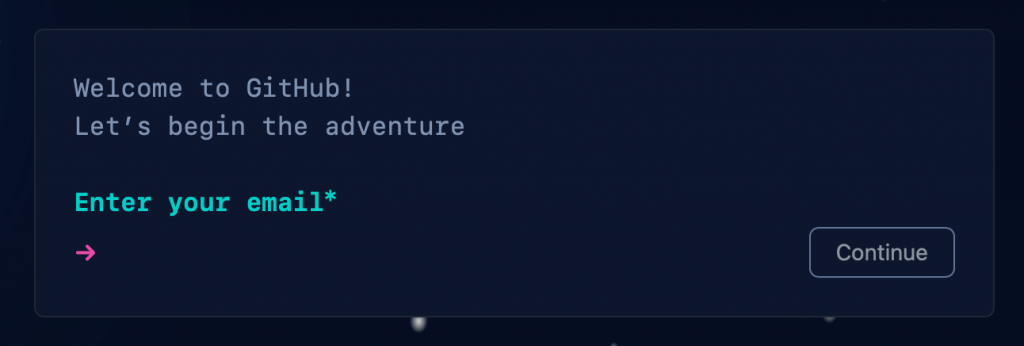
If you don’t already have a GitHub account, you’ll need to create one. Head on over to the sign up page to start the process:
Create a Repository
Now that you have a GitHub account, you’ll want to go to your GitHub home page and click the “New Repository” button.

As mentioned above, a repository is essentially where your project is stored. You’ll typically want a separate repository for each project. This is what the new repository form looks like:
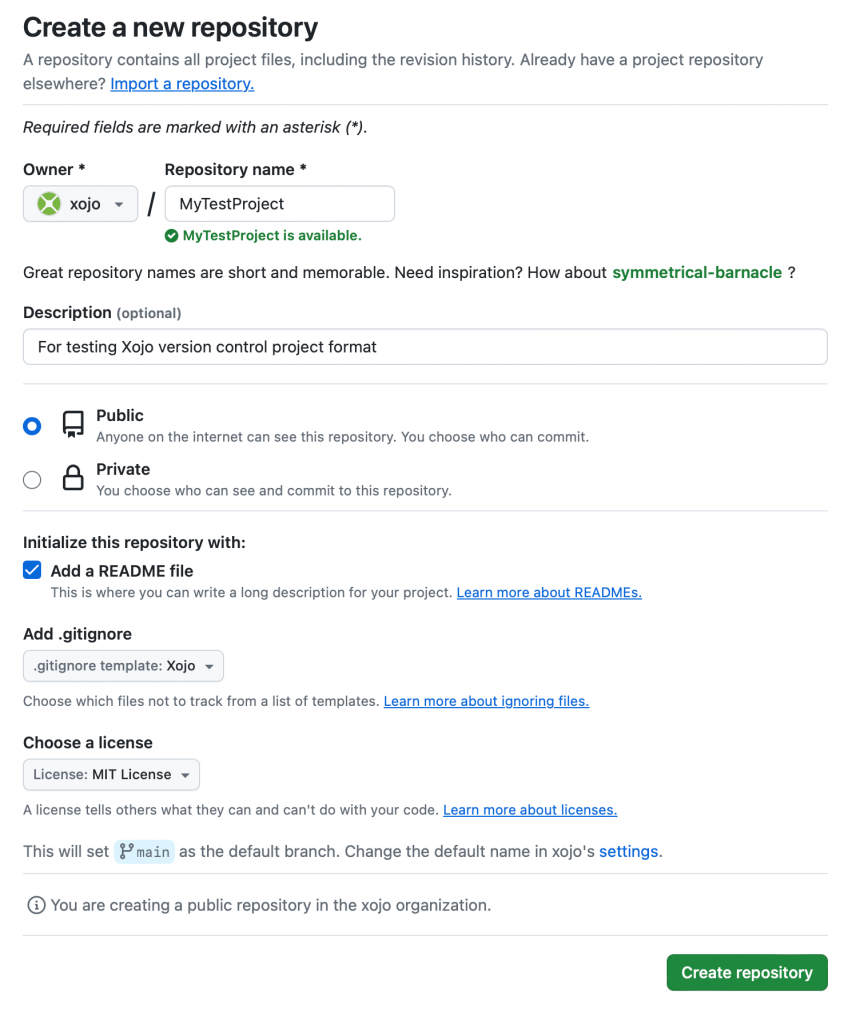
For open-source projects you’ll want to make sure “Public” is selected as it’s not really open-source if it is not public. For a public repository, be sure to come up with a catchy “repository name” and always include a description. Choose “Private” for internal projects.
I always check “Add a README file”, which adds an empty README file to the repository. You can update it later, but it is where you’ll briefly describe the project and how to use it (using Markdown). The README is shown by default when you go to the repository in a web browser.
You should also select “Xojo” for the gitignore template (click the dropdown and type “xojo”). This identifies the project as using the Xojo programming language, which helps with searches and also marks the “uistate” file (which contains user-specific UI settings, such as window sizes and positions) so that it is not included in the project.
Last is the license. For most public open-source projects, I recommend the MIT License, which essentially allows anyone to use your code however they want. For private projects, you can leave it at “None”.
Click the Create Repository button to create the repository.
Clone the Repository to your Computer
With the repository created, you can view it on the GitHub website for you account:
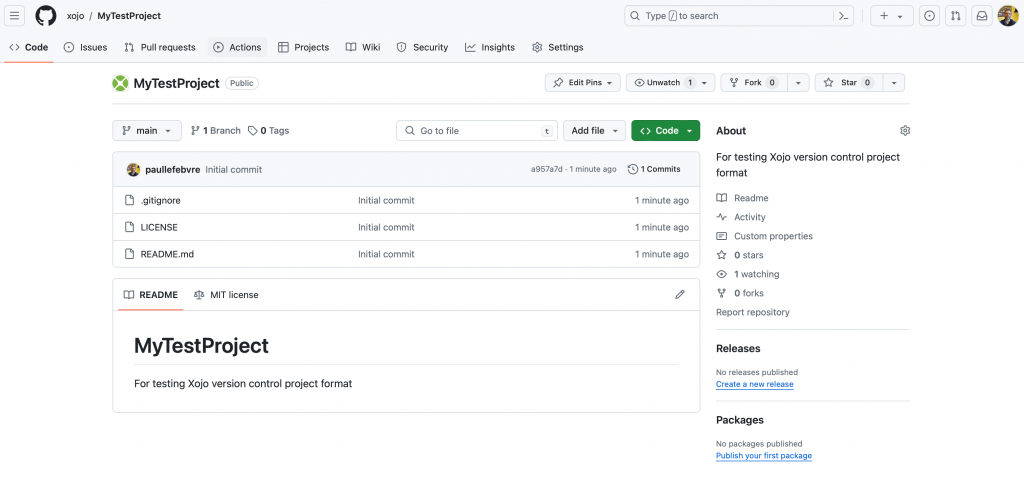
From here you’ll be able to see the files in the repository, along with other information.
You are now ready to “clone” the repository to your computer. This copies the repository files to a folder on your computer so you can modify its files. Of course, the only files in the repository will be LICENSE and the empty README.md, but it is still necessary to do the clone so that you can create the folder where you will then add your Xojo code.
In order to clone, you’ll want to use a Git client application. There are many to choose from, but two free ones are the official GitHub Desktop and Atlassian SourceTree. GitHub Desktop is simpler so that is the one I’ll show here.
Download GitHub Desktop: https://desktop.github.com
Start GitHub Desktop and click “Sign into GitHub.com”.
On the Configure Git page, enter the name and email you want to use to identify your commits.
Click Finish on the next page to show the main screen where you have the option of creating new repositories or cloning a repository. Since we already created a repository online in the previous section, you want to select “Clone a Repository” (you can also choose this from the File menu). In the list, choose the repository you created above, choose your local folder location (Choose…) and click Clone.
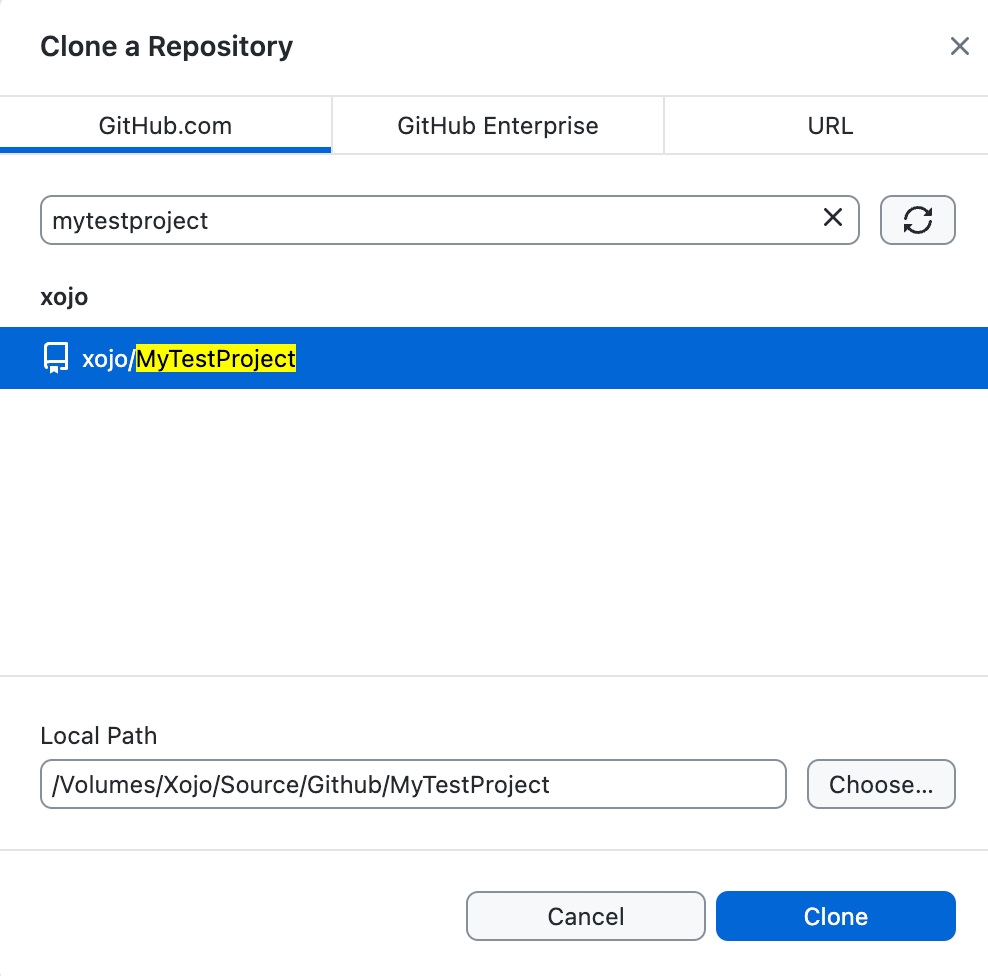
You now have a folder on your disk where you can add your Xojo project. This is what the repository looks like in GitHub Desktop:
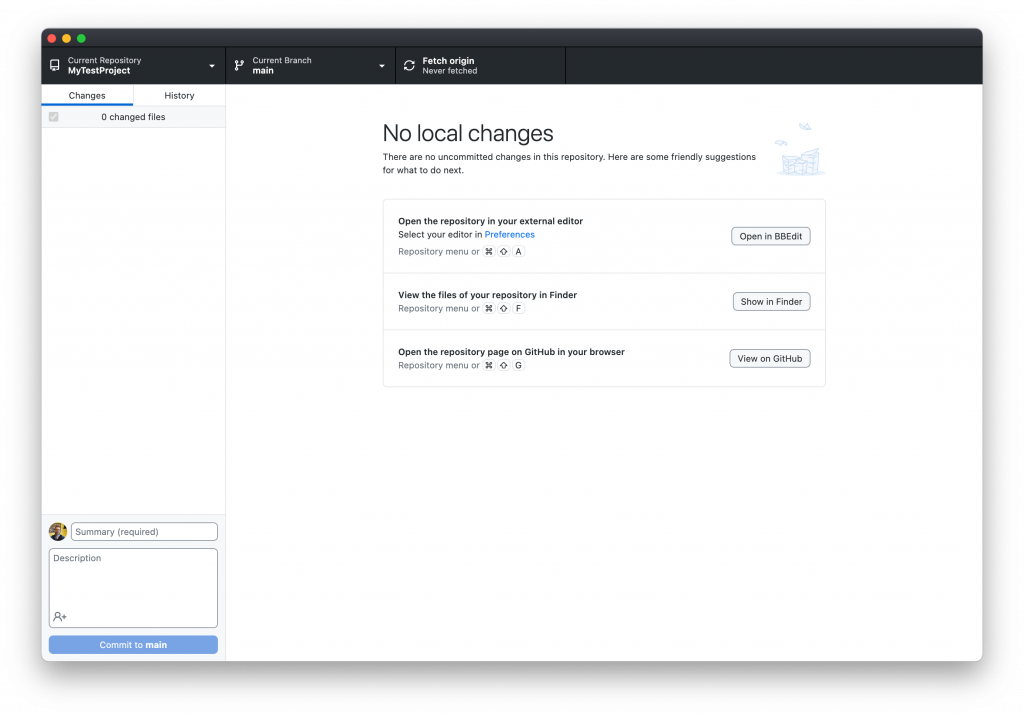
Note: If you are using another Git client, you will choose its “clone a repository from URL” feature and then provide the URL shown in the “Clone or Download” button on the repository page.
Add Your Xojo Project Code
Start Xojo and open the project you want for the repository you cloned (or you can just create a new project). Click “Save As”, make sure the Format is “Xojo Project” and choose the folder you created when you cloned the repository.
Go back to GitHub Desktop and you’ll now see all the Xojo files appearing in the list as “changed files”. (For this test I used a Xojo SQLiteExample.)
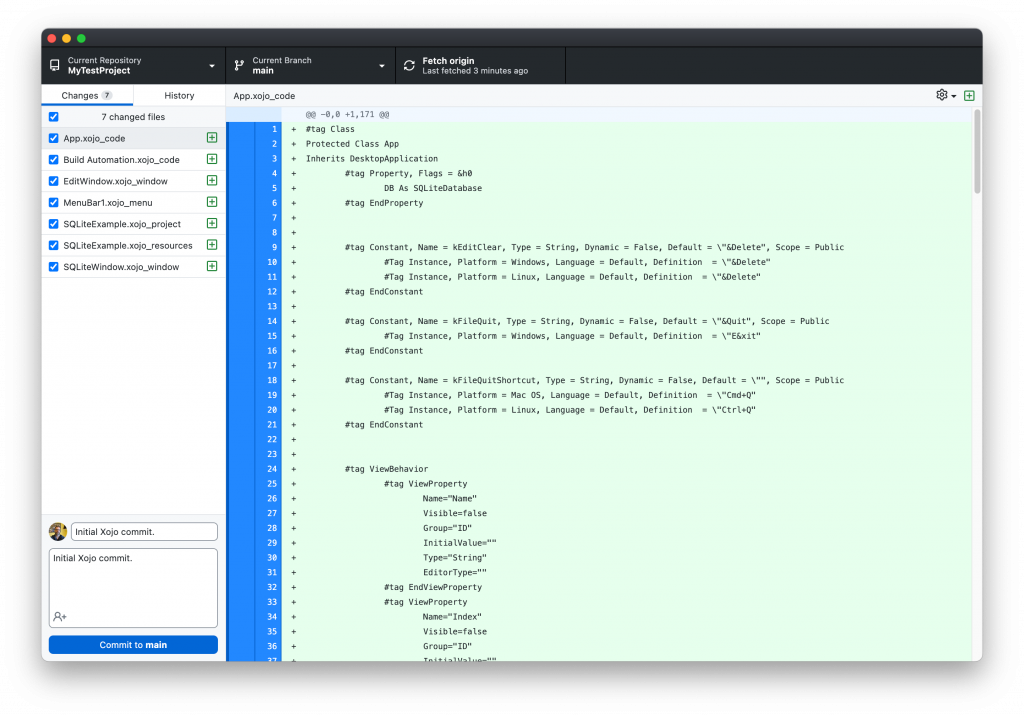
You now need to “Commit” these changes. By default they are all selected/checked in GitHub Desktop so you can enter a brief summary and description (for the first commit, often “Initial commit.” is used, but I used “Initial Xojo commit.”) and then click the “Commit to main” button.
Each time you commit you want to be sure to type a clear summary and description of the changes. This will be helpful later when you are reviewing prior commits.
This marked the files as committed in your local repository, which is needed before you can push the changes up to the online repository. Generally speaking you want to commit things after you have made changes that you want to track. You don’t need to immediately push the changes up to the server (online repository) each time, however, people often do as it is simpler. Some Git clients even offer a single button or command to commit and push in one step.
For this initial commit you definitely want to push the commit to the server, so click the button in the toolbar that says “Push origin”. This pushes the commit to the origin, which is the GitHub repository in this case.
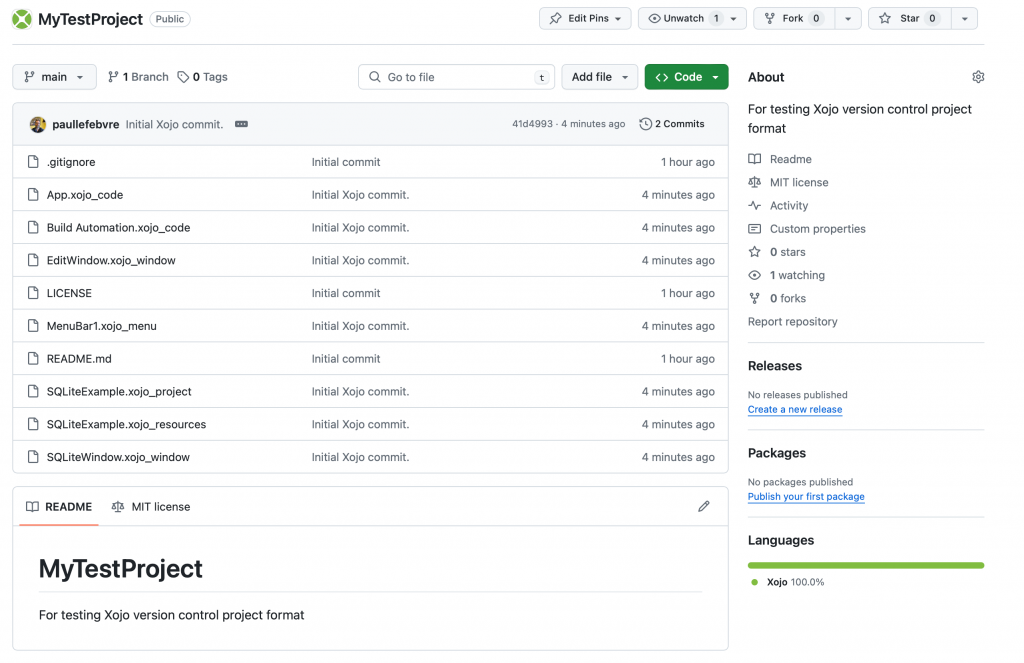
If you now go back to the GitHub repository online and refresh the page you’ll now see the files have been committed:
Sharing Your Public Project
If you created a public repository then it is now available on GitHub for anyone to use. People can find it by searching or you can share the URL (perhaps in the Xojo Forum).
Since I published a public project, anyone can use it. This means that they can clone it and push changes to your project as “pull requests”. A pull request is a change that a user has made that they would also like you to apply to your project. Since this is your project, others cannot directly change it without you adding them as contributors. However, you can review these pull requests and choose to pull and merge the change into your project if you want. Or you can reject the pull request — it’s all up to you since it’s your project.
Changing and Updating Your Project
You’ll likely be continuing to change your project to fix bugs and add features. Each change you make shows up in GitHub Desktop where you can commit it and then push it to the server.
As an example, go back to Xojo and make a change to the project. I added some comments to the AddTeamRow method. After saving, the changes are now visible in GitHub Desktop:
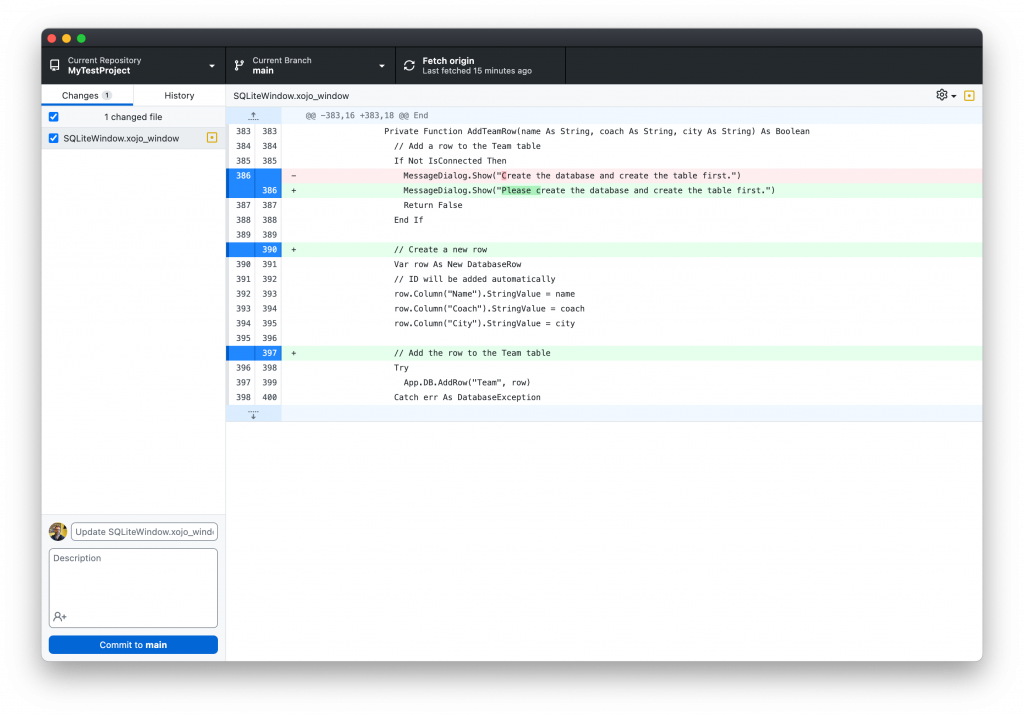
You can see the one file that was changed, SQLiteWindow, and the changes (or diff) is shown in the viewer. Here you can see the changes by the blue highlighted lines in the gutter. The first change indicates that line 386 was removed and replaced, with the change noting that “Please” was added.
The next two changes indicate that new lines were added to the code.
It’s always good to review code like this before you commit it to make sure the changes are what you expect.
You can now Commit this change (always add Summary and Description text so you know the reason for the change!) and then Push it to the server (Push origin).
Discarding Changes
Say you’ve made changes to your Xojo project, but realize you’ve really messed things up and want to go back to the way the code was. For example, say I’ve accidentally deleted a bunch of code in the ShowData method and saved the project. In GitHub Desktop, it would look like this:
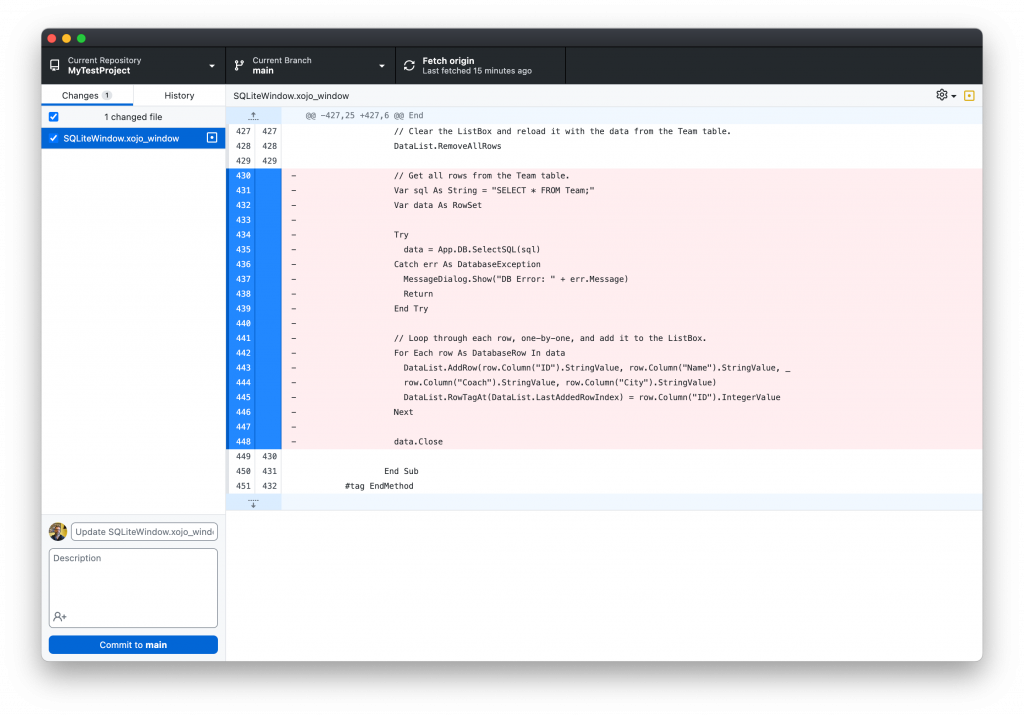
You can see the big red area indicating the code that was removed.
To discard this change, I can right-click on SQLiteWindow in GitHub Desktop and select Discard Changes. This pops up a confirmation dialog and clicking Discard Changes will restore the file to its previous version, which is the version of the file that was last committed to the repository.
After doing this, you will need to close the project in Xojo and then re-open it so that it can refresh its internal project structures to reflect the discarded changes. After doing that, you can go back to the ShowData method to see that the code is restored.
This capability is a big reason why version control is also incredibly useful for solo developers.
Using or Cloning Other Repositories
Don’t forget that you can also use other people’s public repositories. To do so you’ll want to click the “Clone or Download” button on the repository page.
For simple usage, where you just want to grab the current version of the repository because you don’t intend to change anything, you can then click the Download ZIP button. Once downloaded, unzip the file and then open the project in Xojo where you can use it or copy/paste it into your own projects (review the license agreement before you use projects, of course).
You’ll want to clone a project when you want to manage it using GitHub Desktop (or your GitHub client of choice). This allows you to fetch/pull updates from the online repository and also allows you to make your own changes and push them up to the server where the repository owner will get them as pull requests, as described above.
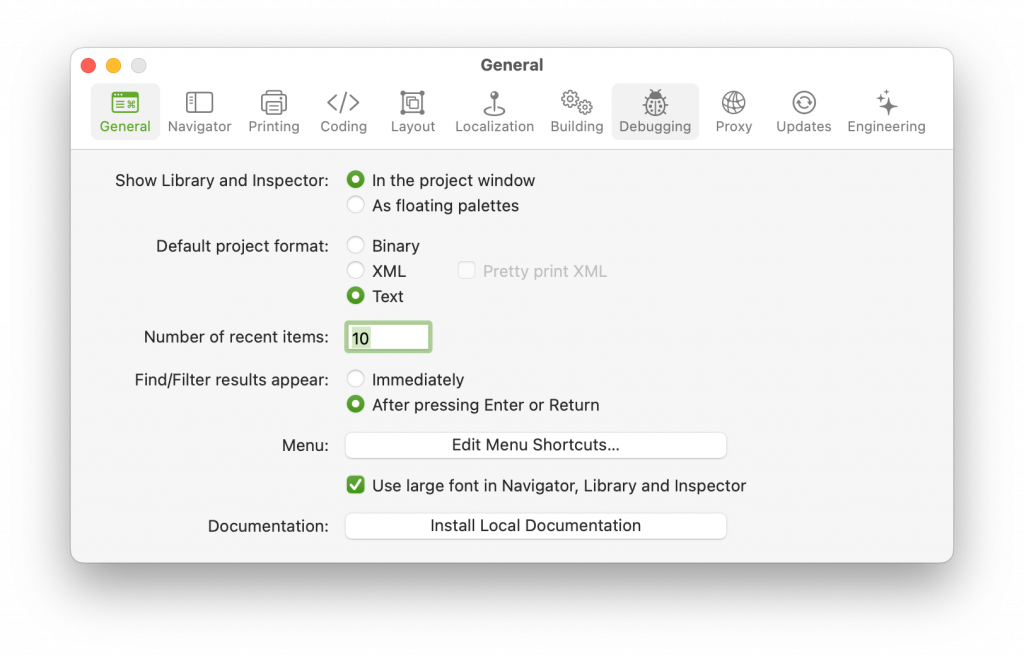
Change Your Default Project Format
You might find it worthwhile to change your default project format to be the version control format. This way it will always be selected by default when you save. You can change this in Xojo’s General Settings:
Pro Tip: When saving a project for the first time in version control format, it is always a good idea to save into a newly created folder. This ensures that all your files will be neatly contained in one place and won’t accidentally override something else that may have been in the folder.
Git Going
If you’ve created Xojo projects in public repositories on GitHub, be sure to share them in the forum!
This post just scratches the surface of what GitHub does and also only touches lightly on Git and the concept of source control in general. If you’d like to use Git for source control, but would prefer an alternative to GitHub you might also want to check out Atlassian BitBucket which also offers free Git hosting for both private and public repositories.
Paul learned to program in BASIC at age 13 and has programmed in more languages than he remembers, with Xojo being an obvious favorite. When not working on Xojo, you can find him talking about retrocomputing at Goto 10 and on Mastodon @lefebvre@hachyderm.io.