
WinUI controls are much larger than their Win32 counterparts, so getting your layouts to look right requires some planning. Eventually, Xojo’s IDE will handle control size differences, in the meantime, I have set up a second installation of Xojo specifically for testing. Class Overrides allow me to change the default size of the controls I commonly use. I have also created a “Default Desktop Project” template with the WinUI options already configured. This makes it much easier to test and experiment in WinUI.
Setting Up the Overrides
After installing Xojo 2026r3, use Windows Explorer to copy and paste the Xojo program folder. Then rename the copied folder.

Next, create an Overrides folder inside the copied program folder.

Then create your overrides files in this folder.
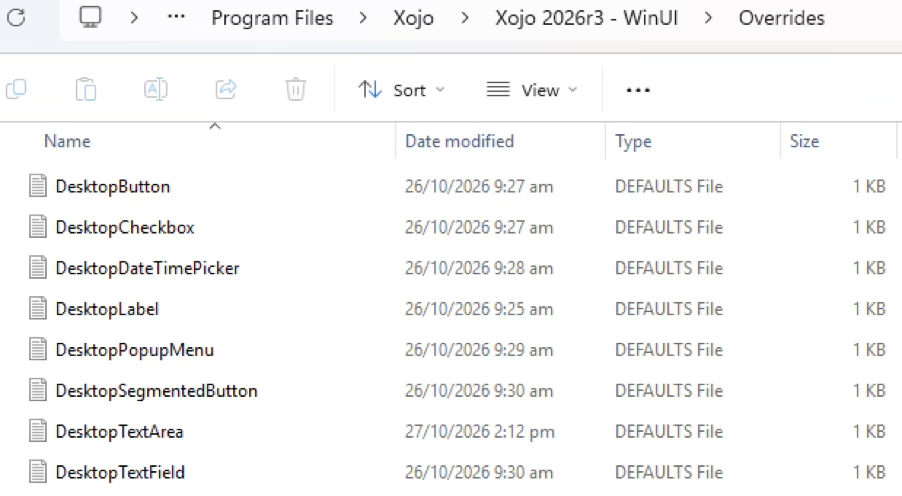
These are the controls I regularly use. DesktopTable is WinUI-aware so it doesn’t need to have an overrides file..
Creating the Default Project Template
Finally, create a new Desktop project and set the WinUI options.
Save the project as “Default Desktop Project” in binary format. Then copy this file into the Template Projects folder in your WinUI installation.
From now on, when you drag controls from the Library, the controls will appear at the correct size in the layout editor.
For your convenience, I have compressed the Overrides files and the project template into a single archive, simply unzip the archive into your WinUI installation and restart the IDE.
Wayne Golding has been a Xojo developer since 2005 and is a Xojo MVP. He operates the IT Company Axis Direct Ltd which primarily develops applications using Xojo that integrate with Xero www.xero.com. Wayne’s hobby is robotics where he uses Xojo to build applications for his Raspberry Pi, often implementing IoT for remote control.