
Did you know that Xojo can call code written in .NET? Here’s how to do it!
Xojo can call Windows COM objects. The trick to calling .NET code is to set things up so that they are COM accessible. These steps show you how to create a simple class in C# that you can then call from Xojo. I want to give special thanks to Jim Cramer for providing guidance on this solution in this forum conversation.
Create Class Library Project
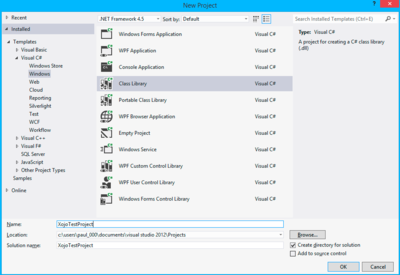
Start Visual Studio by running it as an Administrator (I used Visual Studio 2012, but 2010 or 2013 should also work), create a New Project and select Visual C#->Windows->Class Library from the Project Selector.
This creates a new project with a single C# class called “Class1.cs” in the Solution Explorer. Rename this class to “XojoTest.cs”.
Add the Code
Replace the code in XojoTest.cs with this code:
using System;
using System.Windows.Forms;
using System.Runtime.InteropServices;
namespace XojoStuff{
 [Guid("DB038D2E-BD4D-44A7-BE64-4844FF07F870")]
 [InterfaceType(ComInterfaceType.InterfaceIsDual)]
 public interface IManagedInterface { [DispId(1)] int PrintHi(string name); }
 [Guid("AB46D07F-6920-4114-924B-5E37BED3A65E")]
 [ClassInterface(ClassInterfaceType.None)]
 public class InterfaceImplementation : IManagedInterface {
 public int PrintHi(string name)
  { MessageBox.Show(name); return 1; } }
}
Important Note: For this test, you can likely leave the above GUID values as they are. But for anything that might actually be deployed, you have to replace the GUID values in the above code with your own GUID values to prevent any conflicts with existing COM objects.
This code makes use of some frameworks that may not be part of your project by default. So you may need to use Project->Add Reference (from the menu) and add “System.Windows.Forms” to the Project.
Change Build Settings and Build the Project
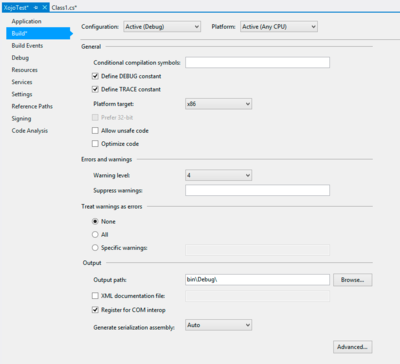
Now you need to set the target platform to x86. Right-click on the Project “XojoTestProject” in Solution Explorer and choose Properties. Now select “Build” and change the “Platform target” to “x86”.
Next, check the “Register for Com interop” checkbox in this same panel. This is also located in the Build area in the Output section near the bottom.
You are now ready to build the project in Visual Studio. If you did not start Visual Studio by running as Administrator, you will need to go back and do that now. The COM component cannot be properly configured unless you run as Administrator.
Select Build->Build Solution from the menu.
Note: If you get an error you may need to open AssemblyInfo.cs and change “[assembly: ComVisible(false)]” to “[assembly: ComVisible(true)]”.
Call the .NET Class from Xojo
With the COM component installed, you can now go ahead and create a new desktop project using Xojo.
Make sure the default window (Window1) is selected then go to the Insert menu and choose ActiveX Component. In the dialog that appears, select the References tab. Find and click the class you made in Visual Studio (XojoTest) and then select OK. This creates a Module (also called XojoTest) that contains the code to connect to the .NET class.
Add a PushButton to the window and in its Action event handler, add this code:
Dim o As New XojoTest.InterfaceImplementation
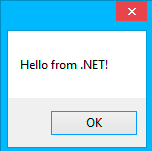
Call o.PrintHi("Hello from .NET!")
Now run the project and click the button. You should see a dialog appear with your message.
You can easily expand this example to use just about anything in .NET, including opening forms, connect to databases, use the .NET framework, etc.