
The Xojo Web Framework offers the WebLink class ready to use which handles showing the text with the proper visuals and the opening of the underlying URL in the browser. But if you need to have that feature on Desktop, it’s not that hard! Continue reading so I can show you one possible implementations to create your own LinkLabel class on Desktop.
Create a new Xojo Desktop project, add a new Class to it and use the Inspector Panel to change some values, like the Class name, the Super Class it will be based on, etc.:
- Name: LinkLabel
- Super: Label
Now let’s add some properties that will take care of things like the link and already visited link colors, the URL string itself and a protected property that will show if the user already clicked on the text so it will change the text color for the visited link.
- Property Name: LinkColor
- Type: Color
- Default: &C2062AD
- Scope: Public
- Property Name: VisitedColor
- Type: Color
- Default: &C8D3F93
- Scope: Public
- Property Name: Visited
- Type: Boolean
- Scope: Protected
Just one additional property left: URL. In this case we will use a Computed Property, so its setter checks if the assigned string starts with “http://” or “https://”, adding this prefix in the case it doesn’t.
So after adding a new Computed Property to our LinkLabel Class, select it and use the Inspector Panel to set these values:
- Name: URL
- Type: String
Now, select the setter of the shared property and type the following code in the associated Code Editor:
If Not value.BeginsWith("http://") And Not value.BeginsWith("https://") Then
  value = "https://"+value
End If

mURL = value
me.TextColor = LinkColor
me.Visited = False
Sure we can set all these values from code, but it is really useful (and most of the time easier) if you set them from the Inspector Panel. That is easy! Select the LinkLabel item in the Navigator and then choose the Inspector Behavior option from the Contextual Menu. This action will bring a new Panel where you only need to activate the checkboxes associated with our new properties so they also show up in the Inspector Panel when you use a new instance from the class in your app’s layouts.
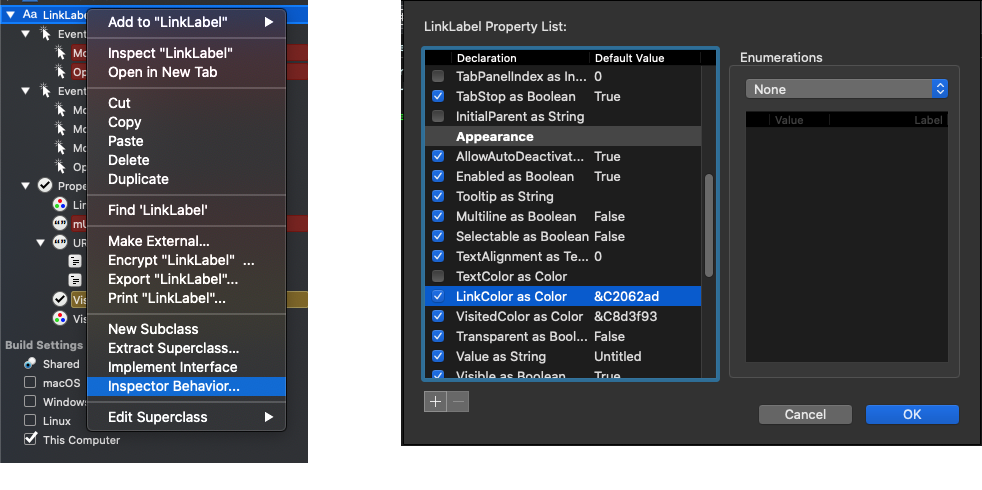
As you can see, it is also possible to re-arrange these properties so they are displayed under the section you may find more suitable.
Adding the Functionality
Once you’ve added the properties to the class and handled it so they can be set from the Inspector Panel, it is time to deal with the subclass behavior.
Let’s add the Open Event Handler so we can set the text color to proper LinkColor. Once you’ve added the Event Handler, write these lines of code in the associated Code Editor:
Me.Underline = True
Me.TextColor = LinkColor
RaiseEvent Open
Here you can see the “RaiseEvent Open”, so we give the opportunity to the class instance to initialize itself in case you need to do any additional operations (we will add this and other Event Definitions a bit later).
Now add the MouseEnter, MouseExit and MouseDown event handlers to the class. The amount of code to write on every one of these is minimal. Let’s start with MouseEnter:
me.MouseCursor = System.Cursors.FingerPointer
And the code for MouseExit:
me.MouseCursor = System.Cursors.StandardPointer
As you can see, these simply change the mouse pointer cursor for the usual finger pointer when the mouse enters the area of the LinkLabel, changing it again to the regular pointer once the mouse leaves the control area.
The code for the MouseDown Event Handler would be:
me.TextColor = VisitedColor Visited = True
ShowURL Me.URL
Return RaiseEvent MouseDown(x,y)
Call the ShowURL function in charge of opening the given URL string in the default browser. After that, we simply change the text color for the one set on the VisitedColor property, giving a hint to the user that the link has been clicked already.
And that’s all!
In order to complete our little subclass, let’s add a couple of event definitions: Open and MouseDown, so the user of the class can put their own code on these. For that, you only need to select the LinkLabel class on the Navigator and choose the Add > Event Definition from the contextual menu, replicating the already used Event Handler signatures.
Improve the control
Of course, there is space for improving this little starting point of the class. For example, you can convert also the LinkColor and VisitedColor properties into Computed Properties, so they values are applied if you decide to change these from code. In that case, you should add the following line of code to the setter method of the LinkColor property:
me.TextColor = value
And this one to the Setter method of the VisitedColor property:
If visited then me.TextColor = value
In addition you can also improve it so the LinkLabel class can work with other protocols apart from HTTP and HTTPS. In that case, I suggest you to visit this thread in the Xojo programming forum… where you can find a good hint about how to do it!
You can download the class with the example Xojo project from this link.
Learn more about this in the Desktop Custom Controls User Guide topic.