
Among the many improvements added to PDFDocument in Xojo 2021r3 is support for Graphics.Transparency as well as support for the alpha value in the color assigned to the Graphics.DrawingColor property. Continue reading to learn more!
With 2021r3 you’ll be able to effectively set and use both Transparency and also the Color alpha component in any item you add to PDF documents: text, shapes and images! Moreover, the support of the Pictures has been improved so PDFDocument will work with the alpha channel of the image, instead of considering the alpha channel of the image as a fixed white background as in previous releases. That means more flexibility in the layout of the PDFs!
And because Transparency support is added to PDF using the Graphic class you, the way to use it is very straightforward. For example, put this following snippet of code in the Open Event Handler for a Desktop project (in this case, the referenced “GrassBG” picture has been added to the project):
// Creating a new PDFDocument instance
Var d As New PDFDocument

// Getting the graphic context from the PDF Document
Var g As Graphics = d.Graphics

// How many rectangles fits in the page width?
Var iter As Integer = g.Width/10

Var x As Integer

// Let's calculate the Y coordinate for center the
// GrassBG in the height of the PDF page
Var imageY As Integer = g.Height/2 - grassBG.Height/2

// And calculate the Y coordinate for drawing the rectangles
Var y As Integer = (imagey + grassbg.Height) - 40

// Transparency value = 0
Var tLevel As Integer

// Value to increase the Transparency on every rectangle
// drawing step
Var offset As Integer = 10

Var txt As String = "Transparency"

g.FontSize = 90
g.Bold = True

// X and Y coordinates to center the "Transparency" text
// on the page width / height
Var txtX As Integer =  g.Width/2 - g.TextWidth(txt) / 2
Var txtY As Integer = ImageY + GrassBG.Height - g.FontAscent

// Drawing the "Transparency" text -> Background layer!
g.DrawText txt, txtX, txty

// Drawing the GrassBG picture over the text
// that's the second layer, and preserving
// the PNG alpha channel
g.DrawPicture grassBG,0,ImageY

// Setting the initial random color for drawing
// the first rectangle
Var rd As New Random
g.DrawingColor = Color.RGB(rd.InRange(0,255), rd.InRange(0,255), rd.InRange(0,255))

Var tmpLevel, y1 As Integer

// Drawing the horizontal strip of rectangles.
// This is the third layer
For n As Integer = 0 To iter

  // Setting the Transparency value
  g.Transparency = tLevel

  // Drawing the rectangle
  g.FillRectangle x,y,20,40

  // Assign the current Transparency value to
  // tmpLevel variable in order to draw the color drops

  tmpLevel = tLevel

  // Y coordinate for the color drop
  y1 = y + 40

  // Drawing the color drops for the current Rect
  For i As Integer = 0 To 10
    tmpLevel = tmpLevel - 10
    If tmpLevel >= 0 Then
      g.Transparency = tmpLevel
      g.FillRectangle x,y1,2, 2
      y1 = y1 + 2
    End If
  Next i

  // We increase the X coordinate for drawing the
  // next rectangle
  x = x + 20

  //…and increase the Transparency value by ten
  tLevel = tLevel + offset

  // we reached the maximum allowable value for
  // the transparency, so let's invert the sign
  // for the offset and set a new
  // drawing color.
  If tLevel = 100 Or tLevel = 0 Then
    offset = -offset
    g.DrawingColor = Color.RGB(rd.InRange(0,255), rd.InRange(0,255), rd.InRange(0,255))
  End If

Next n

// Let's draw the fourth layer over the strip of rectangles
// with the "Comes to PDFDocument" text.
txt = "COMES TO PDFDOCUMENT"
g.FontSize = 30

// Notice that we are setting here the alpha value for
// the color, instead of relying on the Transparency property
g.DrawingColor = Color.RGB(255,255,255,127)

g.CharacterSpacing = 20
txtX = g.Width/2 - g.TextWidth(txt) /2
txty = y + 20 + g.FontAscent/2
g.DrawText txt,txtx, txty

// Getting a FolderItem reference pointing to the
// "Transparency.PDF" file on the desktop.
Var f As FolderItem = SpecialFolder.Desktop.Child("Transparency.pdf")

// Saving the PDFDocument file
d.Save(f)
f.Open
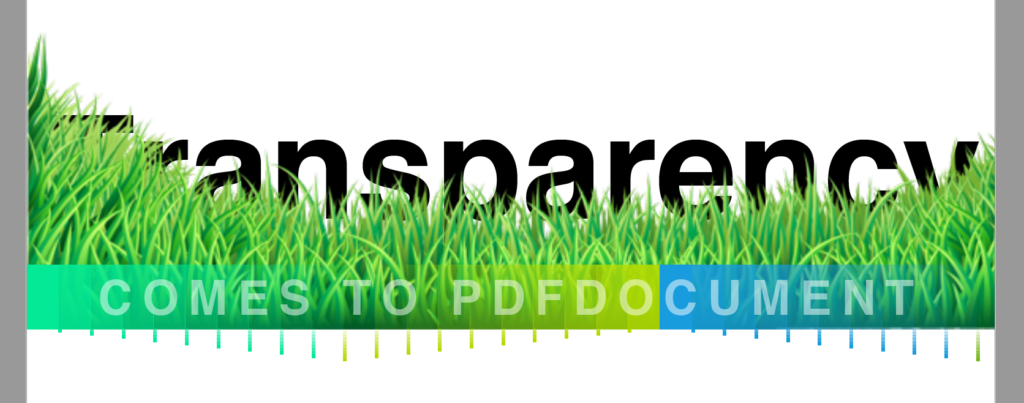
Once you run this code, it will produce the PDF with the image as it is shown at the top of this post.
As you can see, there are four layers to this document with the “Transparency” text drawn in the first layer (the farthest back), followed by a PNG image whose alpha channel lets us see the non-covered portions of the text behind it.
Next, the image is followed by a strip of horizontal rectangles in a new layer over it, that is drawn using a variable amount of transparency.
Finally, in the frontmost layer, we are drawing the “Comes to PDFDocument” text making use of the alpha value in the White color set as the DrawingColor.
You can see how the two upper layers mixed their color / level of transparency against the ones behind them and, of course, the text drawn in the PDF document continues to be vectorial and editable.
Transparency vs. Color’s Alpha Value
As you probably already know, the Transparency value can range from 0.0 (opaque) to 100.0 (fully transparent), while the alpha component of a Color instance can range from 0.0 (opaque) to 255.0 (fully transparent).
What happen when you use both kind of values in the drawings of your PDF document? Let’s suppose you did set a Transparency value of 40 while setting the alpha value of the current drawing color to 127. In that case, the alpha value of the drawing color offers a higher transparency, so that will be the value applied in the drawing (because all kind of drawings, except Pictures, are affected by the current drawing color).
Otherwise, if the Transparency value is higher than the alpha value of the current drawing color, then that will be the level of transparency applied to the drawings and, in this case, also affecting to the Pictures in the PDF document.
Learn more about PDFDocument in the Xojo Documentation. And watch this 7 minute video tutorial that demonstrates this handy new feature!