
Imagine a sleek, interactive Kanban board right in your browser: Columns labeled “To Do,” “In Progress,” and “Done,” each populated with cards representing tasks. With Xojo’s new drag and drop support for web projects, you can grab a card with your mouse, drag it to another column to update its status, or even reorder it within the same column to prioritize it.
The End Result
The latest drag and drop example has a functional GUI that looks professional and feels intuitive. All without writing a single line of JavaScript (we will enhance it a bit with some CSS, though).
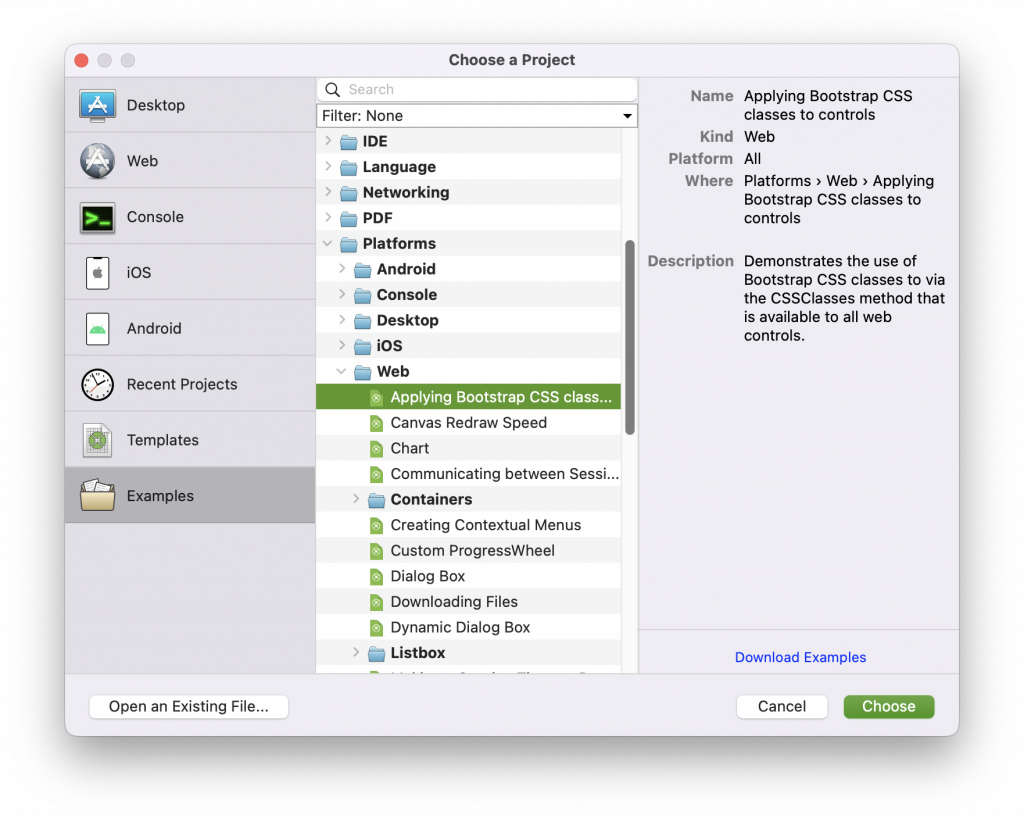
Please note this is a sample project created to explore drag and drop, not a full featured Kanban board. I’ll omit on purpose things like persistence. The complete project can be found in the Examples section of the IDE, under Platforms > Web.
Let’s walk through how to make it happen.
Creating the Required Components
First, we need to define the building blocks of our Kanban board. In Xojo, WebContainers are perfect for modularizing reusable UI elements. Here’s what we’ll create:
- KanbanCard
A WebContainer to represent each task card. It’ll have a simple label for the task name (e.g., “Write blog post”) and maybe a colored border or handle to indicate it’s draggable. Add a WebLabel for the text and set its properties in the Inspector to make it visually distinct. - KanbanCardContainer
Another WebContainer to act as a column. It’ll hold multiple KanbanCard Containers and serve as both a drag source (where cards come from) and a drop target (where cards land). Include a WebLabel at the top for the column title (e.g., “To Do”) and a rectangular area below it to house the cards. - Main Page
A WebPage to host everything. This is where we’ll arrange our columns side by side.
In the Xojo IDE, drag a WebContainer onto your project for the Card, another for the Column, and set up three instances of the Column Container on the main WebPage (“To Do,” “In Progress,” “Done”).
KanbanCard
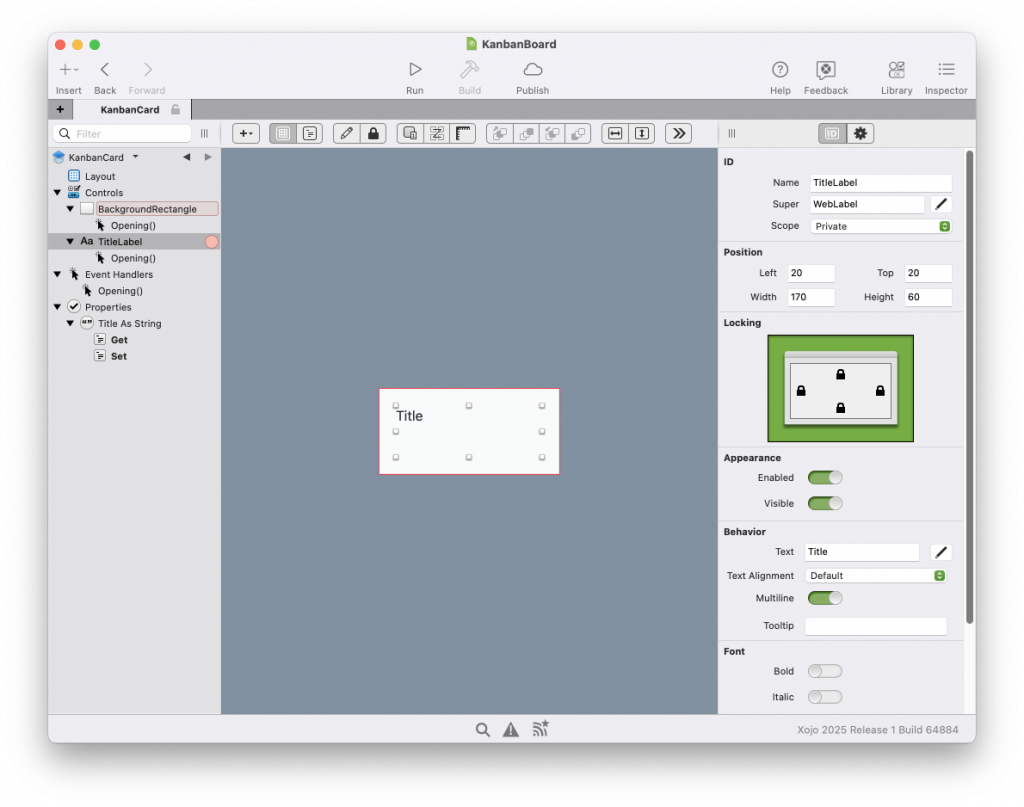
This component will be pretty easy to build. It is basically a WebRectangle with a WebLabel that we will use for the Title. To make it easier to update, I’ve added a Title Computed Property that will update the TitleLabel if needed.
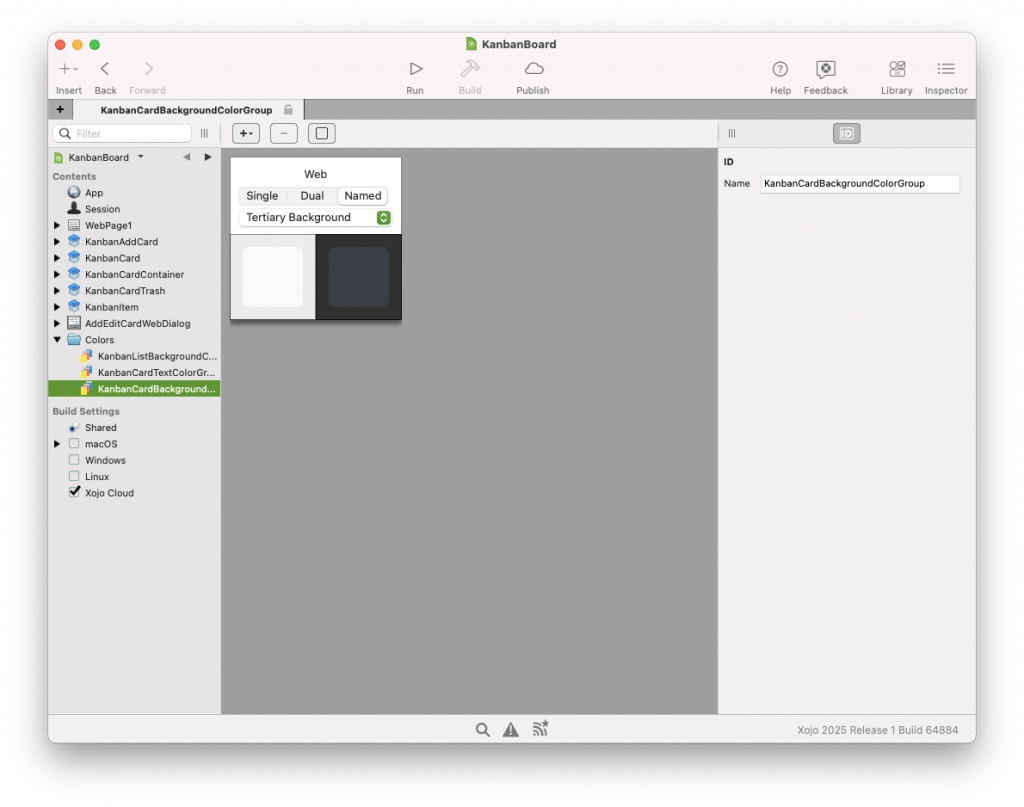
For the background WebRectangle, we will use the following ColorGroup. Please notice Xojo added support for Named colors, that will rely on the current Bootstrap theme, supporting Dark Mode:
As you can see, BackgroundRectangle and TitleLabel controls are implementing the Opening event. This is just to set the mouse cursor that will be shown when we hover:
Me.Style.Cursor = WebStyle.Cursors.MoveThe container itself is also implementing the Opening event. This is to make this control draggable, using the following line of code:
AllowTextDrag(WebDragItem.DragActionTypes.Move)Any descendant of the WebUIControl class is draggable. And yes, that includes custom controls created with the Web SDK.
For the WebDragItem.DragActionTypes Enumeration, you can choose one these options:
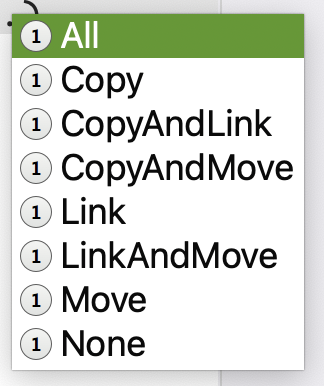
In this case we will only be allowed to “Move” a card from one place to another.
There are cases where it makes sense to support multiple drag action types. In your operating system’s file browser, when you drag and drop files and folders, you can change between Move, Link or Copy by using Keyboard shortcut combinations. Depending on the drag action type, the element will be moved, a symbolic link will be created, or it will be copied, respectively.
Normally you will implement just Move or Copy, but keep in mind it’s possible to have more (at the cost of increasing the learning curve of your application for your users)
Allowing something to be dragged is the first of two steps. You also need a place to drop these items into.
KanbanCardContainer
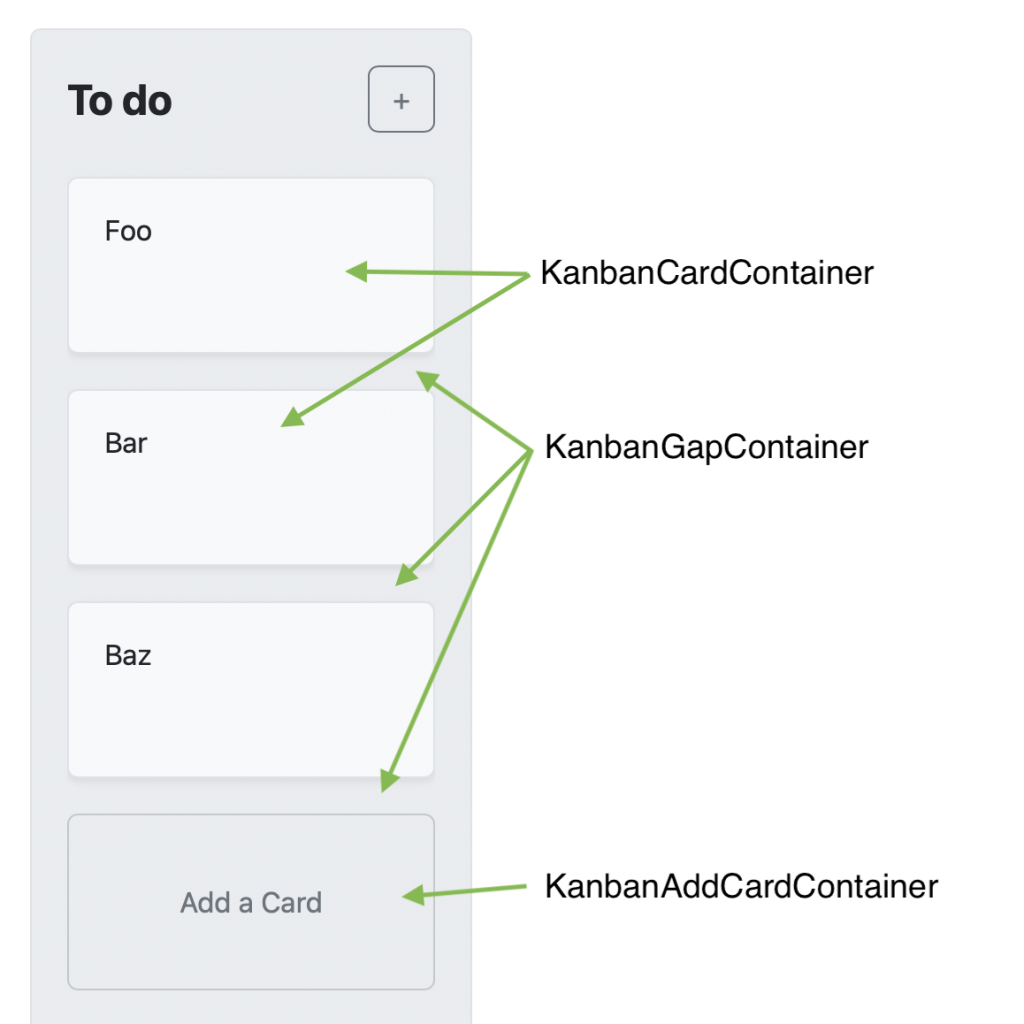
This container will be more elaborate, but should be easy to follow. Let’s see how it works at runtime, with some annotations:
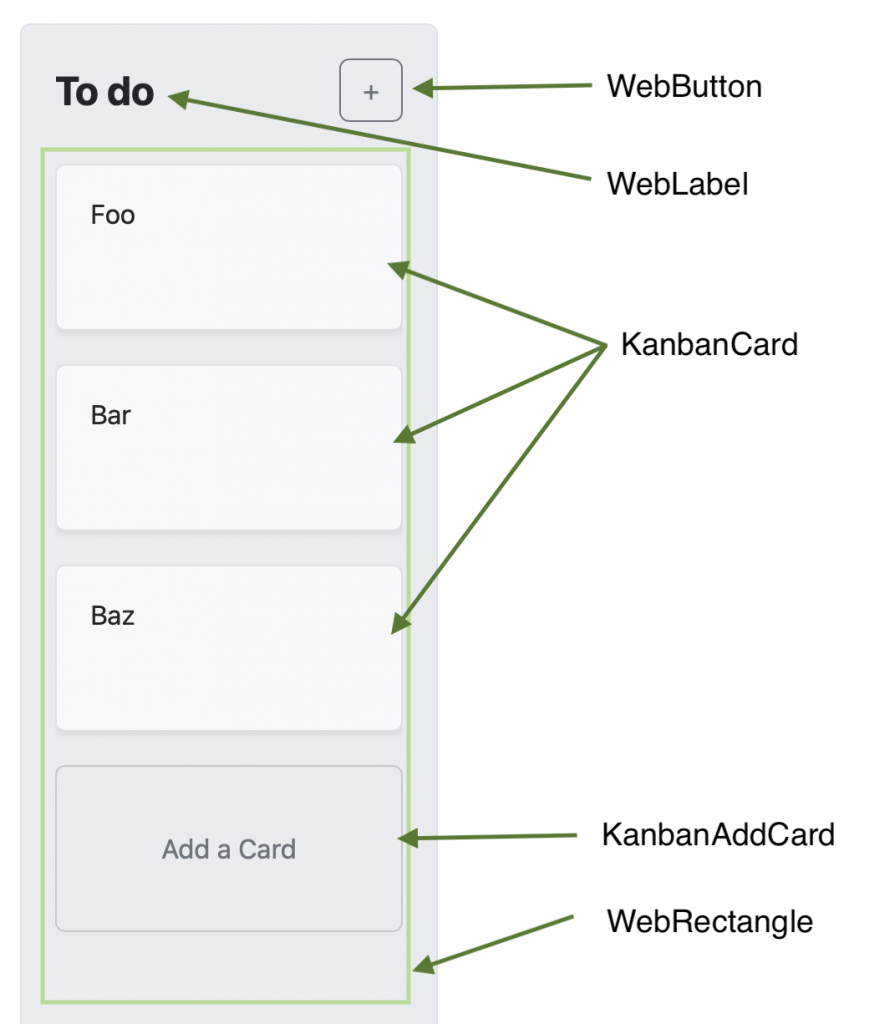
The WebLabel we used for the Title and the WebButton used for adding new cards are positioned manually in the IDE designer. Same as the invisible WebRectangle holding the KanbanCard items and the KanbanAddCard custom button.
But instead of placing our cards manually, we’ll take advantage of the browser’s capacity for doing this job for us. We just want to add them dynamically at runtime and let the browser stack them vertically, automatically. We also want the browser to display a scrollbar if the columns have several cards.
Here is the code we will add to the WebRectangle:
// Let the framework know we want to let the
// browser place the items automatically
Me.LayoutType = LayoutTypes.Flex

// This style will ensure cards won't be
// placed horizontally by the browser
Me.Style.Value("flex-direction") = "wrap"

// If there are more cards than available
// space, this style will allow the user
// to scroll
Me.Style.Value("overflow") = "auto"
Let’s add some methods to add and remove cards at runtime.
- AddCardWithTitle(title As String)
- AddCardWithTitleAt(title As String, index As Integer)
- RemoveCardAt
Moving Cards Between Columns
Here’s where Xojo’s drag and drop shines. Each Card Container needs to be draggable and each Column Container needs to accept dropped cards. In Xojo:
- Make Cards Draggable: Open the KanbanListCard in the IDE and implement the Opening event. Enter this code:
AllowTextDrag(WebDragItem.DragActionTypes.Move) - Accept Card Drops: Open the KanbanCardContainer and implement the Opening event. This is the code we need in order to accept drops:
AcceptTextDrop(WebDragItem.DragActionTypes.Move) - Remove from Source: To move (not copy) the card, in the source Column’s DragEnd event, remove the dragged card from its original parent after a successful drop.
With this, you can drag a card from “To Do” to “In Progress,” and it’ll visually jump columns. Xojo handles the heavy lifting. No JavaScript or DOM manipulation needed!
The Hard Part: Reordering Cards
Reordering cards within a column, or dropping a card into another column in a specific position is trickier. You need to detect where the card lands among its siblings and adjust their positions. Xojo’s drag and drop doesn’t natively sort UI elements, so we’ll simulate it.
There are several ways to achieve this, let’s explore some options.
One would be to deal with X/Y coordinates. Once you drop a card, you could take a look to see where the card landed, compare the coordinates with the other cards and reorder them accordingly. In desktop and mobile projects this could be a valid solution. In web projects, dealing with specific coordinates might work, but there are more accurate and easier solutions.
The second way could be good enough in most cases. Cards could also accept drops so, if you drop one card on another, we just have to put the card being dropped in the position where it’s being dropped, and push down the rest of the stack. This way you won’t need to scratch your head and deal with screen coordinates or control dimensions. The end result will be based on this idea.
But what should we do to generate the gap between Cards? Maybe you can create a transparent Container that also accept Card drops, to simulate the gap between cards.
This would work for you, and I honestly recommend you to give it a try, it’s super easy to implement and it will just work. If you don’t want to explore the CSS rabbit hole, that’s fine, this can be your bus stop.
Two downsides:
- You won’t have animations
- You will double the amount of controls on screen (performance may suffer)
I went in another direction though. Using some CSS, you can add and modify margins on the fly, with neat transitions. In my sample project, the margin between cards is managed by the `margin-top` CSS style.
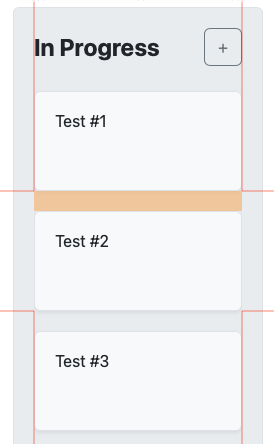
And here is where the Xojo Framework helps. To make styling easier, it adds a CSS class to the element being dragged and also to the element where the mouse is over, when it’s accepting a drop.
dragging – The HTML element being dragged will have this propertydragover – The HTML element under the other element being dragged
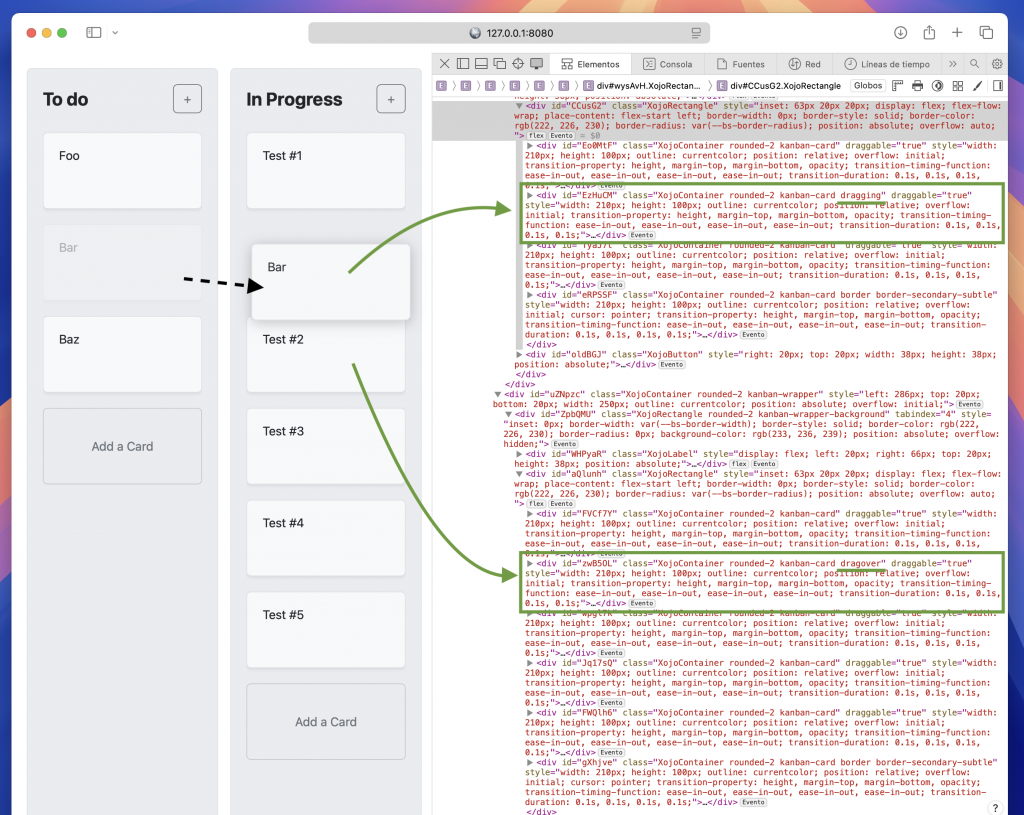
In this case, the “Bar” card will receive the dragging CSS class, while “Test #2” will receive the dragover CSS class, while the “Bar” car is above.
I’ve added some transparency to elements with the dragging class. As you can see in the screenshot, the “Bar” Card opacity is set to 30%.
For dragover class, I’ve added some margin and transitions. If you drag something into a card, the top margin will grow, simulating it’s making room for the card you are about to drop.
Here is how the HTML Header section of the sample project looks like. It isn’t too much code, but it does uses some somewhat advanced CSS tricks:
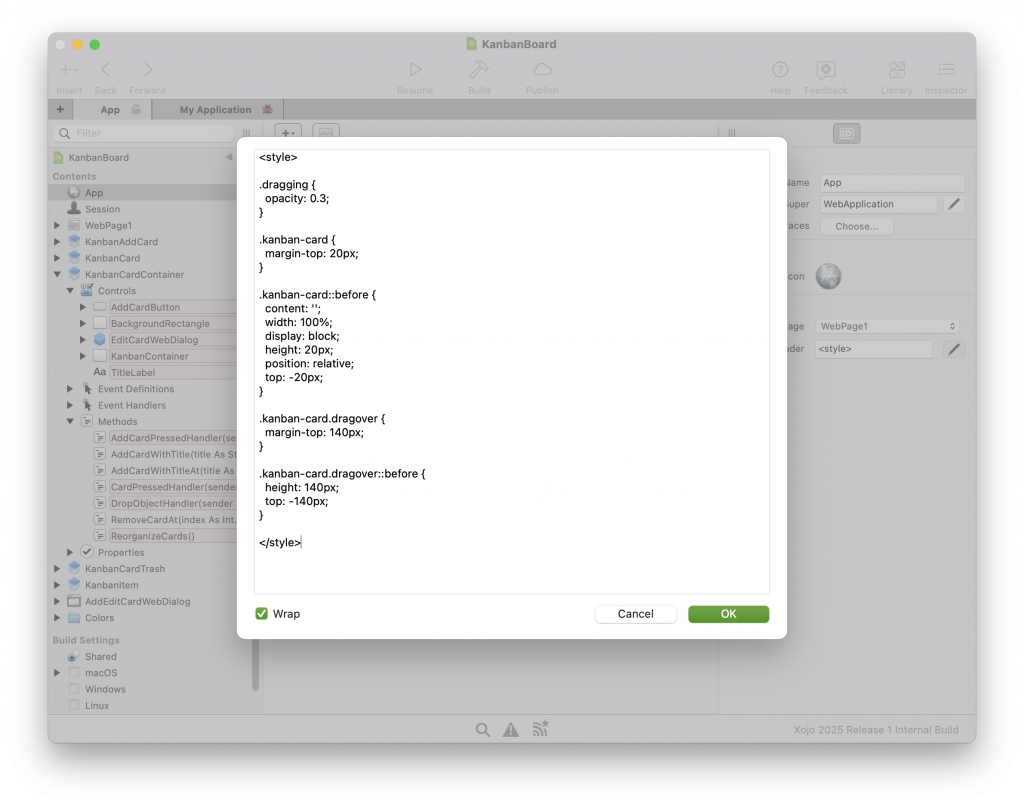
This approach keeps cards neatly stacked and sortable. It’s the “hard part” not because you will have to write a lot of code, but because you’ll actually have to think a solution that won’t require roundtrips between the browser and the server. Xojo’s event system makes it manageable without JavaScript, and with some CSS, the result will be great.
Some CSS Enhancements
In some cases I’m using shadows and border radius using the Bootstrap’s CSS classes.
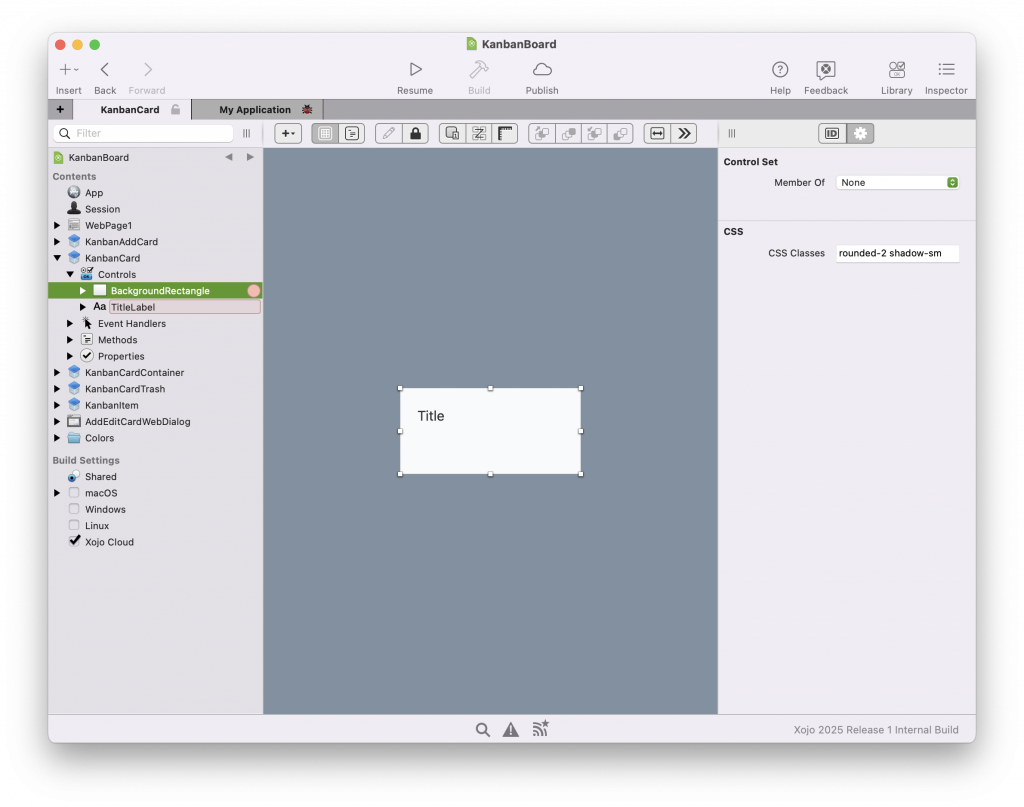
As you can see, I’m using rounded-2 for the border radius, and shadow-sm to easily add a shadow to the cards.
You can read more about this in the following blog post:
Introducing Named Color and CSS Classes in Xojo Web
There is a related sample project you might want to check:
Closing Thoughts
This has been a fun experiment to explore the Xojo Web drag and drop feature. Give the sample project a try and explore each control to see how it’s been created. I can’t recommend enough that you try to build it from scratch (and ask in the forum if you get stuck!)
We can’t wait to hear about how you plan to introduce drag and drop into your projects. Don’t be shy and create a forum thread to show what you have built, or what you are working on.
Ricardo has always been curious about how things work. Growing up surrounded by computers he became interested in web technologies in the dial-up connections era. Xojo has been his secret weapon and language of preference since 2018. When he’s not online, chances are he will be scuba diving … or crocheting amigurumis. Find Ricardo on Twitter @piradoiv.