
With Xojo 2016r2 and later your iOS apps can access and use a new feature: iOS Location. This is a BIG feature to help you determine where in the world the device running your app is located and so you can react to its location. And you know what is even better? Implementing this feature is no-brainer.
In order to see how easy it is to implement this feature, let’s make a simple iOS app from scratch. To start, you’ll need to create a new iOS Project from the Project Chooser on the Xojo IDE, and also to install the free Xcode IDE and associated utilities from Apple. This is the way to run the app on the iOS Simulator.
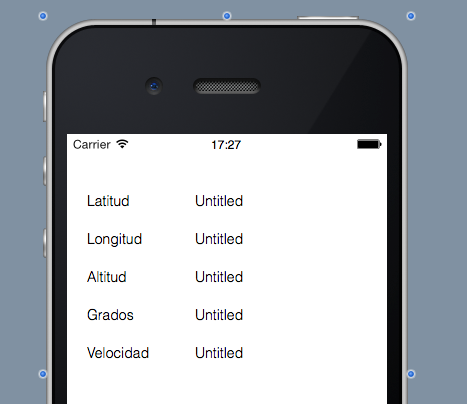
Once you have created the new iOS project, and after selecting the default View included with the Project template, we will add some Labels: to the left we will type a descriptive text about the associated localization data (Latitude, Altitude, Speed…); and the Labels on the right side will be the ones we will refer from code to show the data itself. The resulting View layout should be something like this screenshot:
Access the Inspector for each Label in charge to display the geolocation data, and type a descriptive Name for the control, so it will be easier to refer to it from code.
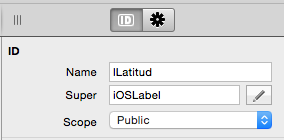
iOSLocation Control
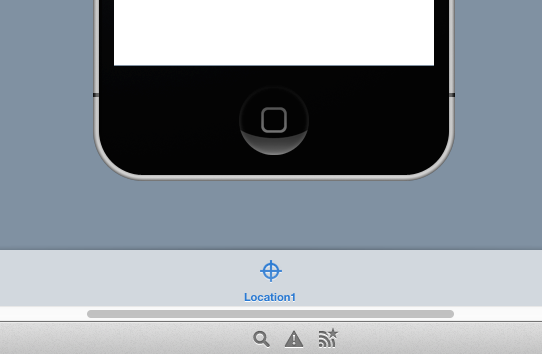
Obviously you’ll want to do better layout designs for your own projects. In fact, you don’t have to display the geolocation data at all! What you need to do is drag and drop the Location Control from the Library over the Layout Editor.

Once done, you’ll see the new Location Control instance displayed in the Tray on the lower part of the Layout Design Editor.
Select that new Location instance on the Navigator and access the Contextual Menu to choose the “Add to controlName Event Handler…” option. In the resulting window, choose the LocationChanged and AuthorizationChanged events, clicking the OK button to confirm the action.
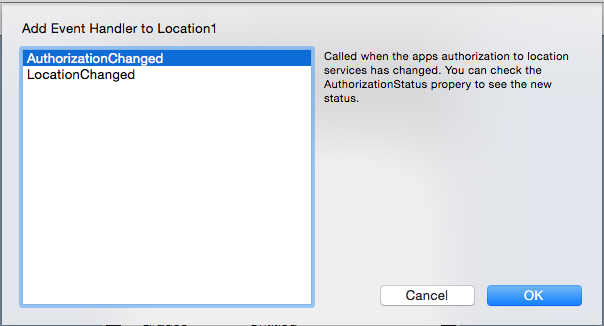
As you’ve probably already guessed, the LocationChanged functionality is very obvious: this is the event fired every time the Location instance needs to notify the app about changes in the geolocation values. In fact, when examining this Event signature we find all the arguments variables in charge to store the values about latitude, longitude, accuracy, altitude, altitude accuracy, the degrees relative to true north, and the speed given in meters per second. In brief, all the information you may need to make complex apps based on the geolocation of the iOS Device.
Choose the LocationChanged event and write the following code, making sure you change the Labels names to those defined by you on your own project:
lAltitud.Text = altitude.ToText
lLatitud.Text = latitude.ToText
lLongitud.Text = longitude.ToText
lGrados.Text = course.ToText

dim velocidad as double = (speed / 1000) * 3600

lVelocidad.Text = velocidad.ToText + " Km/h"
Activating iOSLocation
If you try to execute the iOS app in the Simulator you will find that there are no updates about geolocation at all, even if you change the options available under the Debug > Location menu. This is because iOS apps that want to use the Location services have to ask for permission (you know, this is related with the user privacy; something Apple takes seriously). So, let’s see how can deal with that in this project.
Let’s start writing the code for the second Event we added on the previous step: AuthorizationChanged. This is the Event fired on the iOSLocation instance every time there is a change on the associated authorization state.
Choose the AuthorizationChanged event in order to access his associated Code Editor, and write this line of code:
if me.AuthorizationState = iOSLocation.AuthorizationStates.AuthorizedWhenInUse then me.Enabled = true
When reading the Xojo Documentation you will see how AuthorizationStates is an Enum that also includes Restricted, Denied or AuthorizedAlways among other values. As you can see, if the available value is AuthorizedWhenInUse then the Location instance will be active, starting to receive and forward the changes about the geolocation values.
The only thing left is the code to ask for the authorization itself, firing the previous event in response to the selection made by the app user. This is something we are going to put in the default View Open Event. Once added, choose the Open event and write the following code:
Location1.Accuracy = iOSLocation.Accuracies.Best
if Location1.AuthorizationState = iOSLocation.AuthorizationStates.AuthorizedWhenInUse then
  Location1.Enabled = True
else
  location1.RequestInUseAuthorization
end if
The first line establishes the frequency for geolocation notifications frequency. Once again, this is an Enum whose values are in the Xojo documentation. Generally speaking, the ‘Best’ option has the one that offers a good balance between geolocation accuracy and battery consumption. In fact, this is something you have to take care of when designing any iOS apps that uses Location services!
In the ‘If… Then… Else’ block we check first if our app already has the needed authorization. If this is the case, we simply proceed to activate our Location instance to start receiving the data about geolocation changes.
But if this is the first time our app asks for permission (or if it was denied previously), then our app will execute the second block of code (after the else statement), calling the RequestInUseAuthorization method in charge of showing the Authorization Dialog to the user.
Do I have Authorization, .plist?
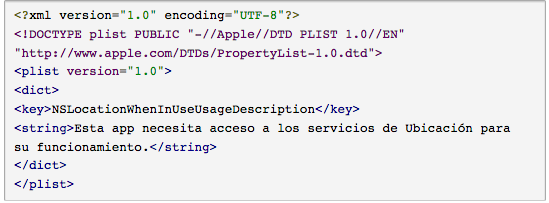
We are one final detail away! A ‘.plist’ file containing the message to show by the Authorization Dialog, and that has to be associated with the key NSLocationWhenInUseUsageDescription. Use the following xml data, save it as a text file using the ‘.plist’ file extension and import it to the Xojo Project.
Ready! Run the app in the iOS Simulator —or on a iOS device— and start to see the updates about the geolocation data. For example, if you are using the iOS Simulator, choose the Debug > Location > City Bicycle Ride option. And that is how easy is to add this feature to your iOS projects!
You can watch the video (in Spanish only) that talks you though this example.
Javier Rodriguez has been the Xojo Spanish Evangelist since 2008, he’s also a Developer, Consultant and Trainer who has used Xojo since 1998. He is in charge of AprendeXojo.com and the developer behind the GuancheMOS plug-in for Xojo Developers and the Snippery app, among others.