

In a previous entry we started to dig into web services with Xojo. The first post focused on the backend (server side), creating the Xojo app acting as middleware between the clients and the database that holds your data. We are using SQLite as the backend engine but it would not be difficult to change to other supported database engines like PostgreSQL, MySQL (MariaDB), Oracle or SQL Server, and even ODBC; all of these are supported by Xojo!
In this second post on the topic we will focus on the client side desktop app that will be in charge of creating the requests using the web service published API. This desktop app will send new data to our web server app so it can be added to the backend database.
The main topics are:
- Creating a subclass from the
URLConnectionclass - Dealing with the data received from the server as result for the request
- Encoding a
JSONItemfor sending data to the web service
As stated in the previous entry, the example doesn’t include the normal (and recommended) verifications on the data provided and received or the check on possible errors; we are only focused on the main topic.
Creating an URLConnection subclass
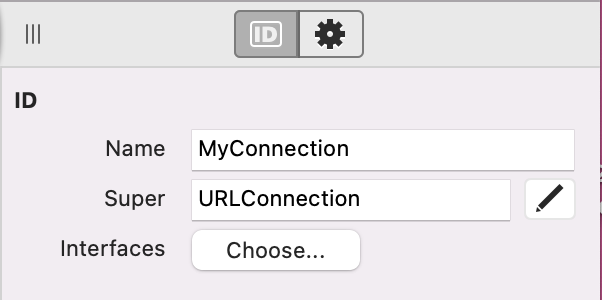
Let’s start by creating a new desktop project. Add a new Class using Insert > Class and use the Inspector to assign URLConnection as the Super Data Type as shown in the picture:
With the just added class still selected in the Navigator (the leftmost column in the IDE Window), add a new property to it (Insert > Property). We will use this property so it points to a DesktopListBox in our user interface, and so we can update it with the data received from our web service. With the just added property still selected, use the Inspector to set its Data Type and Name (text label used from our code to refer to such property) as follows:
- Name: List
- Type: DesktopListBox
- Scope: Private
Note that we set the scope as Private. This means that this property can be accessed only from the instances of the class, and not those that are created from other data types or even those created as subclasses from this class.
URLConnection: Asynchronous communications
Why would we want to maintain a reference to a ListBox control in our URLConnection class? As with any kind of problem, we can take several approaches in order to solve it. In this case, is a very convenient way to get a reference to the control we want to update as we will be using the URLConnection asynchronously.
Once we call the request against our web service, the execution of the app will not be paused until we receive a response, this allows the user to do other operations if they want. In this case the class instance, via the ContentReceived event, will be responsible to receive the new data from the web service, so we can use it.
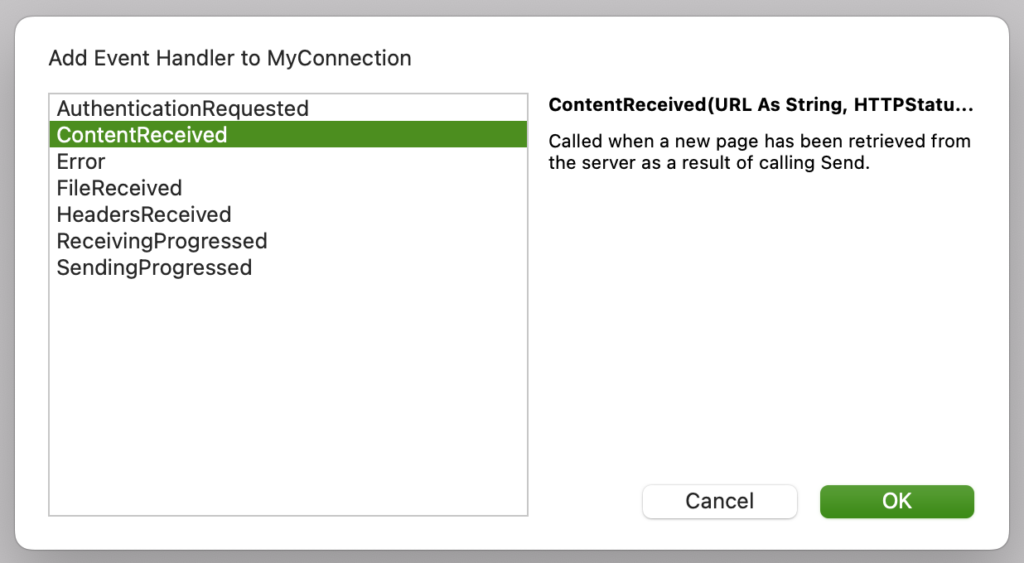
In fact, this is our next step. With our URLConnection subclass still selected in the Navigator, add a new Event Handler to it (Insert > Event Handler…). In the resulting window, choose the PageReceived option from the list and confirm the selection, so the event will be added to the class under the Event Handlers section.
Now, with the just added Event Handler still selected, write the following snippet of code in the associated Code Editor:
#Pragma Unused url

If HTTPStatus = 200 Then // We received an OK as the status for our request
  If Content.Length <> 0 Then // And we have data to process as part of the reply
    List.RemoveAllRows // So we delete previous existing entries in the associated ListBox Control
    content = content.DefineEncoding(Encodings.UTF8) // We set the encoding for the received data

    Var items As Dictionary = ParseJSON(content) // And proceed to create a new dictionary from the received data in JSON format
    items = items.Value("AllAlbums") // We get all the items for the key 'AllAlbums'…
    For Each item As DictionaryEntry In items // …iterating on them…
      Dim tempDict As Dictionary = item.Value // …and retrieving the dictionary (JSON item) for it…
      Dim title As String = tempDict.Value("title") // …so we finally access the desired value
      list.AddRow title
    Next
  End If
End If
The code is commented so you can follow what happens in each line in the process; but it is worth it to point out that the ContentReceived event gives us all the parameters we need in order to work with the data sent from the web service:
- URL: The URL returned as the reply for our request
- HTTPStatus: The HTTP status code that you should read to verify the success of the request
- Content: This is a String that can contain the data associated with the reply.
In addition, you can also add an extra event handler to our subclass: Error. This will be fired when an error is produced while dealing with requests sent from the instance.
With the events and property already set, it is time to add a couple of methods in charge of commanding our URLConnection subclass to launch the requests. For our example, those method names are directly related to the operations we want to do on the web service API created on the first part of this tutorial.
So, with our URLConnection class still selected in the Navigator, add a new method (Insert > Method), using the following data in the associated Inspector. This is the method in charge of requesting our web service for the name of all the available albums. Of course, we expect to receive the reply through the ContentReceived event:
- Method Name: GetRequest
- Parameters: theList As DesktopListBox, theURL as String
- Scope: Public
As you can see, this method expects to receive the reference to a DesktopoListBox control, and the text to the URL that should be the end point of our web service. Now put the following code in the associated Code Editor for the just added Method:
List = theList
self.send("GET", theURL)
Simple, isn’t? As you can see, we save the reference to the DesktopListBox control in the instance property so we can use it later for updating its contents with the received data. Then we use the Send method from the class with the GET verb and the URL where our web service should be listening for incoming requests. As previously stated, this is an async operation, so we will let our object to react through the ContentReceived or Error events.
URLConnection: Sending data as part of a request
Add a new method to the subclass, using the following values in the resulting Inspector. This is the method allowing us to send data to the web service so they can be added to the backend database:
- Method Name: SendItem
- Parameters: Item As JSONItem, theURL As String
- Scope: Public
This time, the method expects to receive and JSONItem object (pointed via the variable Item) and a String instance that should be the web service endpoint URL. Put the following code in the associated Code Editor for the method:
Self.SetRequestContent( item.ToString, "application/json" )
self.Send("POST", theURL)
The URLConnection instances allow us to associate additional information (data) for a request sending, in addition to those added through the HTTP headers (Head), using for that the SetRequestContent method. This method expects two parameters: a String with the real data to attach, and the definition of the type of data we are sending (this is, the MIME Type) as a String instance.
Finally, we launch the request in the second line of code, using for that the URL assigned to the theURL parameter and using the verb POST.
Designing the User Interface
We have already finished all the logic behind our example app, via our URLConnection subclass. So now it’s time to design a minimal user interface so we can verify the correct functionality of our client agains the web service.
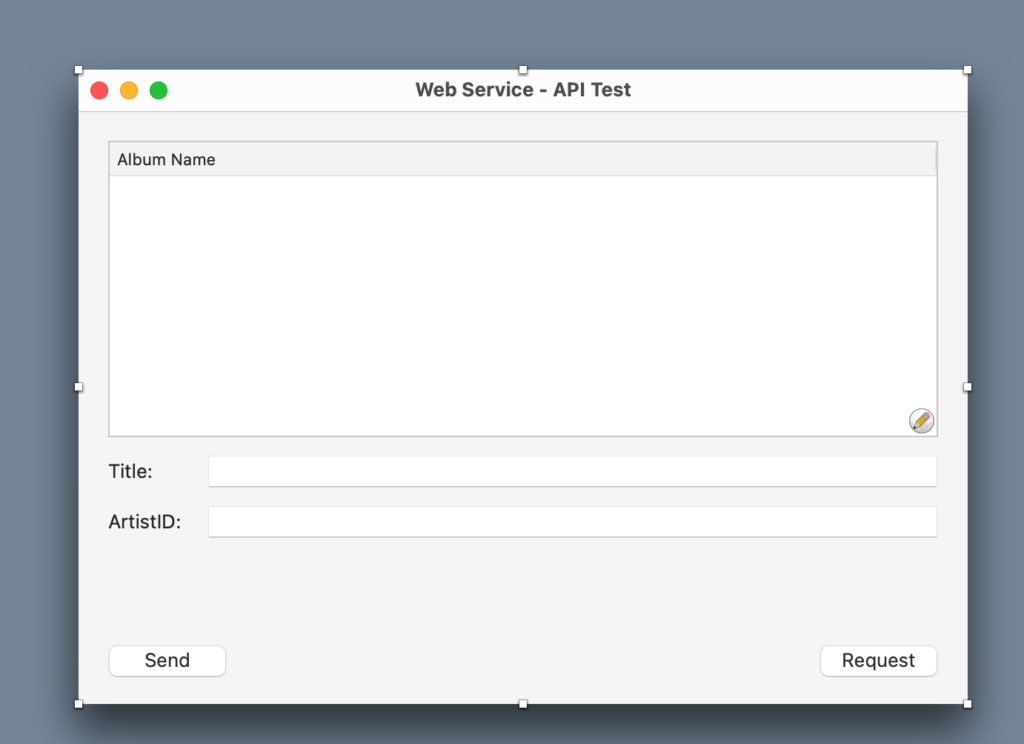
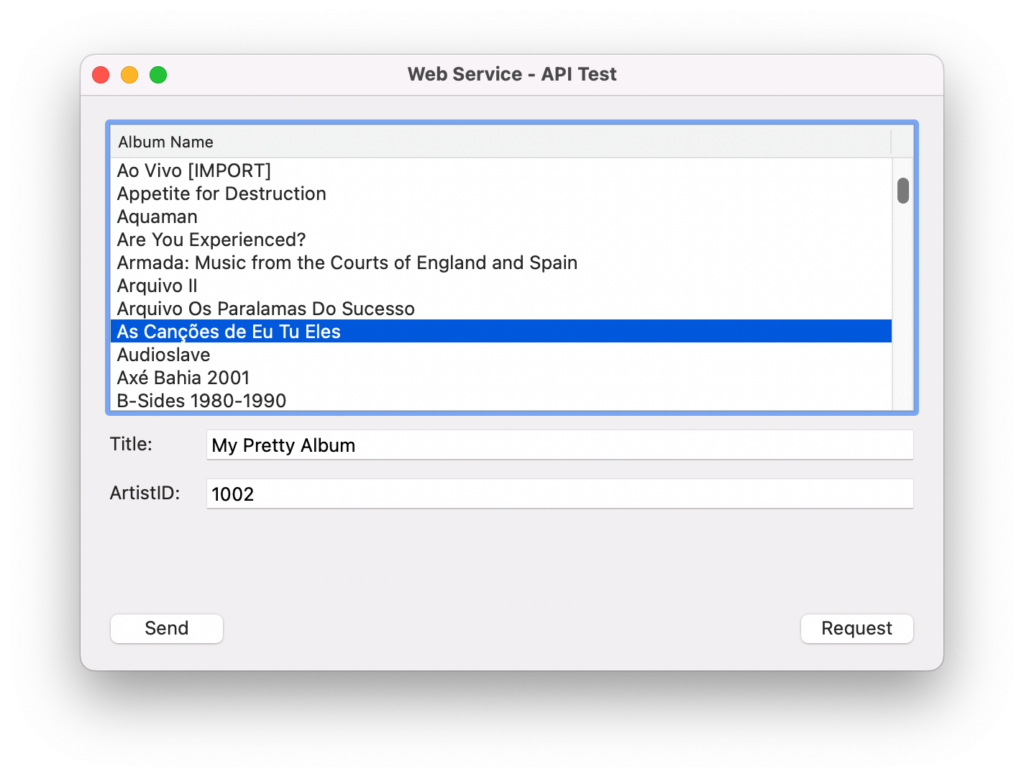
Select the Window1 object and add the required control so it looks like the one displayed here (from top to bottom): a DesktopListBox, a couple of DesktopTextFields in addition of two DesktopLabels, and two DesktopPushButtons named “Request” and “Send”.
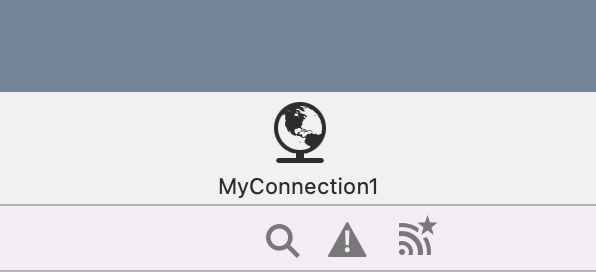
Next, add an instance of the created URLConnection subclass. For that, simply drag the created subclass from the Project Browser to the Window Layout Editor and a new instance will be added to the Tray in the lower section of the Editor, as shown in the following picture:
The only code present in the user interface is the one that we will add to both PushButtons. Double click the one labeled “Request”, and add the following line of code to its Pressed Event Handler:
MyConnection1.getRequest(AlbumListbox, "http://127.0.0.1:8081/GetAll")
It calls the getRequest method on the instance based on our subclass, sending as parameters the control “ListBox1” and the text for the (local) URL where the web service should be listening.
Double click the PushButton labeled “Send” in order to add the Pressed Event Handler and write the following fragment of code into the associated Code Editor:
Var d As New Dictionary
d.Value("Title") = TitleField.Text
d.value("ArtistId") = ArtistIDField.Text
Var item As New JSONItem
item.Value("newAlbum") = d

MyConnection1.sendItem(item,"http://127.0.0.1:8081/AddAlbum")
As you can see, there is nothing magic in it. We simply create a new dictionary using the keys expected from our web server to access the underlaying data for the record. In addition, you can see how easy it is to create a new JSONItem from a Dictionary!
Then, we simply call the sendItem method on our URLConnection subclass instance, passing along the expected parameters: a JSONItem instance and the web service endpoint URL that should include the method we want to call in the remote API.
Ready to listen for your requests!
We have finished our client app! Launch the web service created in the first part of the tutorial (make sure it is listening using the port 8081). Then, run the desktop client app and push the buttons for “sending” or “requesting” the information. You will see how with the request you’ll receive all the albums available in the example database, while with the “Send” button you’ll be able to add new records to the database with the data provided in both TextFields.
In conclusion, Xojo allows us to create both the backend and the multiplatform clients in record time and in a really easy way! Obviously, the examples used in these two articles are not, by far, complete solutions you can use “As Is”, but they give the basics you can use to construct more robust and complete solutions for your own needs.
Javier Rodriguez has been the Xojo Spanish Evangelist since 2008, he’s also a Developer, Consultant and Trainer who has be using Xojo since 1998. He manages AprendeXojo.com and is the developer behind the GuancheMOS plug-in for Xojo Developers, Markdown Parser for Xojo, HTMLColorizer for Xojo and the Snippery app, among others