
Continuing with what we previously learned in Animating Xojo, Part 1, this version introduces the use of linear interpolation to calculate the current stage of the animation at each step, plus switching to a Dictionary object for variable storage to setup for future parts in this series.
Linear Interpolation
Last time we used a static animation step that was calculated in advance to modify the width of our element. That method is fine for many uses, but for more advanced things we want to get a bit more involved with linear interpolation.
The new method will shorten the steps taken if something locks up your application UI so the time you’ve chosen for your animation to take to complete is honored. Previously, if something suspended your application’s main thread, the animation would halt and wait during this period and 250ms could become 100ms before the lockup and 150ms after the lockup. Now, if your selected animation time is 250ms and something suspends UI updates, the animation will complete after the UI updates have resumed as if the UI had never become unresponsive, resulting in a true animation time that roughly matches the specified time (I’ve seen +/- approximately 0.03 seconds using this method with a timer set at the minimum period for the debugging OS).
What is Linear Interpolation
Linear interpolation (or lerp) in animation is used to calculate change based on the total amount of time a process should take, the amount of time passed since the start of the process, and the change in value from start to finish. By using these three values we can determine, at any given point within our animation time-frame, what our current value should be.
You can read more in-depth information about linear interpolation here.
What Does it Look Like?
In code, linear interpolation is a fairly simple algorithm. We provide the following:
- Starting value (starting width, in our case)
- Ending value (the width after animation)
- The amount of time passed (expressed as a double value between 0 and 1, which is typically referred to as alpha)
Private Function lerp(startValue as Double, endValue as Double, alphaValue as Double) as Double
   '// The lerp function evaluates where we should be in the animation
   '   given a starting point, an ending point, and the amount of time
   '   elapsed. Lerp is shorthand for linear interpolation.
   return (startValue * (1 - alphaValue)) + (endValue * alphaValue)
 End Function
We can express that graphically with the two red points below representing our starting and ending values, the blue line representing the current position between those two values over time.
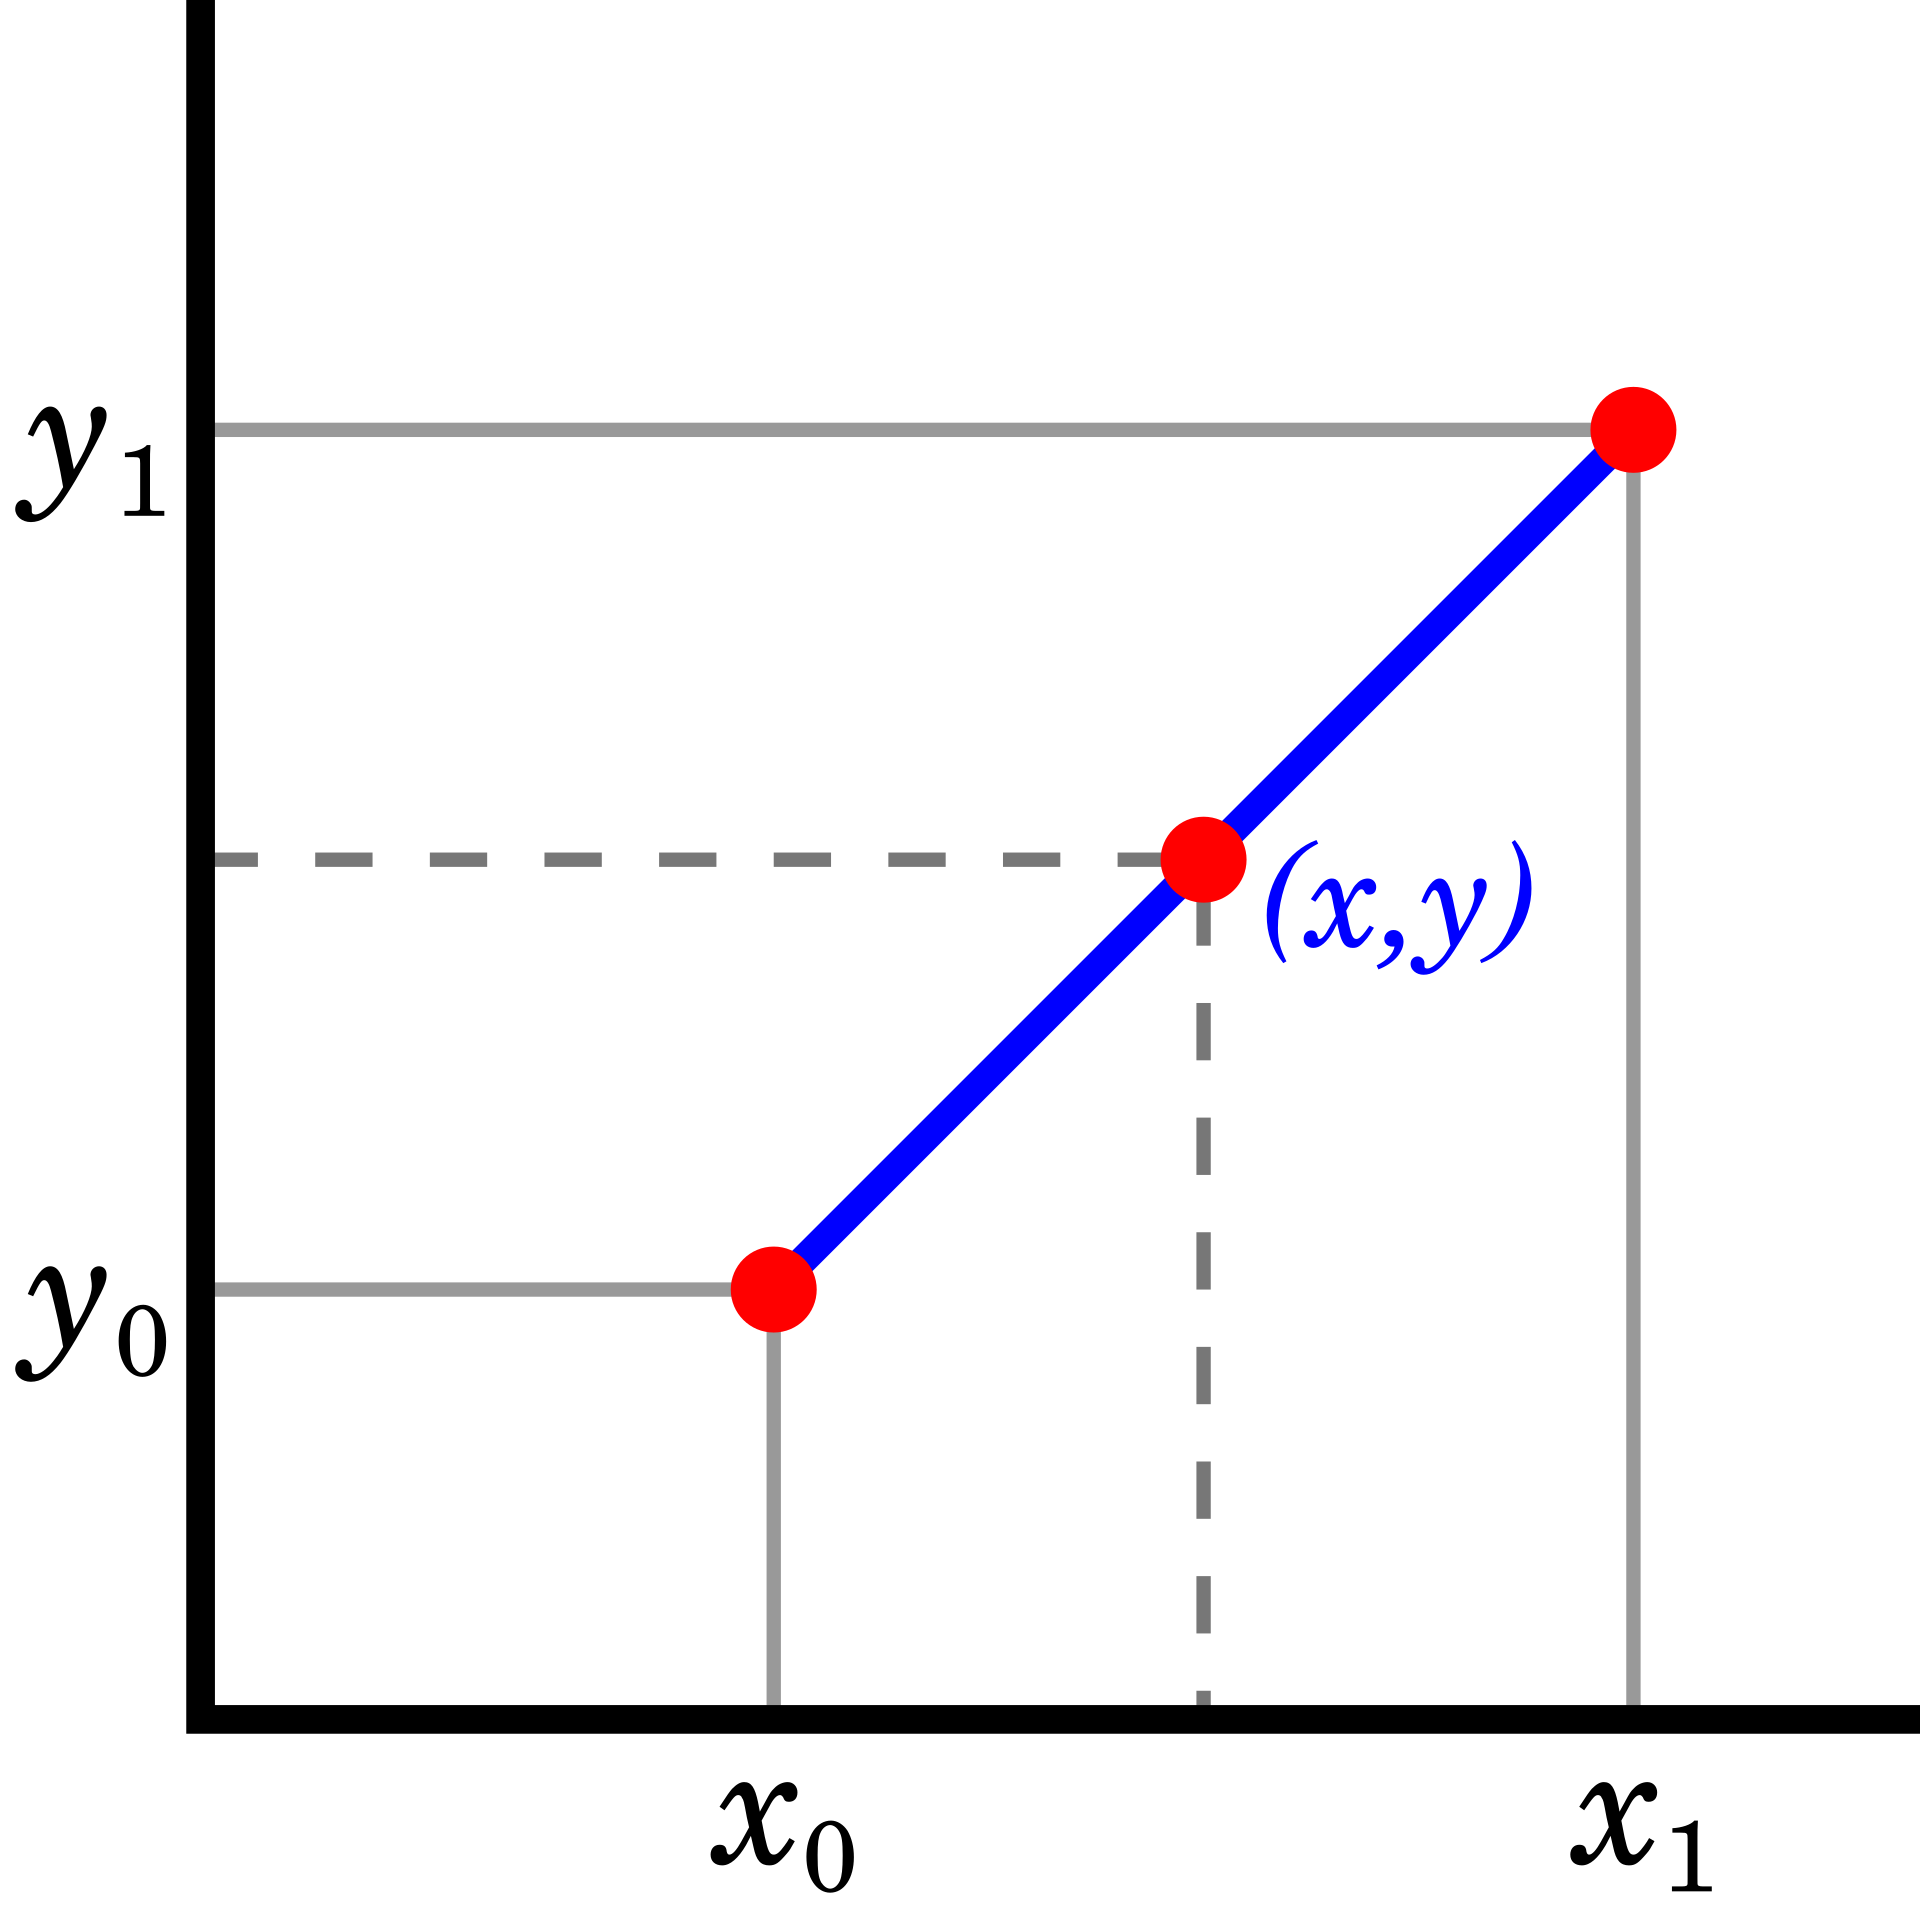
By Berland. Based on png-version Image:Linear_interpolation.png. Newer version by ElectroKid – Own work, Public Domain, Link
Applying Linear Interpolation
Applying this to our previous code requires quite a bit of modification.
First, we need to keep track of when the animation started, the width value when it started, and what we want our width to be at the end. Previously we used properties of the AnimatedCanvas class to track each value we used in our animation. In this version we’re going to use a Dictionary to store values and keep that in a property of the canvas. This gives us a means of throwing away the animated values (setting our Dictionary property to Nil) when we’re not using them, mainly, but also looks a bit cleaner in the Properties listing in our project, and sets up for the future of this project.
Properties
We’re going to add a new property to our AnimatedCanvas class which will hold our calculation values during the animation process:
Private Property animAction as Dictionary
With the addition of this property, we’re going to get rid of our old animStep property.
MouseUp Event
Our MouseUp handler is quite a bit different in this implementation. Instead of calculating the animation steps based on the timer’s interval and the length of time we want our animation to run, we’re now doing the following:
Sub MouseUp(X As Integer, Y As Integer) Handles MouseUp
   '// Just in case we hit some strange scenario where
   '   the timer is disposed of. Should, theoretically,
   '   never happen in this case, but better safe than sorry.
   if IsNull( animTimer ) then Return
 '// Now we're going to check for a currently running
   '   animation. If we find that the timer is currently
   '   running, then we know that the user wants to
   '   animate in the other direction. All we need to do
   '   is switch the direction the animation is running.
   if animTimer.Mode = 2 then
     expanded = not expanded
   end if
 '// Here we create our dictionary object containing
   '   everything our Timer's action event needs to do
   '   the work. The current time in Microseconds, which
   '   will be our start time, the start width, and the
   '   expected resulting width. This "10" is hard-coded
   '   just so that we can actually click on the canvas
   '   again to reverse the animation if it is fully
   '   collapsed. In most scenarios you wouldn't have
   '   a hard-coded value like this and you may even be
   '   triggering the animation from a different element
   '   altogether, so this value is purely for demonstation
   '   purposes in this project.
   animAction = new Dictionary( "s" : Microseconds, "sw" : Width, "ew" : If( expanded, 10, expandedWidth ) )
 '// Finally, enable the timer to perform the animation.
   animTimer.Mode = 2
 '// We've added this event, just in case there's
   '   something you want to trigger at the start of the
   '   animation.
   RaiseEvent BeforeAnimate
 End Sub
As you can see from the comments above, we’re constructing the Dictionary object with the current time(s), the current width(w), and the expected width at the end of the animation(ew).
These changes also allow for the user to click again during the animation to reverse it without, theoretically, causing any strangeness such as animation skipping or jumping. The new animation operation just begins when the user clicks, cancelling the old one. Since we’re using linear interpolation, the timer’s Action event handler just keeps trucking along with a calculated width based upon the changes.
Timer Action Handler
Our timer’s action handler method is also quite different. This is where we use the Dictionary we created in the MouseUp event handler and assigned to our animAction property to calculate and apply the new width of our component.
Private Sub animTimer_Action(sender as Timer)
   '// In this version we've moved from having properties to store
   '   the values we use in our animation to a dictionary
   '   because it's both data we don't want to keep around when not
   '   animating, and it'll be a bit easier to implement multiple
   '   running animations later by looping over an array of these
   '   dictionary objects on each Timer action.
 '// Our first step is to make sure we actually have an animation
   '   to perform.
   if IsNull( animAction ) then
     '// No current animation. The timer shouldn't even be running,
     '   so we'll go ahead and kill it. Theoretically this should
     '   never happen, but it's another case of checking just so
     '   we're not using unnecessary CPU cycles.
     sender.Mode = 0
     Return
   end if
 '// Now we'll get our operation values from the dictionary object.
   '   it is possible to run into KeyNotFoundExceptions here, since
   '   we're not checking first, but if you do, then you've likely
   '   made an error when modifying the code since we create the
   '   Dictionary with the same set of keys every time and always
   '   overwrite the old object with the new one.
   dim animStart as Double = animAction.Value("s").DoubleValue
   dim animStartWidth as Double = animAction.Value("sw").DoubleValue
   dim animEndWidth as Double = animAction.Value("ew").DoubleValue
 '// timePercent is used in the lerp function and gives us a basis
   '   for dividing up the distance we need to cover in to constituent
   '   pieces for animating. We also use this for cutting out of the
   '   animation at the appropriate time. This value ranges from
   '   0 to 1.0. We subtract our start time from the current time in
   '   microseconds, then divide by one thousand to convert that in to
   '   milliseconds. We then divide the result of that by our AnimationTime
   '   as that's already expressed in milliseconds.
   dim timePercent as Double = (((Microseconds - animStart) / 1000) / manimTime)
 '// Here we pass our start value, end value, and the percentage
   '   of time passed to our lerp function parameters to
   '   calculate what the current width should be at this point
   '   in the total animation time. Note that, in our previous
   '   version, we used a step value and modified our current width
   '   but in this version our step value is the entire calculated
   '   current width.
   dim animStep as Double = Lerp( animStartWidth, animEndWidth, timePercent )
 '// If we've reached our ending width or our alotted time has
   '   passed then we bail and set the values we expect at the
   '   end of the animation.
   if animStep = animEndWidth or timePercent >= 1 then
     me.Width = animEndWidth ' Set our width to the end result.
     expanded = not expanded ' Toggle the state boolean.
     animAction = nil ' Set our dictionary to nil since we don't need it.
     sender.Mode = 0 ' Disable the Timer
     RaiseEvent AfterAnimate ' Notify that the animation is done.
 Return ' Bail out.
 end if
 '// If we get here, then we're still somewhere in the middle
   '   of the animation. Apply the new width value, and we're
   '   good to go.
   me.Width = animStep
 End Sub
New Events
For this version, I’ve also added a couple of new events. These can be used to perform other actions that you may want to carry out when the animation process has started or ended. Here’s our two new event definitions:
Event AfterAnimate()
Event BeforeAnimate()
Other Changes
When you launch the demo project, you’ll notice that there’s a lot more going on with wndAnimate than the previous version. First, I renamed the animTime property to a computed AnimationTime property and added it to the inspector, so there’s a field on the window to change this value.
Second, there’s a new checkbox captioned “Insert Interruption”. This uses the BeforeAnimate event to cause the app’s main thread to sleep for 50% of the animation time beginning at 25% of the animation time, which results in the UI becoming unresponsive and the animation to halt for the duration of the Sleep. Once the call to sleep is complete, you’ll see the animation pick up where it would have been if there had been no call to sleep.
Then, a group of RadioButtons for verifying that modal elements do not interfere with animation on the main thread. The choices are: None, MenuItem, and Modal Window. When Xojo was still using Carbon for macOS, modal elements would interfere with UI updates to the main window until that modal element was dismissed. There’s all sorts of technical-ness as to why, but all we really care about is that with the move to Cocoa this is no longer an issue, and the demo proves it.
Finally, I’ve moved the instance of AnimatedCanvas to the right of the Window. This isn’t purely aesthetic as I plan to use this setup in a future version to show how to run multiple concurrent animations.
You can download the updated demo project here.
Anthony G. Cyphers is the Lead Developer and Sole Proprietor of GraffitiSuite Solutions, and has been providing custom Xojo components and contract development since 2003. He runs the Xojo User’s Discord server, and is an administrator in the Xojo User’s Facebook user group.