
It’s helpful and common these days to add a “Recent Items” menu that tracks the last opened files or other recent searches among other things. This blog post will teach you one of the multiple approaches to do this in Xojo.
Once you create a new Xojo Desktop project the first thing we need to do is to add a new class to it because this will be a dynamically created submenu. This will be a subclass of the MenuItem class, so we can implement the Action Event Handler. This event is the one that will be fired every time the user selects an entry among those listed in the “Recent Items” submenu from the main File menu.
So, add a new class to the project using the following data in the Inspector Panel:
- Class Name: MyMenuItem
- Super: MenuItem
Then, add a new Delegate to the subclass using the following data in the Inspector Panel:
- DelegateName: MenuItemCallBack
- Parameteres: Caption As String, Value As String
- Scope: Public
Next, add a new property to the class using this data in the Inspector Panel:
- Name: pMenuItemCallback
- Type: MenuItemCallBack
- Scope: Public
The purpose of this property is to store the address of the method that will be invoked when the user selects a given menu item based on this class (i.e.: a recent item from the “Recent Items” submenu).
The last thing to do in our subclass definition is adding the Action Event Handler. Once added, simply write this line of code in the resulting Code Editor:
if pMenuItemCallback <> nil then pMenuItemCallback.Invoke(me.Text, me.Tag)
As you can see, it limits itself to invoke the method pointed by the pMenuItemCallback property passing along both the Text and Tag properties of the instance. In our example, the Text will be the file name, while the Tag property of the MenuItem will store the NativePath pointing to the real file on the original drive.
With our subclass completed, the second step is to provide a way to create new MyMenuItem instances and add them to the desired menu item. In order to keep things simple, we will include a button in the user interface of the app that when clicked will let the user select any file, creating a new MyMenuItem instance that will reference that file and that will be added to the File submenu on the main menu bar.
In addition, we will keep track of the added files in an Array of Strings.
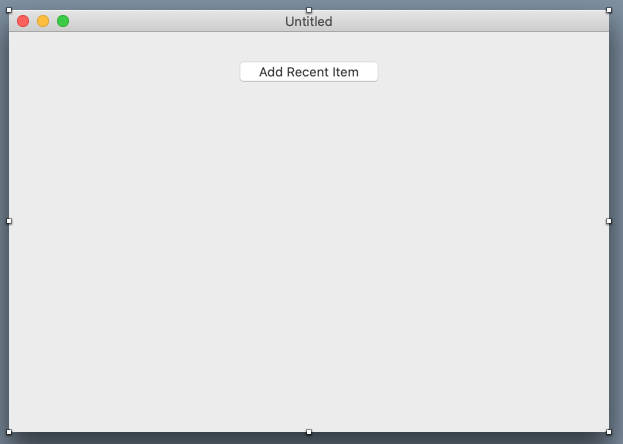
So, select the Window1 window in the project to access the Layout Editor and add a new Button to it from the Library using the following data in the Inspector Panel:
- Name: AddItem
- Caption: Add Recent Item
Then, add the Action event to the just added button and write the following code in the associated Code Editor:
// Display a dialog so the user can choose a file
Var f As FolderItem = FolderItem.ShowOpenFileDialog("")

If f <> Nil Then

  // Add the name and the nativepath of the selected file, separated with the Tab character
  app.RecentItemsCollection.AddRow(f.DisplayName + Chr(9) + f.NativePath)

  // Create a new menu item Instance from the MyMenuItem class, setting the name, tag
  // and the property with the method callback.
  // Then add the new menu item to the FileRecentItems submenu.

  Var mi As New MyMenuItem
  mi.Text = f.DisplayName
  mi.Tag = f.NativePath
  mi.pMenuItemCallback = WeakAddressOf app.recentItemCallback
  FileRecentItems.AddMenu(mi)

End If
As you can see here, we need to create the “RecentItemsCollection” array property under the App Object, and make sure that we name the File submenu “FileRecentItems”.
Select the App object and add a new property to it named “RecentItemsCollection() As String”. Keep the Scope as Public.
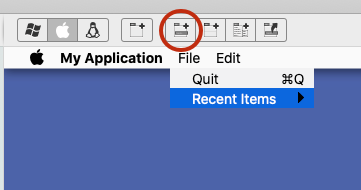
Next, select the MainMenuBar item in the Project Navigator so the Menu Editor is Displayed. Then, click on the File menu and add a new Menu item clicking on the fourth button from the right in the editor toolbar. That action will add a new menu item under the File menu.
Use the Inspector panel to set the following values in the just added menu item:
- Name: FileRecentItems
- Text: Recent Items
- Submenu: Enabled
Enabling all the Recent Items
We would want that the “Recent Items” menu and all the items under it are enabled by default every time the user clicks on the File menu. For this, we need to add the EnableMenuItems Event Handler to the App object. This is the event that will be fired every time the user clicks on an item in the menu bar, giving us an opportunity to decide which one should be displayed as enabled or not.
Once the EnableMenuItems has been added, write the following code in the associated Code Editor:
FileRecentItems.Enabled = True

For n As Integer = 0 To FileRecentItems.LastRowIndex

  FileRecentItems.MenuAt(n).Enabled = True

Next
As you can see, we are enabling the FileRecentItems and all the items that may have been added to this submenu. For that we only need to iterate over all the descendant items and access them using the MenuAt method to set their Enabled property to True.
Loading and Saving Recent Items
By now, we know how to create new menu items and add them dynamically to the expected submenu; and even how to enable them when the user clicks on the menu bar. But some important pieces are left. First of all, we still need to add the RecentItemsCallback to the App object, because this is the method we assign as the delegate to every new MyMenuItem instance (that is, the method that will let us know the recent item that has been selected by the user).
So, select the App object in the Project Browser and add a new Method to it using these values in the Inspector Panel:
- Method Name: RecentItemCallback
- Parameters: Caption as string, Value as String
- Scope: Public
Then write this line of code in the Associated Code Editor:
MessageBox "Recent Item Selected" + endofline + endofline + "Selected item: " + Caption + EndOfLine + endofline + "File Path: " + Value
As you can see, our example project will limit to display a dialog with the name of the selected item and the underlying native path to the real file. You may want to do something more interesting in your own projects using these pieces of information. For example, open a new document or the selected file in order to edit it!
But none of this of this is very useful if you are not able to save and later retrieve these entries every time you run this example app (or your own apps!). So let’s take care of it now.
Let’s take care of saving the current “Recent Items” to disk. We will do that using a regular text file stored in the path pointed by SpecialFolder.ApplicationData; so that will assure us that the file is going to be saved in the proper place on every supported OS (even if you intend to distribute your solutions as sandboxed apps). Of course, you can opt to save this information as JSON, XML or in a database; in that case, you should modify the provided code in order to parse and process the data acordingly to your format of choice.
We will save our Recent Items when the user closes the app, so it makes sense to add the code to the Close Event Handler in the App object. Once added, write the following snippet of code in the associated Code Editor:
Try
  Var f As FolderItem = SpecialFolder.ApplicationData.Child("RecentItems")

  If f.Exists Then f.Remove

  Var tos As TextOutputStream = TextOutputStream.Open(f)

  For Each item As String In RecentItemsCollection
    tos.WriteLine item
  Next

  tos.Close

Catch e As IOException
  MessageBox e.Message
End Try
As you can see, there is nothing exceptional in this code. It simply creates a TextOutPutStream on the “RecentItems” folderItem (stored in the path pointed by ApplicationData), saving every entry stored in the RecentItemsCollection, line by line.
How can we retrieve this information, recreating the menu items the next time the user runs the app? This is something we are going to do in the Open Event Handler of the App object. Select it in the Project Browser and write this piece of code in the associated Code Editor:
Var f As FolderItem = SpecialFolder.ApplicationData.Child("RecentItems")

If f <> Nil And f.Exists Then

  Try
    Var tis As TextInputStream = TextInputStream.Open(f)
    Var recentItems() As String = tis.ReadAll.ToArray(EndOfLine)
    Var mi As MyMenuItem

    For Each item As String In recentItems
      app.RecentItemsCollection.AddRow item

      If item <> "" Then
        mi = New MyMenuItem
        mi.Text = item.NthField(Chr(9),1)
        mi.Tag = item.NthField(Chr(9),2)
        mi.pMenuItemCallback = WeakAddressOf RecentItemCallback

        FileRecentItems.AddMenu(mi)
      End If

    Next

    tis.Close

  Catch e As IOException
    MessageBox e.Message
  End Try

End If
As you can see, we are doing the opposite opperation; pointing the folder item to our “RecentItems” file under the ApplicationData directory and opening it as a TextInputStream. Then, we create a temporary array with all the file contents using the EndOfFile character as the separator for each new array entry.
Then we iterate the temporary array to recreate the menu items and add them to the FileRecentItems submenu. It’s that simple!

Summary
This is one way you can implement a “Recent Items” submenu in your desktop apps. Of course, there is much room for improvement. For example, you can check if an item has been added already to the Recent Items submenu (hint: maybe you want to use the RecentItemsCollection array for that), and even limit the maximum number of items displayed in the Recent Items menu.
Questions? Ask me on Twitter @XojoES or on the Xojo Forum.