
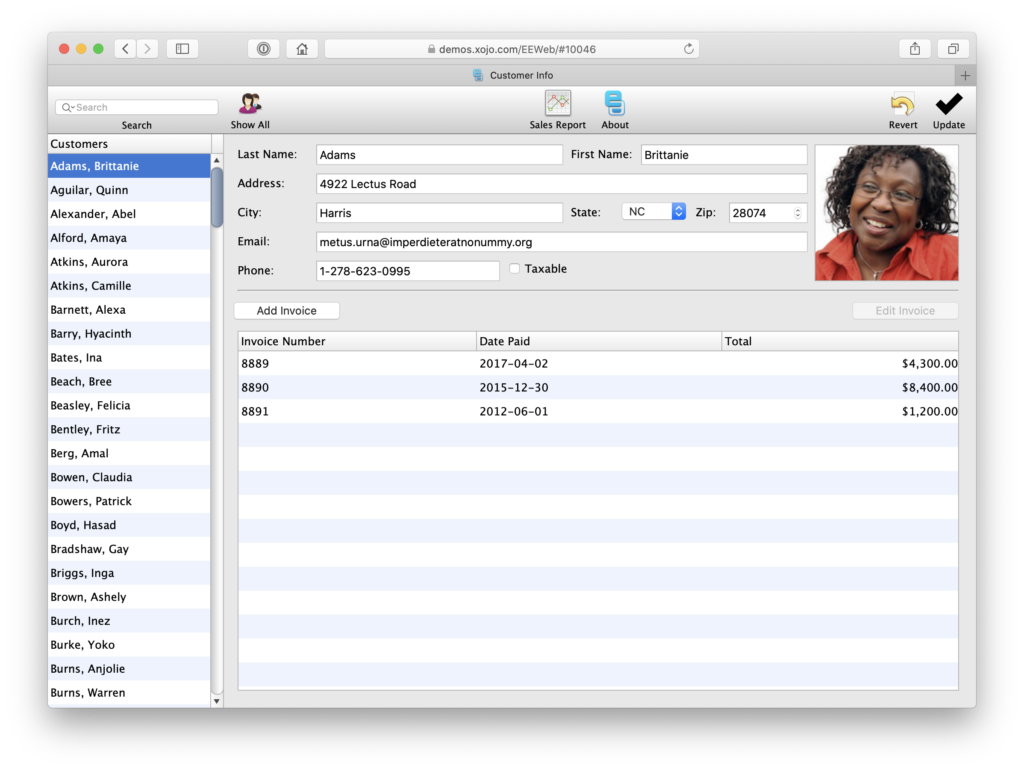
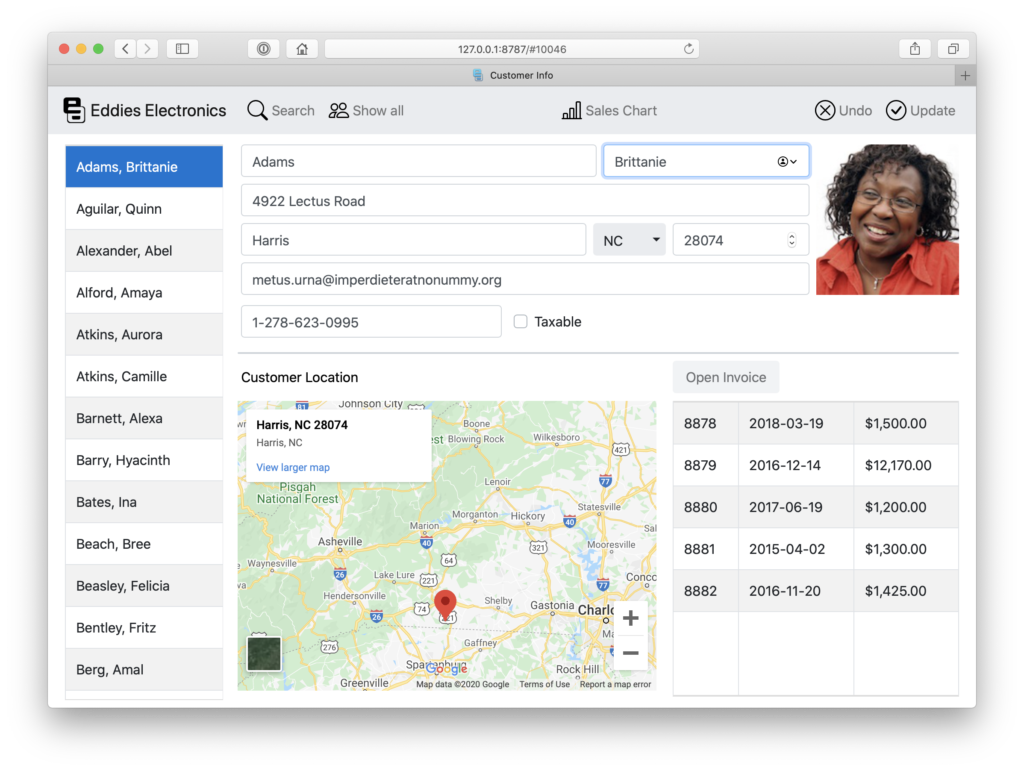
With the release of Xojo 2020r1 comes the new 2.0 version of our web framework. While the way in which you build web applications hasn’t fundamentally changed, this new version is a from-the-ground-up rewrite and utilizes API 2.0 for greatly improved consistency. The conversion process will be well worth the effort as web applications built upon Web Framework 2.0 will be more robust, handle more users, be more responsive and have a far more modern look and feel. For example, compare this layout from our Eddie’s Electronic’s demo app made with Web Framework 1.0 to the same layout updated to Web Framework 2.0:
User Comments about Conversion
After initial testing I quickly recognized the great performance gain Xojo Web 2.0 brings to our application. Transitioning to Web 2.0 was easier than we had expected. The backend code could be taken over almost completely without changes and the user interface was redesigned based on the new controls. The performance gain, especially with many concurrent sessions, is huge and allows a fluent user experience, with a very modern look and feel.
Andreas Reichmann of inoxision GmbH
Should You Convert Your Project
There are two reasons that it might not make sense to convert a project at this time. The first would be if this project is both quite large and a short-term solution. If you don’t see it being in use in 5 years, it might make more sense to continue to maintain it in 2019r3. The second reason would be if your project currently relies on some function of Web Framework 1.0 that does not exist in Web Framework 2.0. Primarily this would be mouse events for Label, Canvas, MapViewer and ImageViewer. If your app depends on mouse events for these controls, wait for a future release.
How Much Work Will It Be?
I personally converted the Eddie’s Electronic’s demo web app from Web Framework 1.0 to 2.0. The end result was a project with 9 layouts and just over 400 compiler errors. I was able to fix the errors, update the layouts (modernizing the main layout a bit in the process), and updated the non-web framework code to API 2.0 as well. The Eddie’s project file is 11.6MB and the entire process took about a day to complete.
Custom Controls
If you have any WebSDK-based custom controls on your layouts, you should remove them first as they will not convert. A new WebSDK is coming soon and the authors of those controls will need to update them to work with Web Framework 2.0.
Work with a Backup
First and foremost, make sure that you have a backup of your project before you start the conversion process. You will want to be able to maintain your existing Web Framework 1.0 projects while you go through this conversion process. It may be short, it may be long, depending on how big your project is and what it uses.
The Overall Process of Conversion
The best order in which to do a conversion is the following:
- Convert Container Controls
- Convert Web Framework Code
- Convert Layouts
- Convert API 1.0 code to API 2.0
Let’s look at each of these steps in order.
Don’t Panic
When you initially open your project in Xojo 2020r1 (or later), you’re likely to see this dialog box:

This is simply telling you that you’re using a control, event or property that no longer exists in Web Framework 2.0. Once you save your project, these incompatible items will be removed. Fear not, however, as you are working with a copy of your project so you can always refer back to your original Web Framework 1.0 project if the need arises.
Converting Container Controls
If your project utilizes Container controls, you’ll want to open it in Xojo 2020r1, immediately save it and then reopen it again. This will convert your Container controls properly allowing them to render correctly in the Layout Editor.
Converting Events
While many event names have changed, only a few have changed dramatically. Most have changed to make it more clear when they occur. For example, WebPage.Open is now Opening to reflect the fact that the page is actually in the process of opening and is not open yet. WebPage.Close on the other hand has been renamed Closed, because at the point at which the event fires, the page has already closed.
All of the code in events is automatically moved over to the new events when you open your project in 2020r1. However, you will likely have some code in events that cannot be auto-converted because a similar event does not exist. You will need to move this code manually. If there’s not an obvious new event, save this code somewhere until you get through the rest of the process and can decide where it should go. Then you can delete the unconvertible event.
In the case of Eddie’s Electronics, the project had 107 events, 7 of them could not be auto-converted.
Converting Web Framework Code
Once you have handled any events that can’t be auto-converted, the next step is to fix the compiler errors that are the result of changes in APIs between Web Framework 1.0 and 2.0. Web Framework 2.0 uses API 2.0 exclusively.
API 2.0 was designed to be extremely consistent. At first it may seem slightly foreign because you are accustomed to the original framework. Most find they get used to the new APIs fairly quickly and appreciate the consistency as it makes it far easier to find the API you’re looking for and thus faster for development.
Unfortunately, for the web framework it was not practical to keep both the old and the new APIs, so this means you’ll need to make some code changes before your web project will compile. The easiest thing to do is click the Run button and let the compiler figure out what it doesn’t understand. It will give you a list of errors most of which can be fixed by simply replacing an old API with a new one.
The most common change will be that the property that holds the primary value of a control is (in most cases) called Value. TextField1.Text for example, becomes TextField1.Value. These are fairly quick to change. The only code you must update is code that is associated with the web framework. While code not specific to the web framework might generate warnings that it should be updated to API 2.0, that’s not absolutely required to get your project converted and running. Depending on the size of your project, you may choose to do that conversion work at a later date.
Referring to the internal project I mentioned earlier, after dealing with 7 events that could not be auto-converted, clicking Run again results in just over 400 compiler errors. Now that may seem like a daunting task but it’s not as bad as it sounds. Almost half of those errors come from things that can be fixed with a simple search/replace. For example:
| Old Method/Property | New Method/Property | Count |
| Text | Value | 77 |
| ListIndex | SelectedRowIndex | 30 |
| LastIndex | LastAddedRowIndex | 5 |
| DeleteAllRows | RemoveAllRows | 8 |
| Cell | CellValueAt | 12 |
| MsgBox | MessageBox | 12 |
| RowTag | RowTagAt | 8 |
| ForeColor | DrawingColor | 24 |
| DrawRect | DrawRectangle | 6 |
| FillRect | FillRectangle | 6 |
| Total | 191 |
There are many others as well that can be converted via/search and replace.
Note on Search/Replace: When replacing class members, always start with a period and for methods end with an open parenthesis to reduce the chance you're going to replace something that matches but isn't a class member or is the wrong class member.

For example: .Cell(
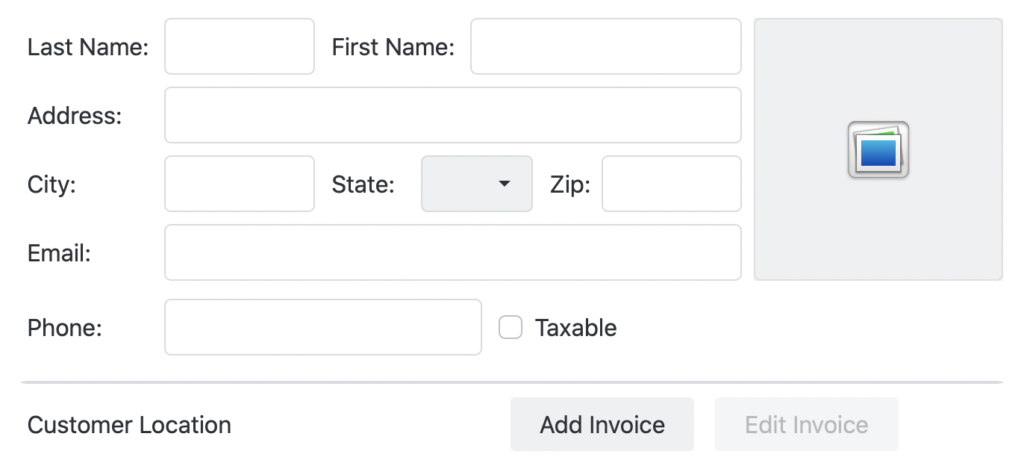
Converting Layouts
Most controls in Web Framework 2.0 are taller than their 1.0 counterparts. This means you’ll need to resize them and then in many cases, reposition them. For the controls that have a standard height such as Label, TextField, Button, PopupMenu, Checkbox, SegmentedButton, it is recommended that you initially resize them to their new standard height of 38 first. You can do this all at once for a single layout. Just shift-click on several controls then change their Height property collectively to 38.
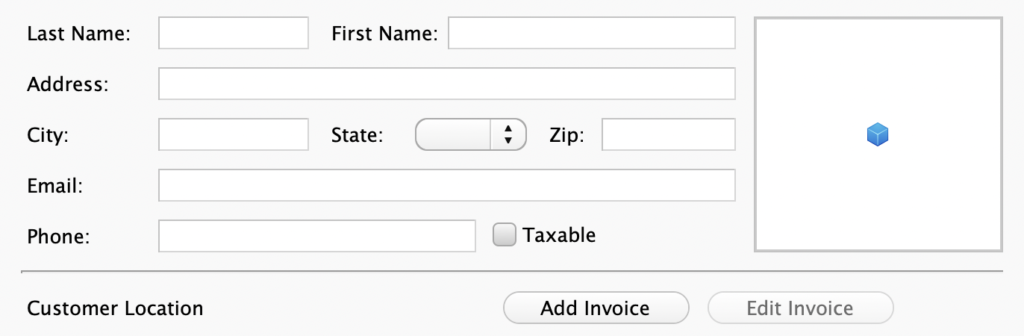
Now that you have all the controls at the proper height, you can begin repositioning them. However, before you do that, you may want to resize the layout itself to create additional room for the new, taller versions of your controls. Before you do that, look at ListBox, ImageViewer, TextArea and MapViewer controls to see if their locking properties are set in such as way that they will resize when you resize the page. If they are, turn those off for now so you can easily create more room.
Now you’re ready to make your layout taller to accommodate the taller controls. The most popular controls (Label, TextField, Button, Checkbox, Popupmenu and others) are 42% taller. To understand how much taller to make your layout, measure the height of the area with the controls that have become taller (a Rectangle works great as a measuring tool) and then add 42%. For example, in the internal project example we’ve been using, the area of the CustomerDetailsPage layout that includes the name and address fields is 158 pixels tall in the original version. 158 * 1.42 = 224 pixels. The difference is 66. Thus, making the entire layout 66 pixels taller created enough room for the various controls at their new heights.
If you follow these guidelines, you’ll find that that webpages, containers and web dialogs can be updated very quickly. The example took 5 minutes to update.
Here’s a video showing the process:
In Summary:
- Turn off LockTop for any controls below the controls being resized and turn on LockBottom for those same controls so that when you make the layout bigger, those controls will move downward.
- Measure the area these controls currently require, multiple that by 1.42 then subtract the original height. This will give you the number of pixels you should add to the height of the layout in the Inspector to make room for the taller controls.
- Select all Labels, TextFields, Buttons, CheckBoxes, PopupMenus and SegmentedButtons. In the Inspector, set their height to 38.
- Starting with the newly resized controls closest to the bottom of the layout, move them downward then work your way towards the top.
- Turn back on any locking properties you turned off in step 1.
Note about Toolbars: While a new visual editor is in the works, it's not available for 2020r1. Toolbars are supported in the framework so you can create them in code. See WebToolbar in the language reference for an example.
Note about Separators: The separator control no longer exists. When your project is imported, separators are converted to Rectangles and made thin to do the same job.
Note about WebAnimator: This class no longer exists. However, See the WebStyle class for details on how to add animated transitions.
Note about WebStyles: Because Web Framework 2.0 relies heavily upon themes rather than styling individual controls, there is no visual web style editor. You can, however, use the WebStyle class to style individual controls. You can also create your own Bootstrap theme which will be applied across all controls on all layouts.
Testing the Initial Conversion
At this point you are ready to test your initial project conversion. Click Run and test all of your functionality. You may still need to make some additional changes to get these just right.
Bonus Step: Converting Remaining Code to API 2.0
Now that your app is converted, you may want to consider converting the remaining code to API 2.0 since that is the API we will be focusing our attention on going forward. It’s also the API that is shared with the desktop and will be shared with our mobile support soon.
Now, you are probably asking yourself, “What a minute, didn’t I just convert my code to API 2.0 when I fixed all of those compiler errors?” You did but that was just for the Web Framework itself. Your app likely also uses parts of the console framework which is the part that handle things like reading/writing files, network connectivity, database connectivity, and more. This code doesn’t have to be immediately converted to API 2.0 but you should plan to do it at some point.
When you decide to do so, choose Project > Analysis Warnings. When the dialog appears, make sure that the first two checkboxes are checked. Those are the ones that will inform you of deprecation warnings. Now choose Project > Analyze Project. The Warnings and Error panel will provide you with a list of places where you are using a class, method or property that has been replaced and will provide the replacement. At that point you just need to go error by error making the indicated changes. API 2.0 and API 1.0 share a lot of the same implementation under the hood so it may be a while before you really need to make this switch. You could also decide to do it slowly or just do it when you need to like when you encounter a bug in something from API 1.0 that is fixed in the API 2.0 version for example.
You will find that these conversions are easy to do and many can be handled with search and replace. I especially enjoyed converting database prepared statements as most went from four or five lines of code down to just one.
Conclusion
The bigger your project is, the more work it will be to convert. Fortunately, this is a one-time process for each project. The process suggested above will save you time during your project conversion.