
The process of adding new controls to windows (or containers) at runtime has been greatly simplified. Instead of having to deal with control arrays, when you use Xojo 2021r3 or later you can call the new AddControl method on the DesktopWindow (or DesktopContainer) where you want to add the new control. Continue reading and I will show you how!
The new AddControl method on DesktopWindow and DesktopContainer accepts any DesktopUIControl instance you want to add to a window or container.
To make the new DesktopUIControl instance really visible in the target window or container, you’ll need to set some basic properties; specifically the desired width and height values for the new instance control and also the left and top coordinate values where you expect the control to be added. These values are relative to the left/top corner of the target window/container, so a value of top = 0 and left = 0 means to add the control at the top/left corner of the target window itself.
In order to see how this works, this example creates a Desktop project that includes multiple DesktopButton instances at runtime while also removing them from the target DesktopContainer (calling the Close method on the instance to do that). Plus we’ll make them adjust as the size of the Container changes like you see in this example below.
1. Creating the Base Container
Open Xojo and create a new Desktop project. Double click on the Container in the Library so it is added to the Navigator in the IDE. Use the Inspector panel to change the following properties:
- Name:
BaseContainer
Add a new property to the BaseContainer subclass in the Navigator (use the contextual menu for that), setting the following values in the Inspector panel:
- Name:
Controls() - Type:
DesktopUIControl - Scope:
Public
2. Adding New Controls to the BaseContainer
We are going to need some Methods in the BaseContainer, starting with the one responsible for adding new DesktopButton instances. Add a new Method setting the following values in the associated Inspector Panel:
- Method Name:
AddNewControl - Scope:
Public
Write the following snippet of code in the associated Code Editor for the Method:
// Setting static values for the new Button instances
// Width and Name values
Static cWidth As Integer = 40
Static cInitialName As String = "ControlName"

// Initial X and Y coordinates for the control instance
Var startX As Integer = If(Controls.Count = 0, 20, Controls(Controls.LastIndex).Left + cWidth + 20)
Var startY As Integer = If(Controls.Count = 0, 20, Controls(Controls.LastIndex).Top)

// We need to adjust the X/Y coordinates if the control
// exceeds the available BaseContainer width
If startX + cWidth > Me.Width Then
  startX = 20
  startY = startY + Controls(Controls.LastIndex).Height + 20
End If

// Creating the new DesktopButton instance to be added
// and setting the expected values so it is visible
// at the desired size and position.
Var nControl As New DesktopButton
Var idxNumber As Integer = Controls.LastIndex + 1
nControl.Name = cInitialName + idxNumber.ToString
nControl.Caption = idxNumber.ToString
nControl.Left = startX
nControl.Top = startY
nControl.Width = cWidth

// On macOS we get the default height for free
// this is not the case on Windows
#If TargetWindows Then
  nControl.Height = 22
#EndIf

// We set the method to be called by the instance
// when the user presses the button
// so we can catch it and forward it to the
// BaseControl instance
AddHandler nControl.Pressed, AddressOf ControlActionCallback

// Adding the new control instance to the array
controls.Add(nControl)

// …and adding it to the BaseContainer
// calling the new AddControl method for that
Me.AddControl(nControl)
As you can see, we are using the AddHandler method to substitute the original Event fired by the control with our own Method; so let’s create that. Add a new Method to BaseContainer using the following values in the Inspector Panel:
- Name:
ControlActionCallback - Parameters:
tControl As DesktopUIControl - Scope:
Public
And write this line of code in the associated Code Editor:
RaiseEvent ControlPressed(tControl)
3. Removing Controls From the BaseContainer
The third and last method we need to add to our BaseContainer subclass is the one responsible of removing the last added control; add a new method to the BaseContainer subclass using the following values:
- Method Name:
RemoveLastControl - Scope:
Public
And write the following snippet of code in the associated Code Editor for the Method:
If Controls.LastIndex <> -1 Then

  Var tControl As DesktopUIControl = Controls.Pop

  // We need to remove the callback method from the original
  // Pressed event on the instance
  RemoveHandler DesktopButton(tControl).Pressed, AddressOf ControlActionCallback

  // Closing the control instance so it is removed from the
  // containing BaseControl
  tControl.Close

End If
4. Forwarding Events
Because we are forwarding the received Pressed event from the DesktopButton to the ControlActionCallback method, and it is raising the ControlPressed method passing along the received instance, we need to define that Event in our BaseContainer subclass using the following values in the associated Inspector Panel:
- Event Name:
ControlPressed - Parameters:
tControl As DesktopUIControl
5. Reacting to Resizing
We want our BaseContainer to react to changes in its width and/or height, so it has the chance to change the layout (position) of the controls added to it. With the BaseContainer selected in the Navigator, add the Resizing Event and type the following code in the associated Code Editor:
#Pragma DisableBackgroundTasks
#Pragma DisableBoundsChecking

Var startX As Integer = 20
Var startY As Integer = 20

Var lastIndex As Integer = Controls.LastIndex
Var tControl As DesktopUIControl

For n As Integer = 0 To lastIndex

  tControl = Controls(n)

  If n <> 0 Then startX = Controls(n - 1).Left + Controls(n - 1).Width + 20

  If startX > Me.Width - tControl.Width Then
    startx = 20
    If n <> 0 Then startY = startY + tControl.Height + 20
  End If

  tControl.Left = startX
  tControl.top = startY

Next n
6. Designing the User Interface
Select the Window1 window in the Navigator so it is displayed in the Layout Editor. Next, drag a Button from the Library and place it at the top/left corner leaving the expected margins recommended by the Layout Guides.
With the just added button still selected, change the following values in the associated Inspector Panel:
- Name:
AddControlButton - Caption: “Add Control”
Add the Pressed Event to the button and type the following line of code in the associated Code Editor:
BaseContainer1.AddNewControl
Add a second button and place it just below the previous one. Use the associated Inspector Panel to set the following values:
- Name:
RemoveControlButton - Locking: Left and Top locks closed
- Caption: “Remove Control”
Use the resizing handlers on the control to make its width enough to display the Caption properly.
Add the Pressed Event to just added button and type the following line of code in the associated Code Editor:
BaseContainer1.RemoveLastControl
Add a Label from the Library and place it to the right of the first button. Use the Inspector Panel to set the following values:
- Locking: Left and Top locks closed
- Text: “Control Pressed:”
Use the resizing handlers on the control to make its width enough to display the Text properly.
Add a second Label and place it to the right of the previous one, using the Inspector Panel to set the following values:
- Name:
ControlPressedName - Locking: Left and Top locks closed
- Text: “”
Finally, drag the BaseContainer from the Navigator and place it below the second button. Use the resizing handlers on the control to make it width and tall enough to fill all the remaining area on the window. The final layout should look more or less like this:
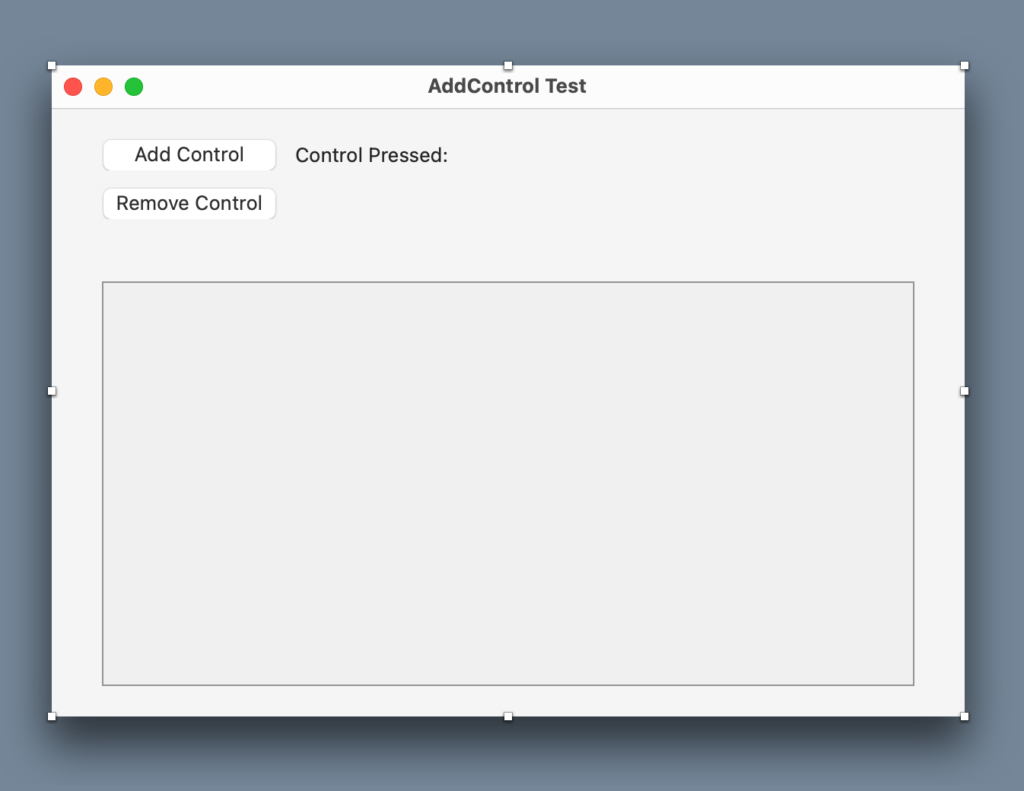
Use the Inspector Panel to set the following values:
- Locking: left, top, right and bottom clocks closed (locked)
With the BaseContainer1 instance selected in the Layout Editor, add the ControlPressed Event to it and write the following line of code in the associated Code Editor:
ControlPressedName.Text = tControl.name
7. Running the App
All set! Run the App, press the “Add Control” button to add as many buttons you want to the BaseContainer1 control, and press the “Remove Control” button to remove controls. Try to resize the window and you’ll see how the controls change their position as needed.
Paul learned to program in BASIC at age 13 and has programmed in more languages than he remembers, with Xojo being an obvious favorite. When not working on Xojo, you can find him talking about retrocomputing at Goto 10 and on Mastodon @lefebvre@hachyderm.io.