
There are times when you will want to use the resources of your web application’s user computer, for example, printing a sales docket for a Point-Of-Sale site. In this article, I will expand on William Yu’s blog post Custom URI Schemes On Windows from 2016. Again, I’m going to use a simple alert-type application, add an Inno Setup script to install the client app, and show how to invoke that app from your web application.
First, I’m going to create a headless desktop application. A console application would work, but shows a command box.
In the Xojo IDE, create a new desktop project and delete Window1 and MainMenuBar. Then add the Opening Event Handler to App and add this code:
Self.AllowAutoQuit = TrueThis will allow the application to quit when done.
Add the DocumentOpened Event Handler to App and add this code:
If item _ ' Using item
.NativePath _ ' property NativePath
.NthField(":", 1) <> "AlertDemo" Then ' Compare the value left of the ":"
Return ' If invalid return (quit)
End If
Var alert As String ' Define the variable
alert = item _ ' Using Item
.NativePath _ ' property NativePath
.NthField(":", 2) ' Extract the contents to the right of the ":"
alert = DecodeURLComponent(alert) ' Convert the content to plain text
MessageBox(alert) ' Show the alert
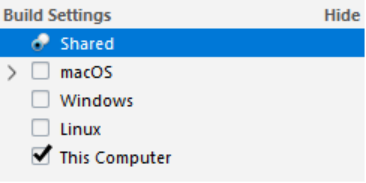
' The app will now quitTo test you can select Shared in Build Settings.
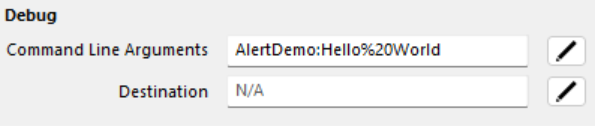
And enter a value into Command Line Arguments:
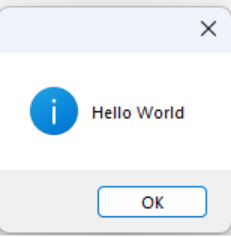
Running the app in debug mode will show:
Now build the project and create an installer using Inno Setup.
[Setup]
AppId={{B4D9ABDA-9F58-4FE0-A5F3-3E39C28EAB59}
AppName=Alert Demo
AppVersion=1.0
DefaultDirName={commonpf64}\Axis Direct Ltd\Alert Demo
DefaultGroupName=Axis Direct
OutputDir=C:\Xojo Projects\Alert Demo\Installer
OutputBaseFilename=AlertDemoInstaller
Compression=lzma
SolidCompression=yes
ChangesEnvironment=yes
[Languages]
Name: "english"; MessagesFile: "compiler:Default.isl"
[Tasks]
[Dirs]
Name: "{app}\Alert Demo Libs"
[Files]
Source: "C:\Xojo Projects\Alert Demo\Project\Builds - Alert
Demo\Windows 64 bit\Alert Demo*"; DestDir: "{app}"; Flags:
ignoreversion
Source: "C:\Xojo Projects\Alert Demo\Project\Builds - Alert
Demo\Windows 64 bit\Alert Demo\Alert Demo Libs*"; DestDir:
"{app}\Alert Demo Libs"; Flags: ignoreversion
[Icons]
[Run]
[Registry]
Root: HKCR; Subkey: "AlertDemo"; Flags: uninsdeletekey
Root: HKCR; Subkey: "AlertDemo"; ValueType: "String";
ValueData: "URL:AlertDemo Protocol"; Flags: uninsdeletekey
Root: HKCR; Subkey: "AlertDemo"; ValueName: "URL Protocol";
ValueType: "String"; ValueData: ""; Flags: uninsdeletekey
Root: HKCR; Subkey: "AlertDemo\shell"; Flags: uninsdeletekey
Root: HKCR; Subkey: "AlertDemo\shell\open"; Flags:
uninsdeletekey
Root: HKCR; Subkey: "AlertDemo\shell\open\command"; Flags:
uninsdeletekey
Root: HKCR; Subkey: "AlertDemo\shell\open\command";
ValueType: String; ValueData: "{app}\Alert Demo.exe %1";
Flags: uninsdeletekey
The registry section creates the registry entries per William’s blog post.
Now that the application Is installed, we’ll look at the Web Application. For the sake of testing, I’m just adding a Button to a WebPage and adding the following code into the pressed event.
Var s As String = "Hello World"
Var Alert As String
Alert = EncodeURLComponent(s) ' Make the string URL safe
GoToURL("AlertDemo:" + Alert, True) ' Launch the app in a new tab
And that is it!
For printing a docket, I would pass a unique identifier for the transaction using this method then access the data using URLConnection & HandleURL.
Wayne Golding has been a Xojo developer since 2005 and is a Xojo MVP. He operates the IT Company Axis Direct Ltd which primarily develops applications using Xojo that integrate with Xero www.xero.com. Wayne’s hobby is robotics where he uses Xojo to build applications for his Raspberry Pi, often implementing IoT for remote control.