
You can develop and build console and desktop apps for the Raspberry Pi using Xojo 2019r1 or later for free.
Download Xojo today and get started with this simple music player app for your Raspberry Pi that can play mp3 and aac (m4a) files from a folder.
By default Raspberry Pi sound output is sent to the HDMI port. There is also a headphone port that can be used for sound output to make it easier to hook up speakers. To switch between the sound outputs, you use this command at the Terminal:
sudo amixer cset numid=3 1
Other values you can use are: 0=auto, 1=headphones, 2=HDMI.
Create the Project
Create a Desktop project and call it MP3Player. For controls, you will add three buttons and a label to Window1. Arrange them to look like this:
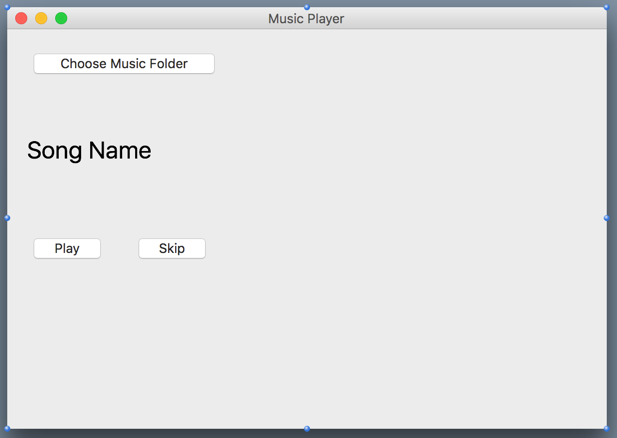
Change the name of the label from “Label1” to “NowPlayingLabel” and make it as wide as the window.
Now add these properties to keep track of the song files to play and the currently playing song sound:
CurrentSong As Sound
CurrentSongIndex As Integer
Songs() As FolderItem
The music files are loaded as Sound objects and the CurrentSong property is the song that is currently playing. The Songs() array is an array of the MP3 and AAC files that were loaded from the selected folder. And the CurrentSongIndex is the position of the current file (in the array) to play.
With this setup out of the way, you can start adding code. The first thing to do is to load the music files from the selected folder. Add the Action event to the “Choose Music Folder” button and enter this code:
' Choose a folder, grab all music files in the folder
' and save in array
Dim musicFolder As FolderItem = SelectFolder
If musicFolder <> Nil Then
  CurrentSongIndex = -1
  ReDim Songs(-1)

  Dim count As Integer = musicFolder.Count
  For i As Integer = 1 To count
    Dim f As FolderItem = musicFolder.Item(i)
    If f <> Nil And (f.Name.Right(3) = "mp3" Or f.Name.Right(3) = "m4a") Then
      Songs.Append(f)
    End If
  Next
End If

PlayNextSong
The last line calls a method, PlayNextSong, that starts playing the next song in the array. Here is the code for the PlayNextSong method:
Sub PlayNextSong()
If CurrentSong <> Nil Then CurrentSong.Stop
CurrentSongIndex = CurrentSongIndex + 1
If CurrentSongIndex > Songs.Ubound Then CurrentSongIndex = 0
If CurrentSongIndex <= Songs.Ubound Then
CurrentSong = Songs(CurrentSongIndex).OpenAsSound
CurrentSong.Play
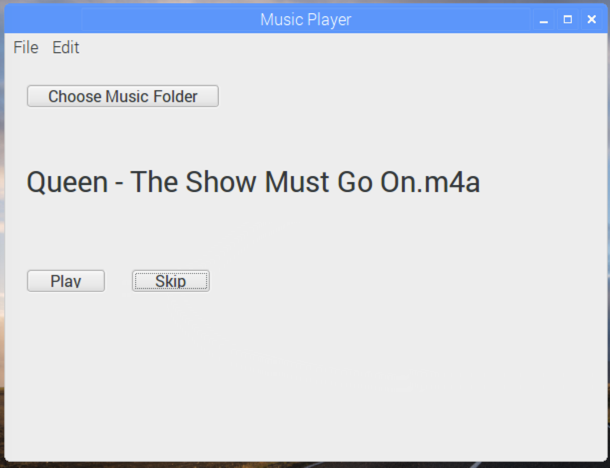
NowPlayingLabel.Text = Songs(CurrentSongIndex).Name
End If
End Sub
Note: Do not type the Sub/End Sub part of the method in the code editor; instead enter that information in the Inspector.
This code stops any currently playing song, increases the current song index by 1 (looping back to the start if the end is reached) and then loads the sound file from the array so it can be played. Lastly it updates the label with the name of the song file.
You can do a quick test with just this code in place. Run the project (using the Remote Debugger) on the Pi and choose a folder containing music files. The first song in the folder should start playing.
Adding Features
There are still two buttons on the window that don’t yet do anything. The Play button will be used to Play and Stop the current song. Add the Action event to the Play button and enter this code:
If CurrentSong.IsPlaying Then
  CurrentSong.Stop
Else
  CurrentSong.Play
End If
The Skip button skips to the next song. Add the Action event and have it call the PlayNextSong method:
PlayNextSong
You can now again run the project on the Pi to test out these new features. When music is playing, click the Play button to stop and play. Click the Skip button to skip to and play the next song.
If you’ve let a song play until it finishes, you’ll notice that the next song does not start playing. This is because there is no code to check if the current song has finished. If you recall the code in the Play button it checks a property called “IsPlaying” to see if the song is currently playing. That property could be also be used by a Timer to check if the song has finished playing so it could start playing the next song. However this won’t quite be enough. If the user manually stops the song, then IsPlaying will be false and the Timer will automatically start playing the next song, which is probably not the behavior you want. To track when a user has manually stopped the music, another property is needed. Add this to Window1:
IsSongStopped As Boolean
Now you can drag a Timer on to Window1 and add the Timer’s Action event handler with this code (you can leave the Timer with its default period of 1000 and Mode to Multiple):
If CurrentSong <> Nil Then
  If Not CurrentSong.IsPlaying And Not IsSongStopped Then
    ' The song is no longer playing and the user has not manually stopped
    ' so that must mean the song has finished on its own.
    PlayNextSong
  End If
End If
And lastly, you need to go back to the Play button Action event handler and change its code to set the value in IsSongStopped like this:
If CurrentSong.IsPlaying Then
  CurrentSong.Stop
  IsSongStopped = True
Else
  CurrentSong.Play
  IsSongStopped = False
End If
Run the project on the Pi and you’ll see that the next song starts playing about 1 second after the current song finishes.
More Raspberry Pi Projects
Are you interested in trying more Raspberry Pi projects with Xojo? Download Xojo for free and then check out the free Programming the Raspberry Pi with Xojo book available on the Xojo Dev Center, which contains this project and many others.