
At the recent Build conference, Microsoft released the final version of Visual Studio for Mac. As a former Visual Studio developer who left that world for the fun, fast development that is Xojo, I had to check it out to see how it compares to Xojo.
First, if you’ve ever used Visual Studio on Windows before, be aware that Visual Studio for Mac is not the same thing. Essentially Visual Studio for Mac is new branding for Xamarin Studio (Microsoft bought Xamarin in 2016), so Visual Studio for Mac looks and works nothing like Visual Studio for Windows.
After the 15-minute download and installation process, where I was asked for my admin password three times, the first thing that surprised me is that Visual Studio for Mac is a bit limited in how it can create desktop apps. Although it can technically create two types of desktop apps (cross-platform desktop apps using Gtk# and native Cocoa Mac apps), it cannot create native Windows, Linux or Raspberry Pi desktop apps.
Since Visual Studio for Mac is just a rebranded Xamarin Studio, I was able to find a tutorial on the Xamarin site called “Hello, Mac” that shows you how to create a simple Mac Cocoa app with a button and a label. When the button is clicked, the label displays the number of times it has been clicked.
I should warn you: it is very long and frankly a bit complicated for such a simple app. In particular I was surprised that Visual Studio for Mac does not have a built-in layout editor to design your Mac app’s UI. You have to use Xcode for that and then make sure its changes synchronize back with Visual Studio for Mac. All in all, it took me about 20 minutes, minus interruptions.
If, like me, you’ve used Xamarin Studio or Visual Studio for Mac you might be wondering how this compares to making the same app in Xojo. Here’s how to make that same app in Xojo:
Hello, Mac
Start by downloading and installing Xojo.
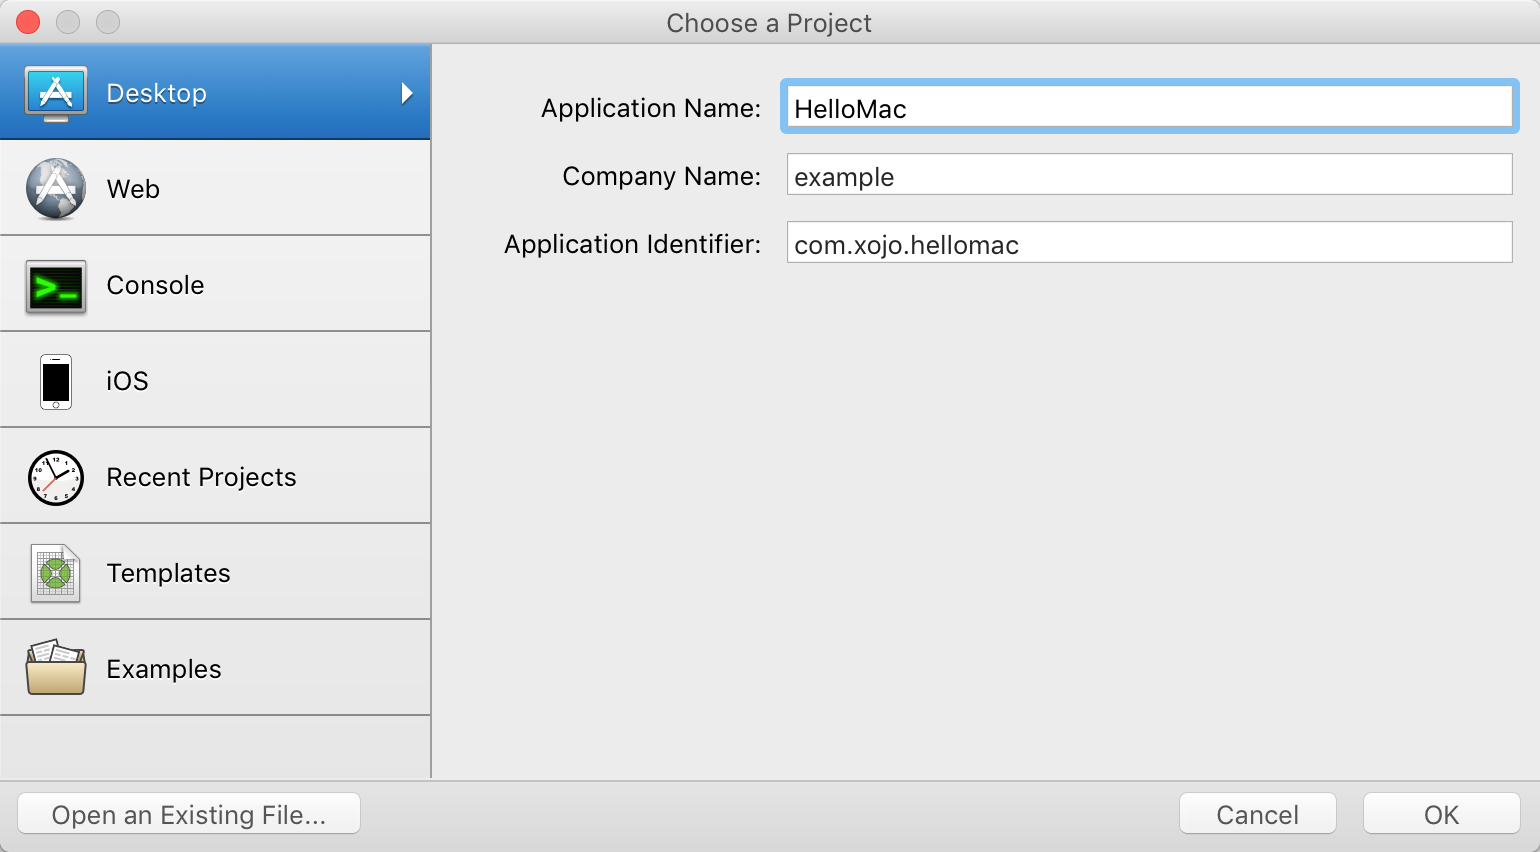
- Launch Xojo and click “Desktop” in the Project Chooser. For Application Name use “HelloMac”. Click OK.
You are now looking at the Xojo Workspace window. You’ll be doing all your development in this window and won’t need to switch to another tool at any point.
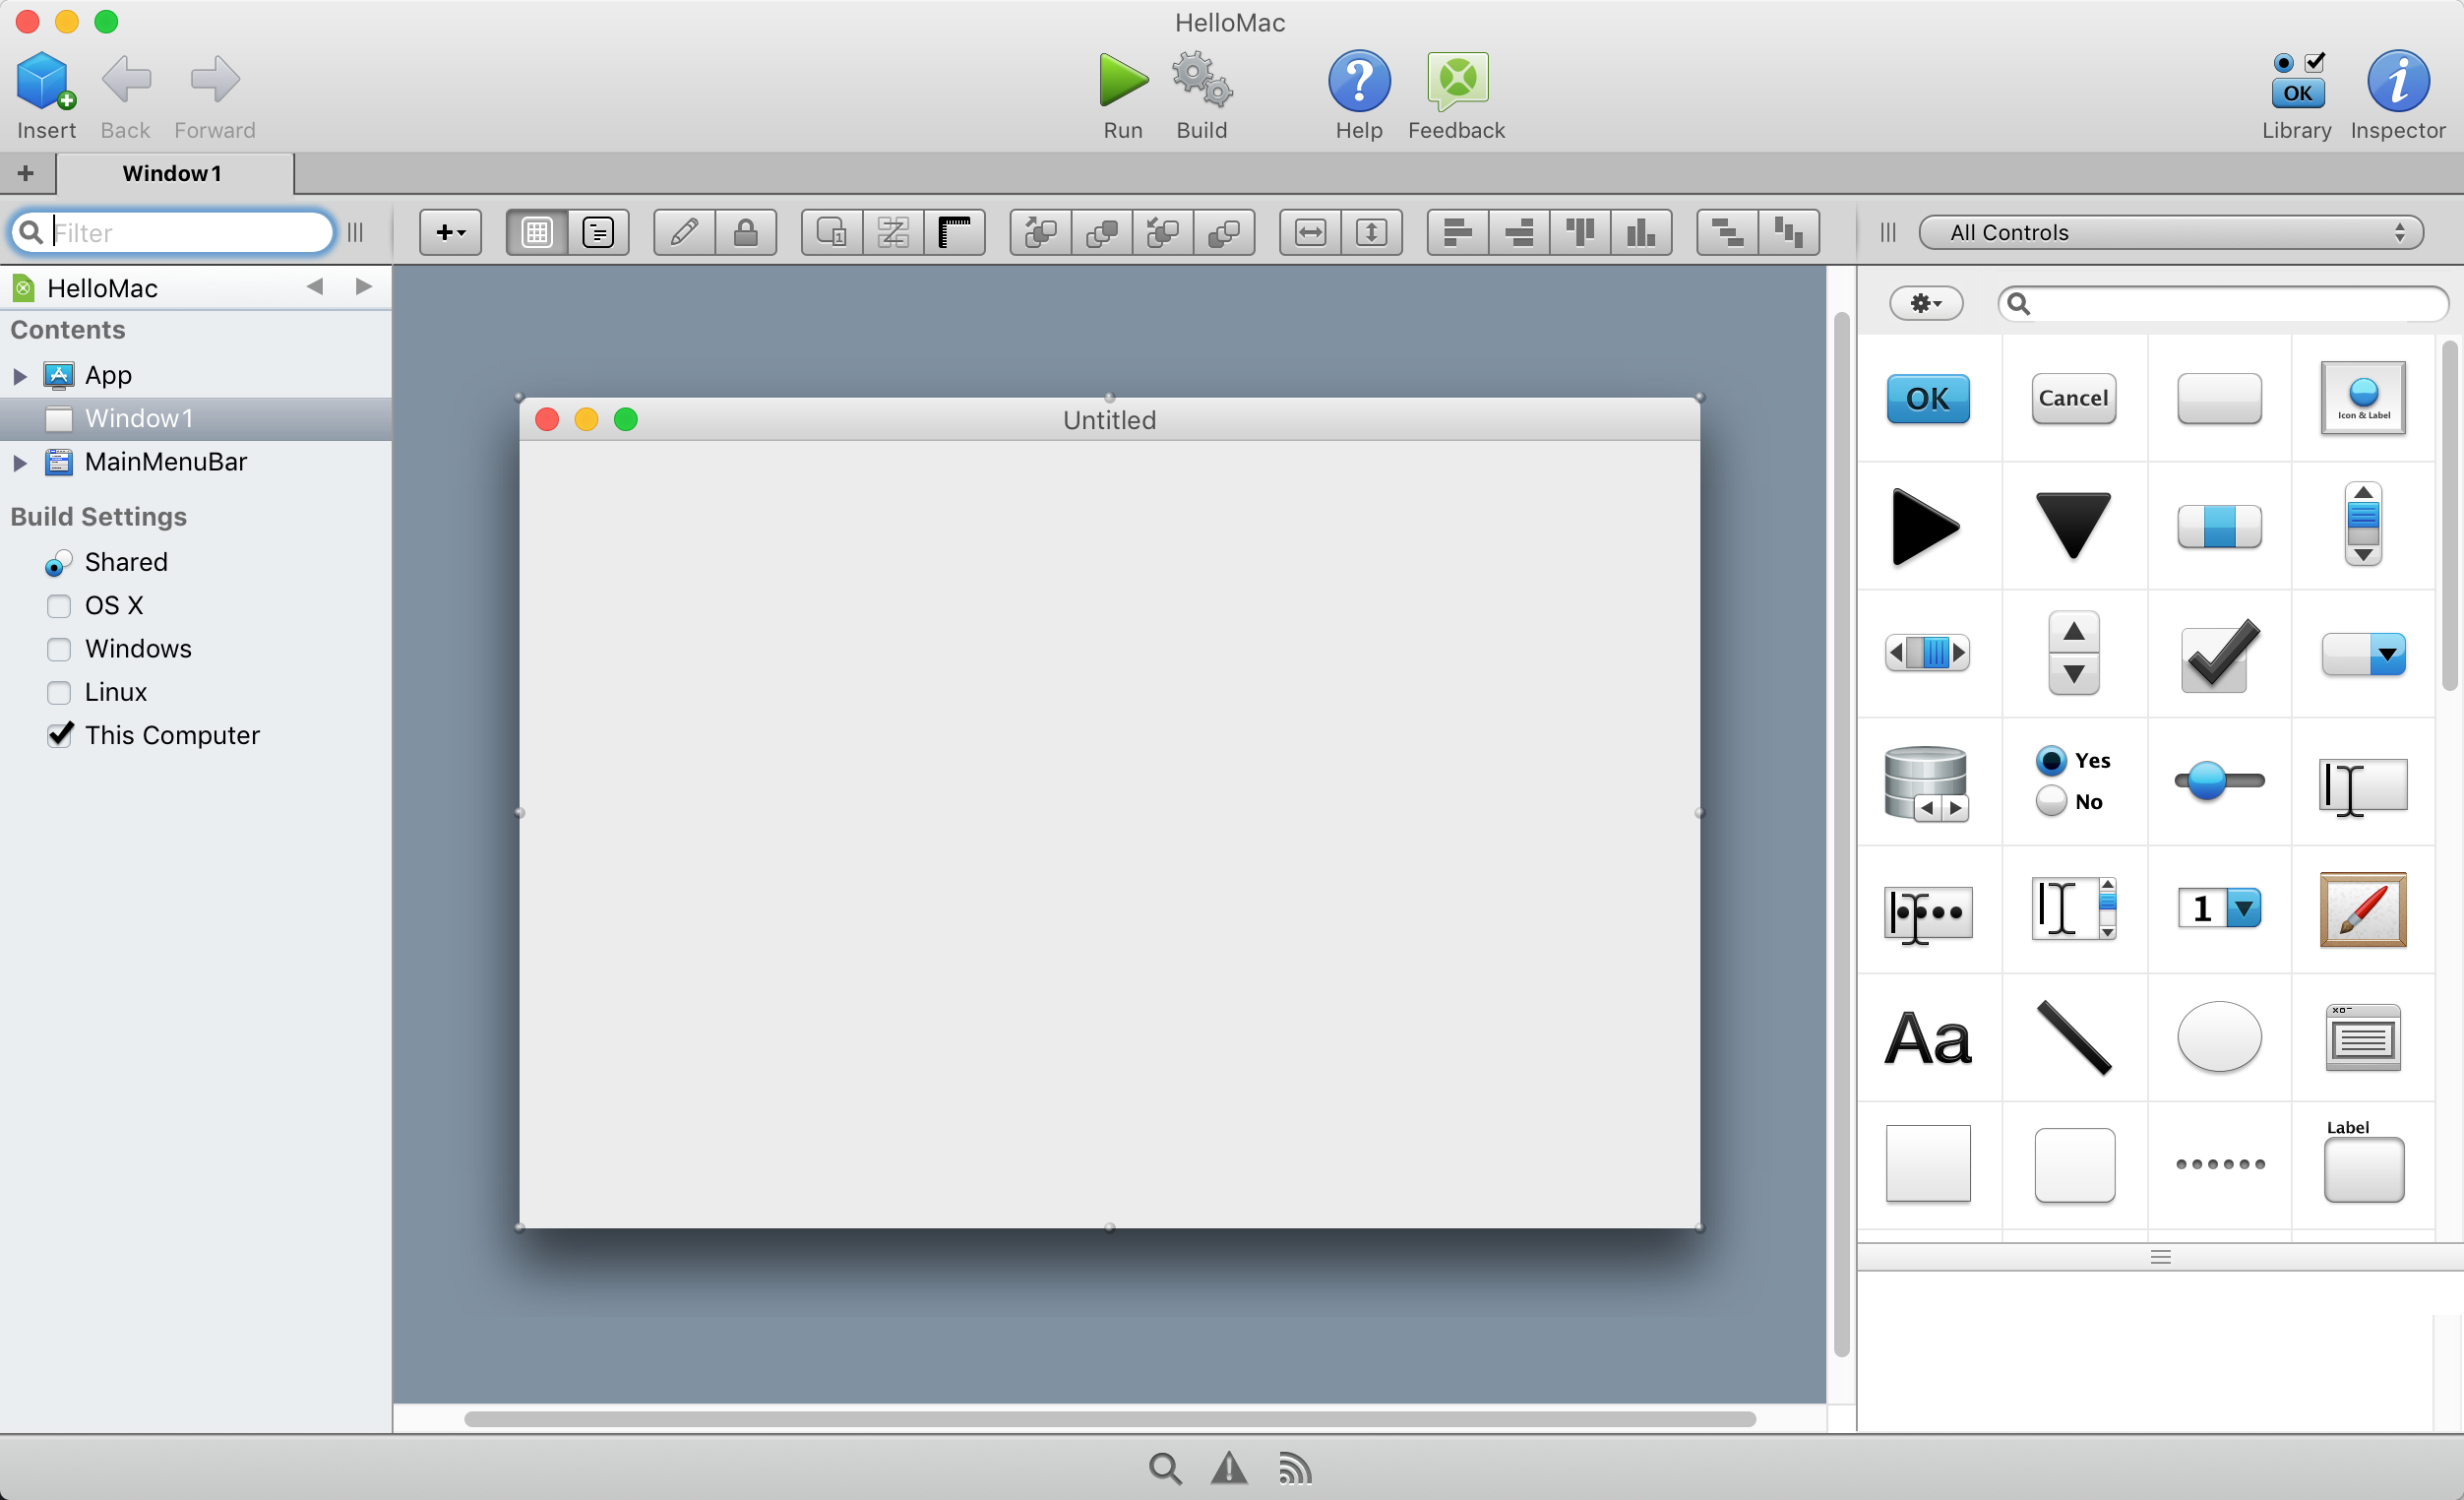
On the left you can see the Navigator which has the default components for a desktop project: App, Window1 and MainMenuBar with Window1 already selected and its window layout displayed in the Layout Editor in the center of the screen. Unlike Visual Studio for Mac, Xojo has a built-in Layout Editor for designing your Mac UI so you won’t have to jump over to Xcode to create the layout.
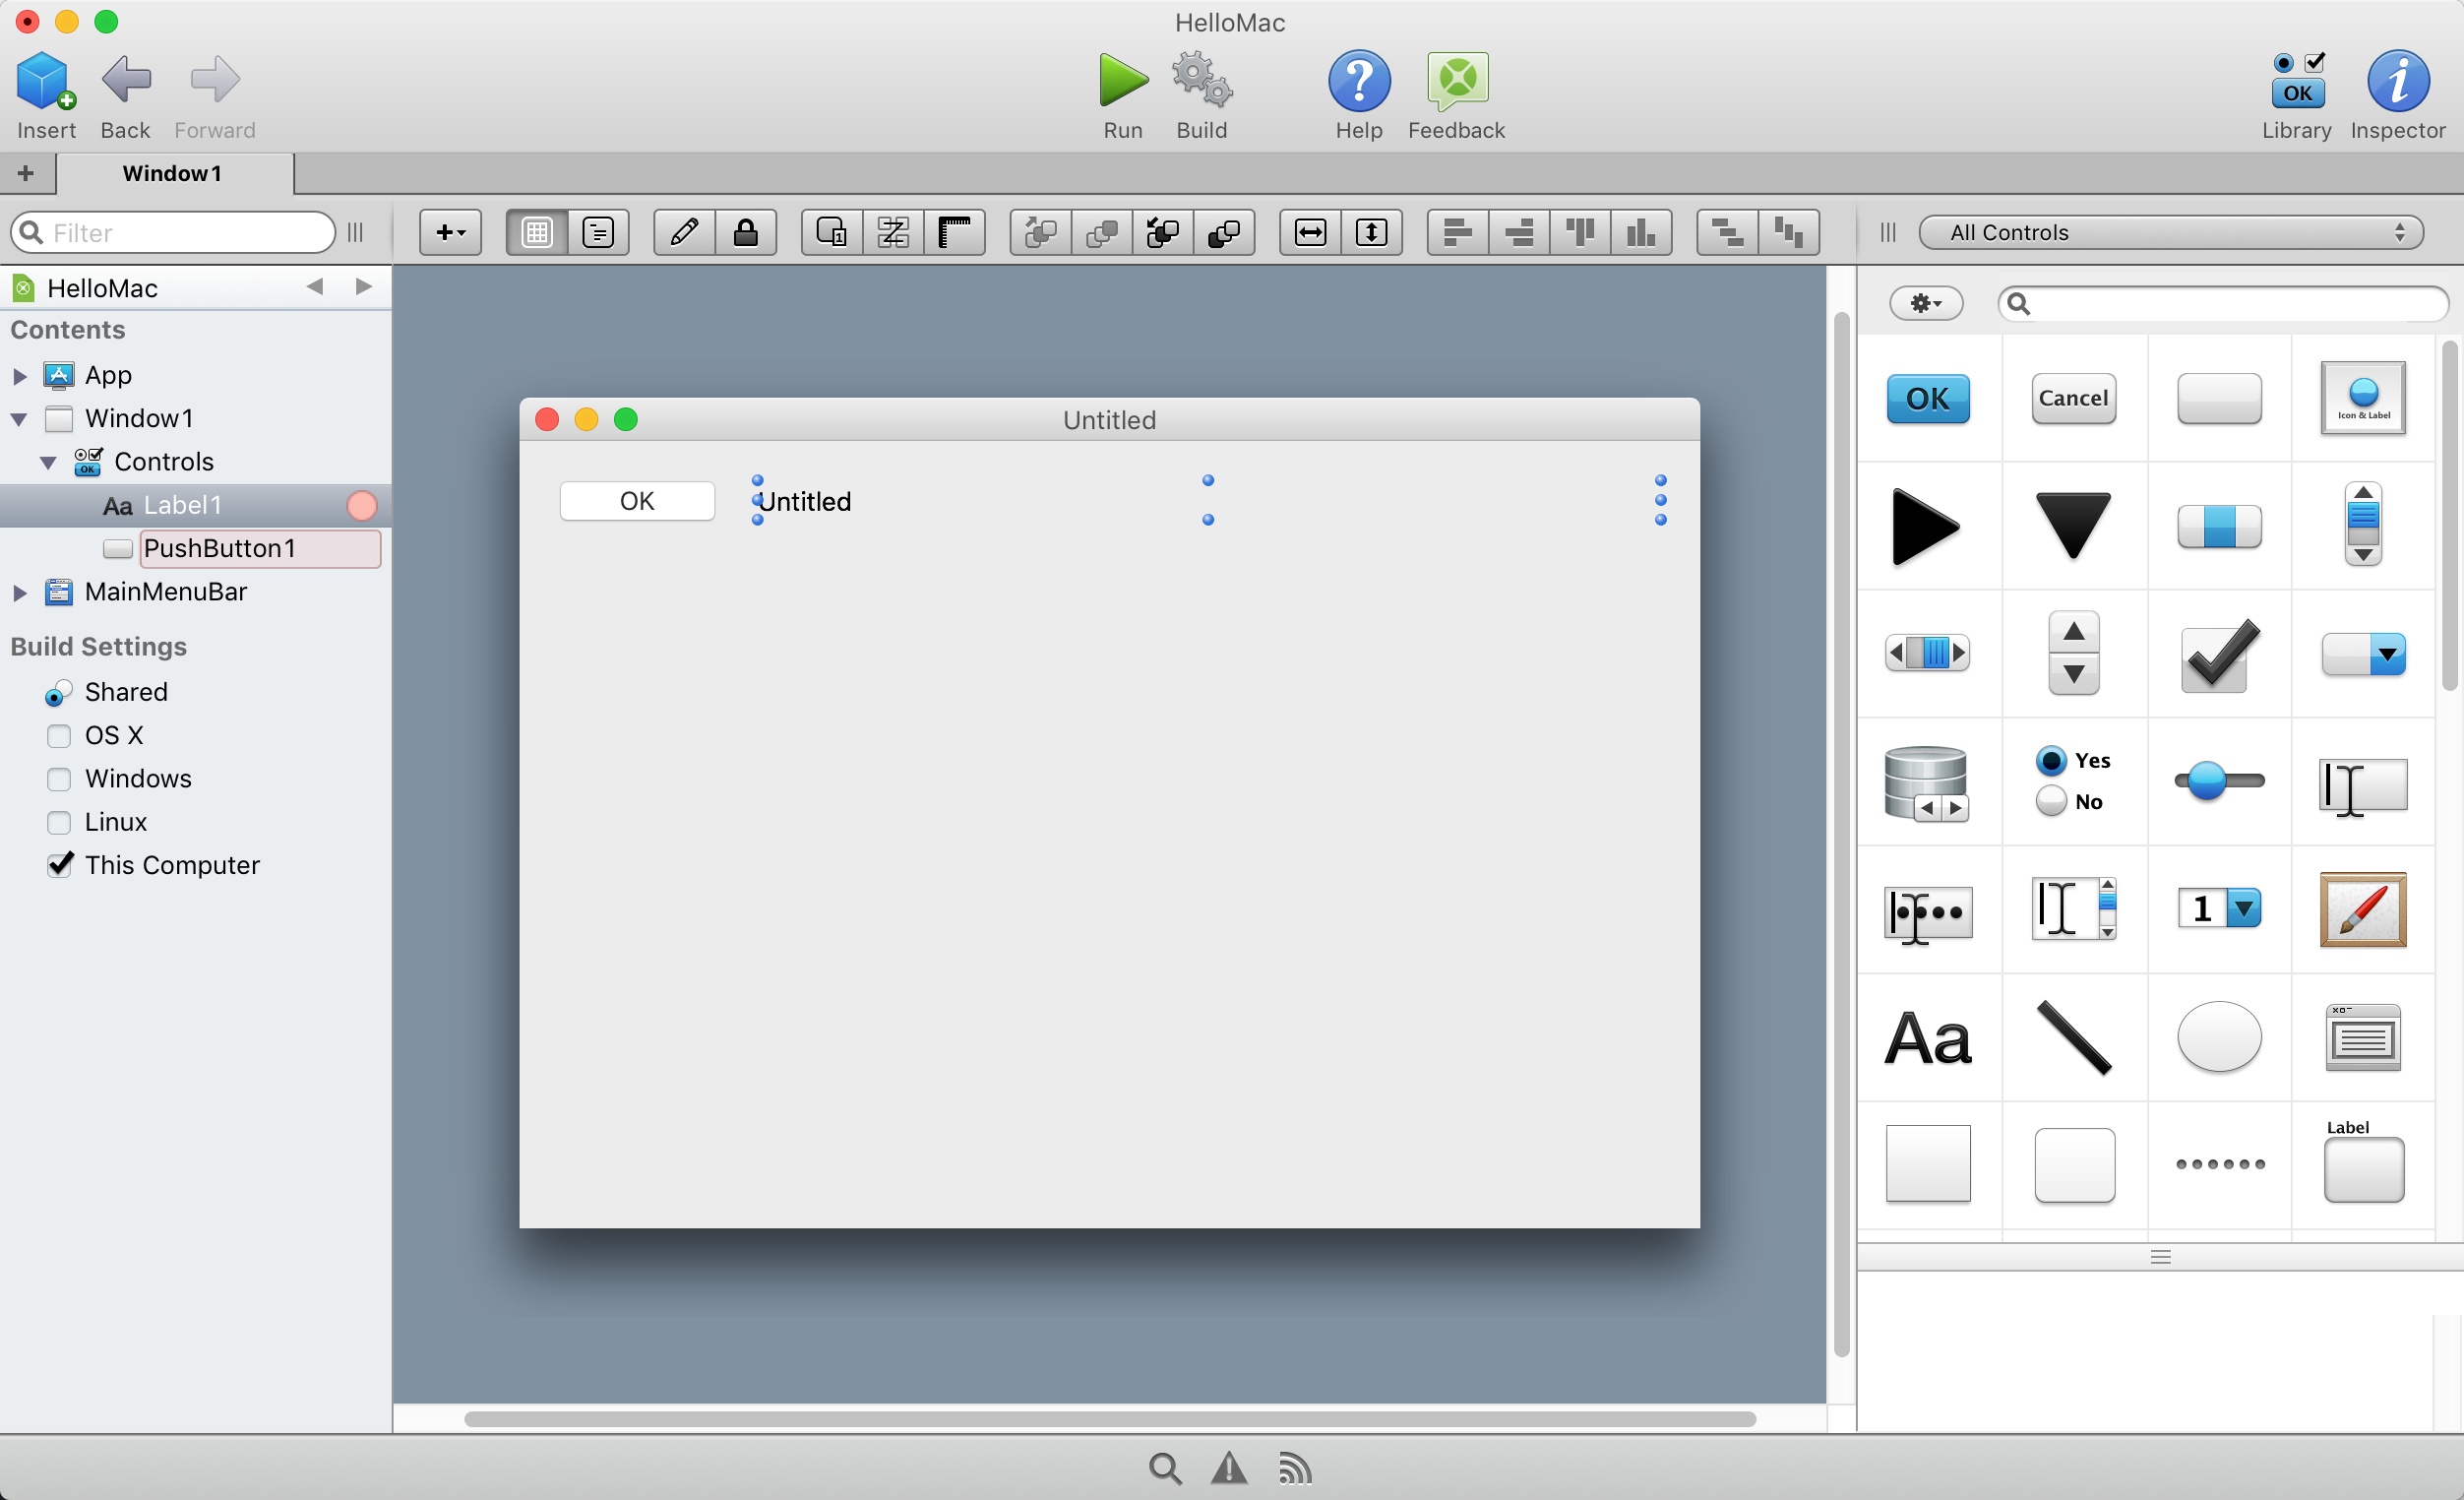
- On the right you’ll see the Library of controls. From there, drag a Button and a Label positioned like this:
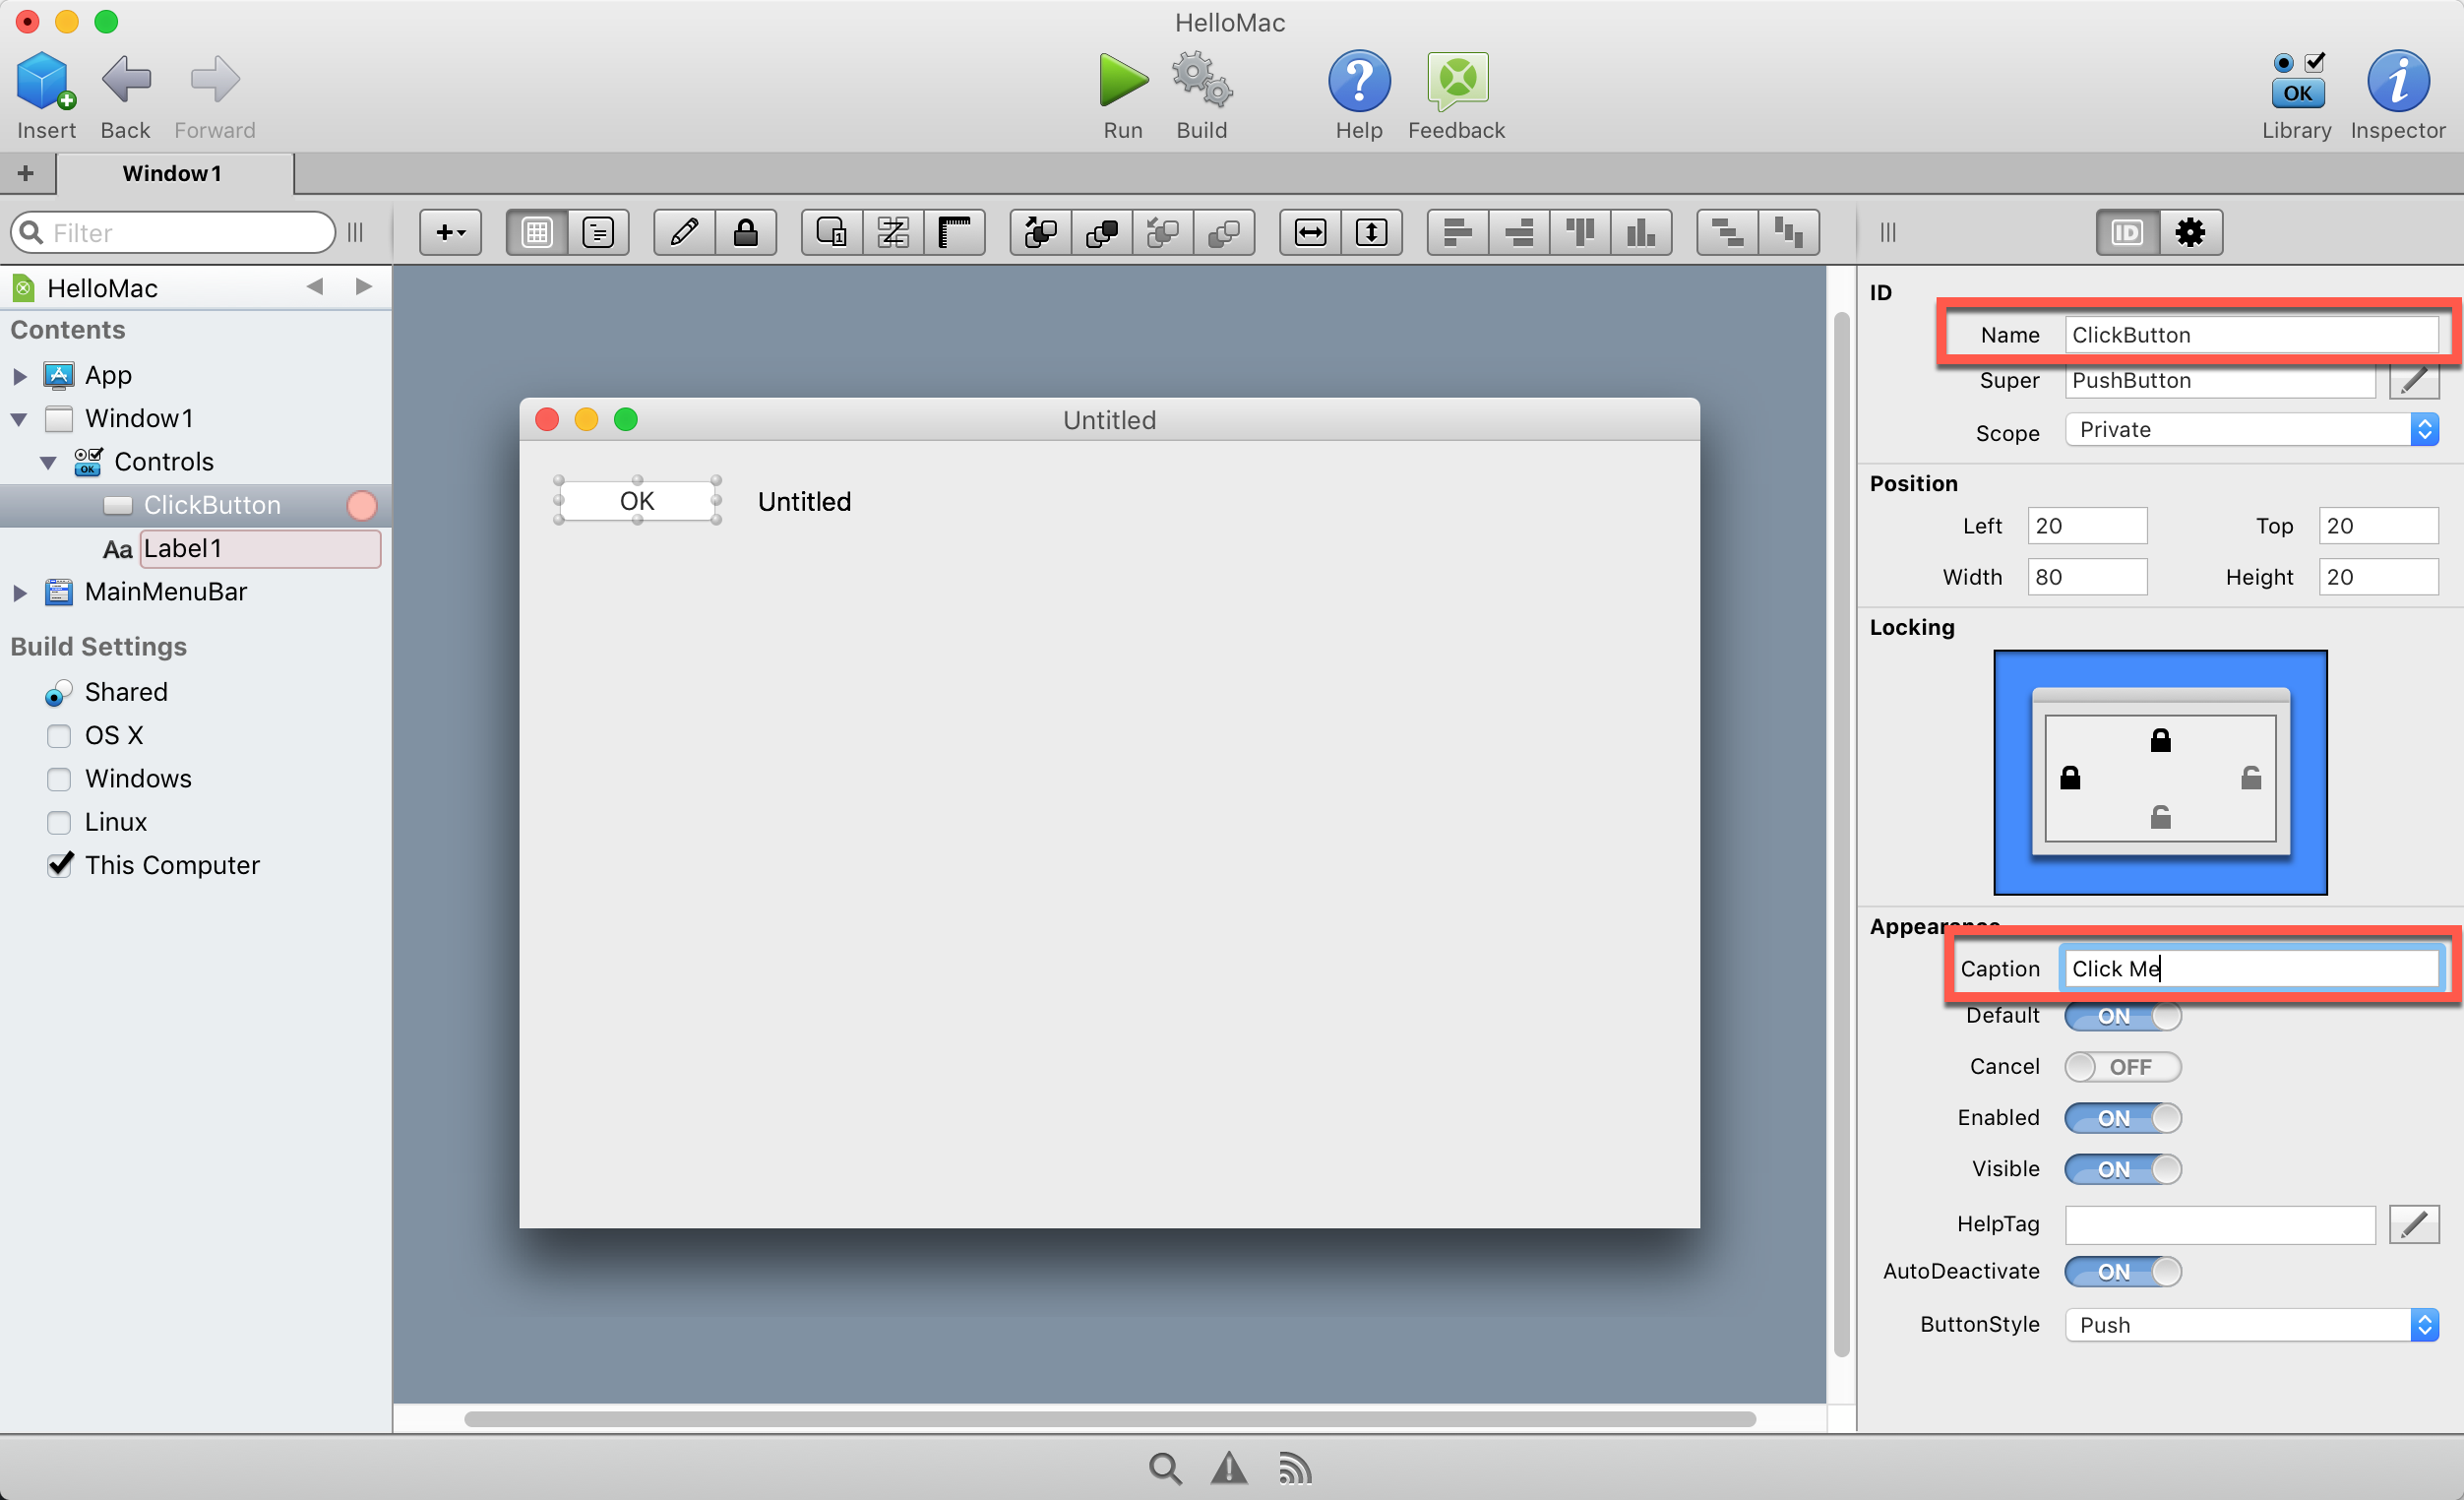
- Click on the Button and then click on the Inspector button in the toolbar (top right) to show the properties. Change the Name to “ClickButton” and the Caption to “Click Me”.
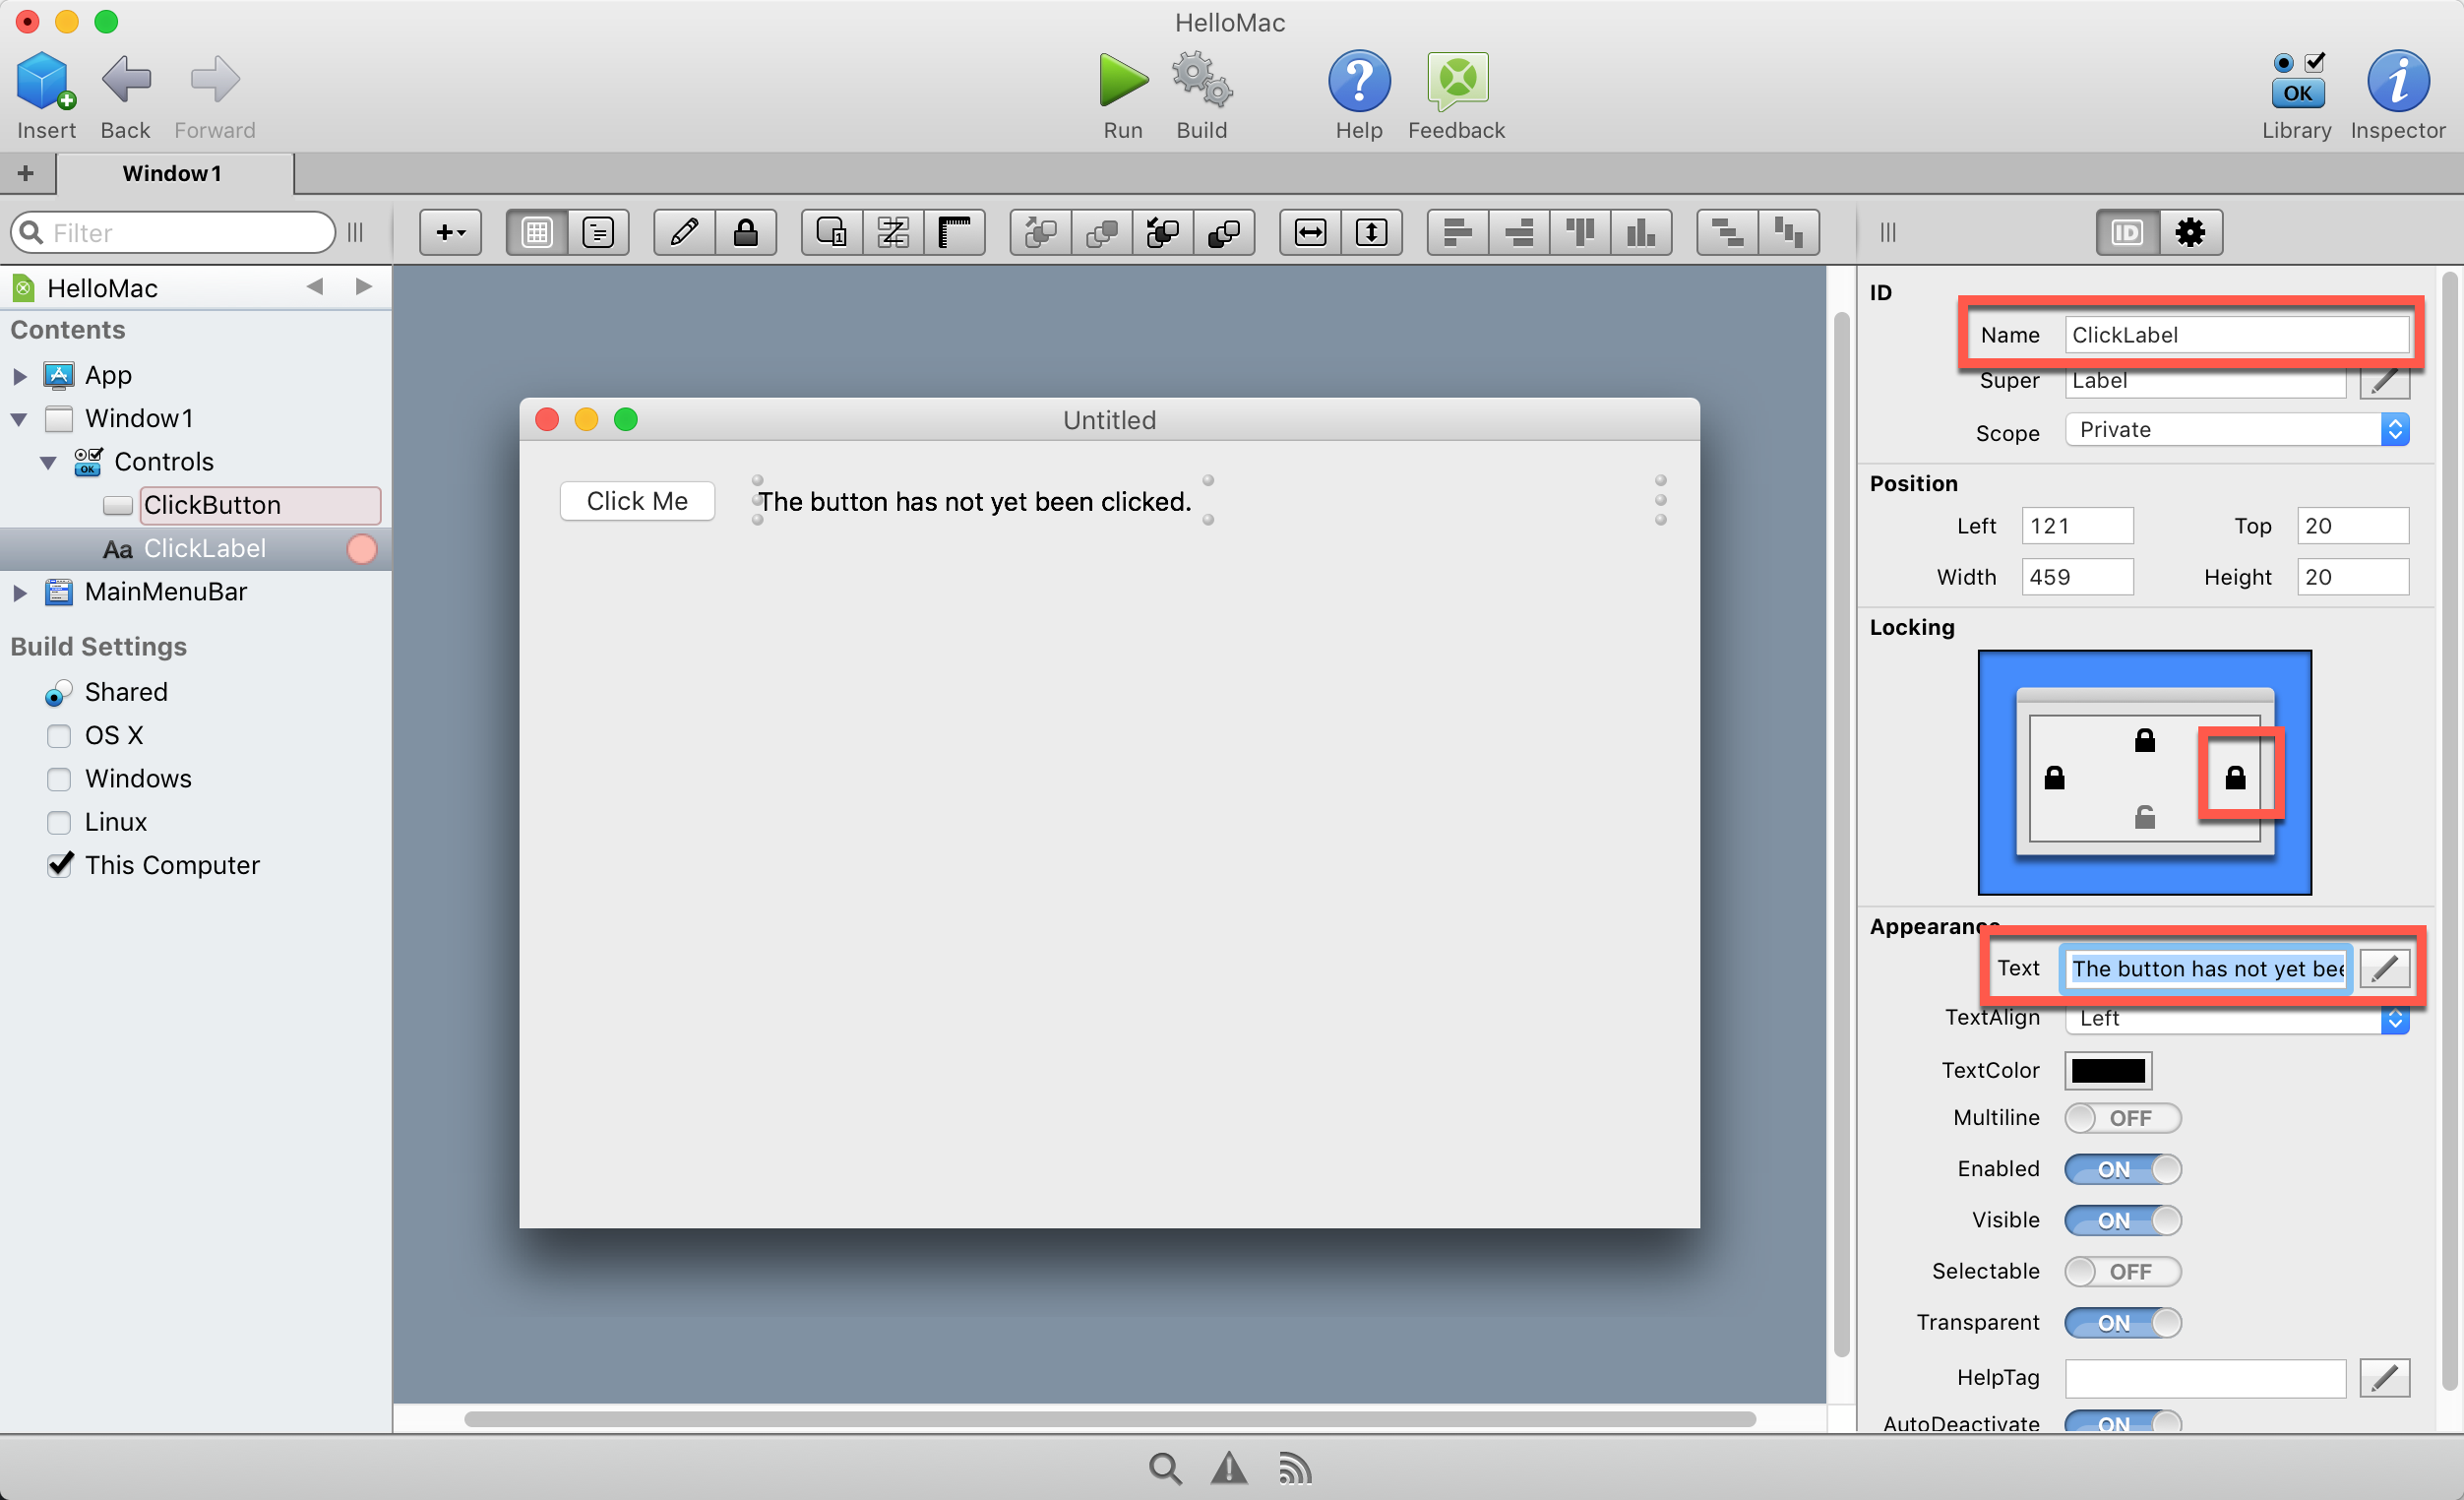
- Click on the Label and change the Name to “ClickLabel” and the Text to “The button has not yet been clicked.” For the Label you’ll also want to check the right-hand lock in the Locking section so that the label grows and shrinks as you resize the window.
You are now done with the layout and can move on to the code.
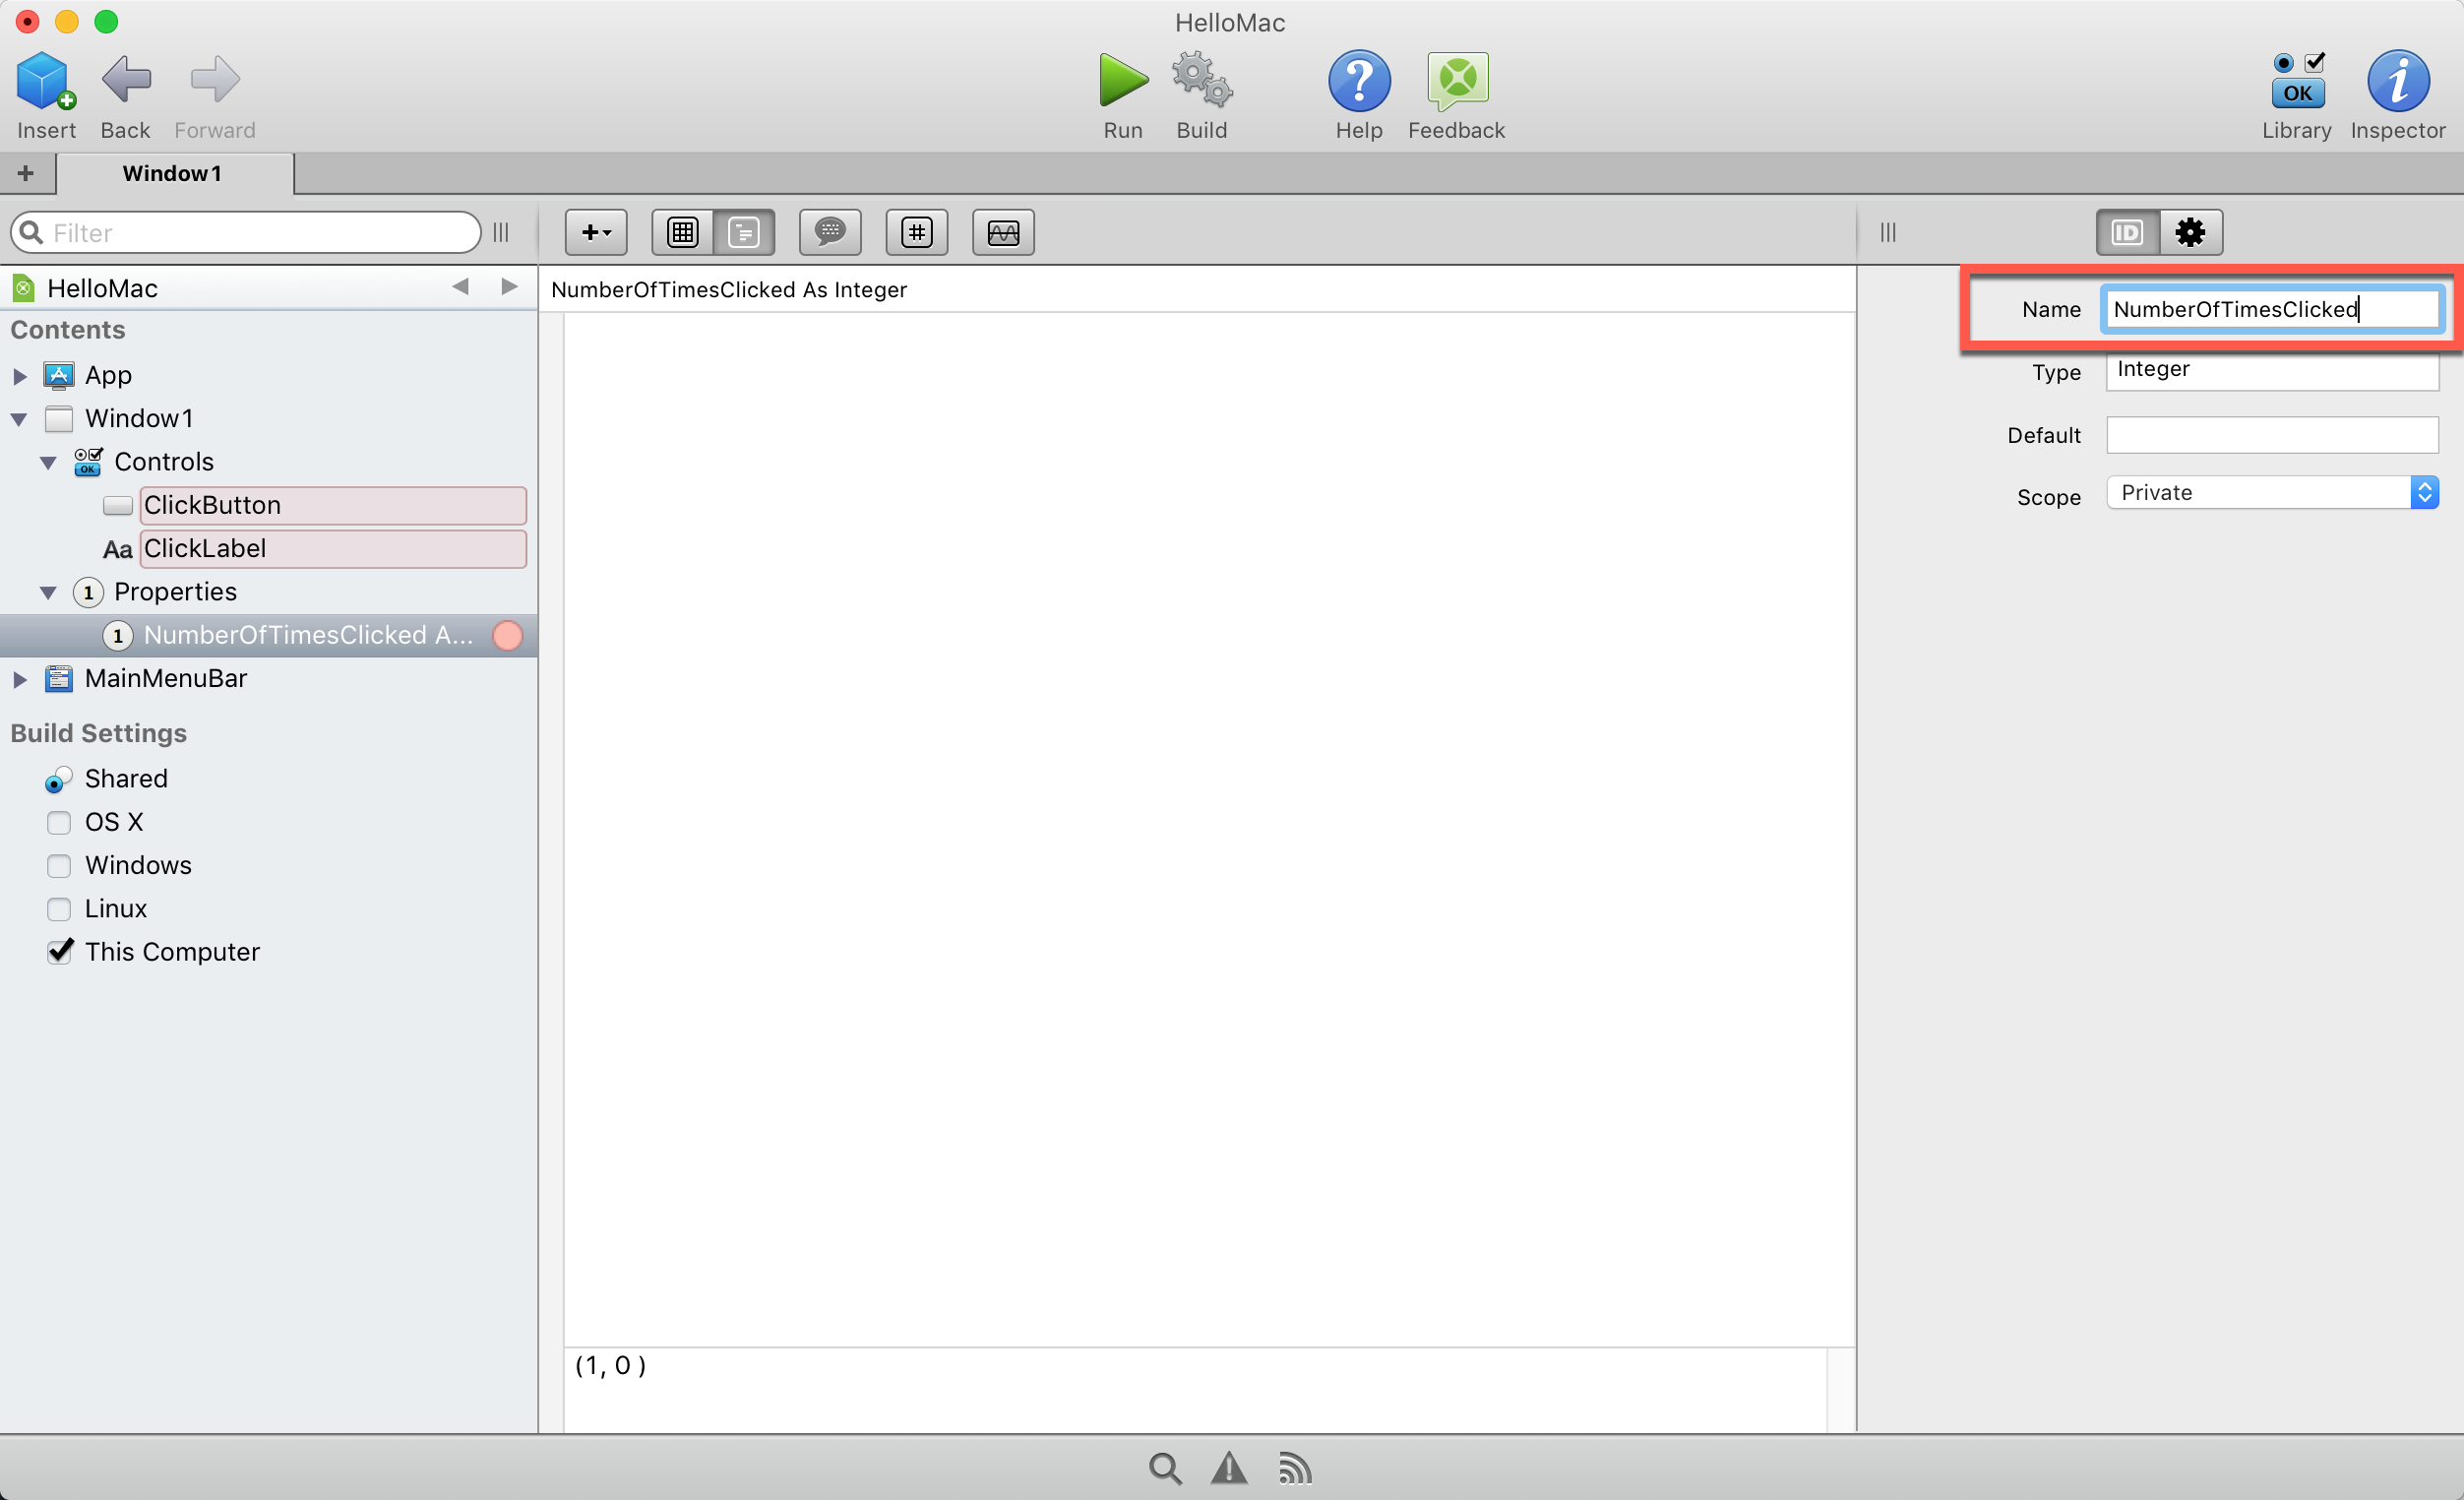
- To track the number of clicks you’ll want to add a property. Click the “+” button on the Layout Editor command bar and select Property. Give it the name “NumberOfTimesClicked”. Leave the Type as Integer.
- The last thing to add is the code to increase the click count and display the count in the label when the button is clicked. Click on Window1 to go back to the window Layout Editor and double-click on ClickButton to show the Event Handler window.
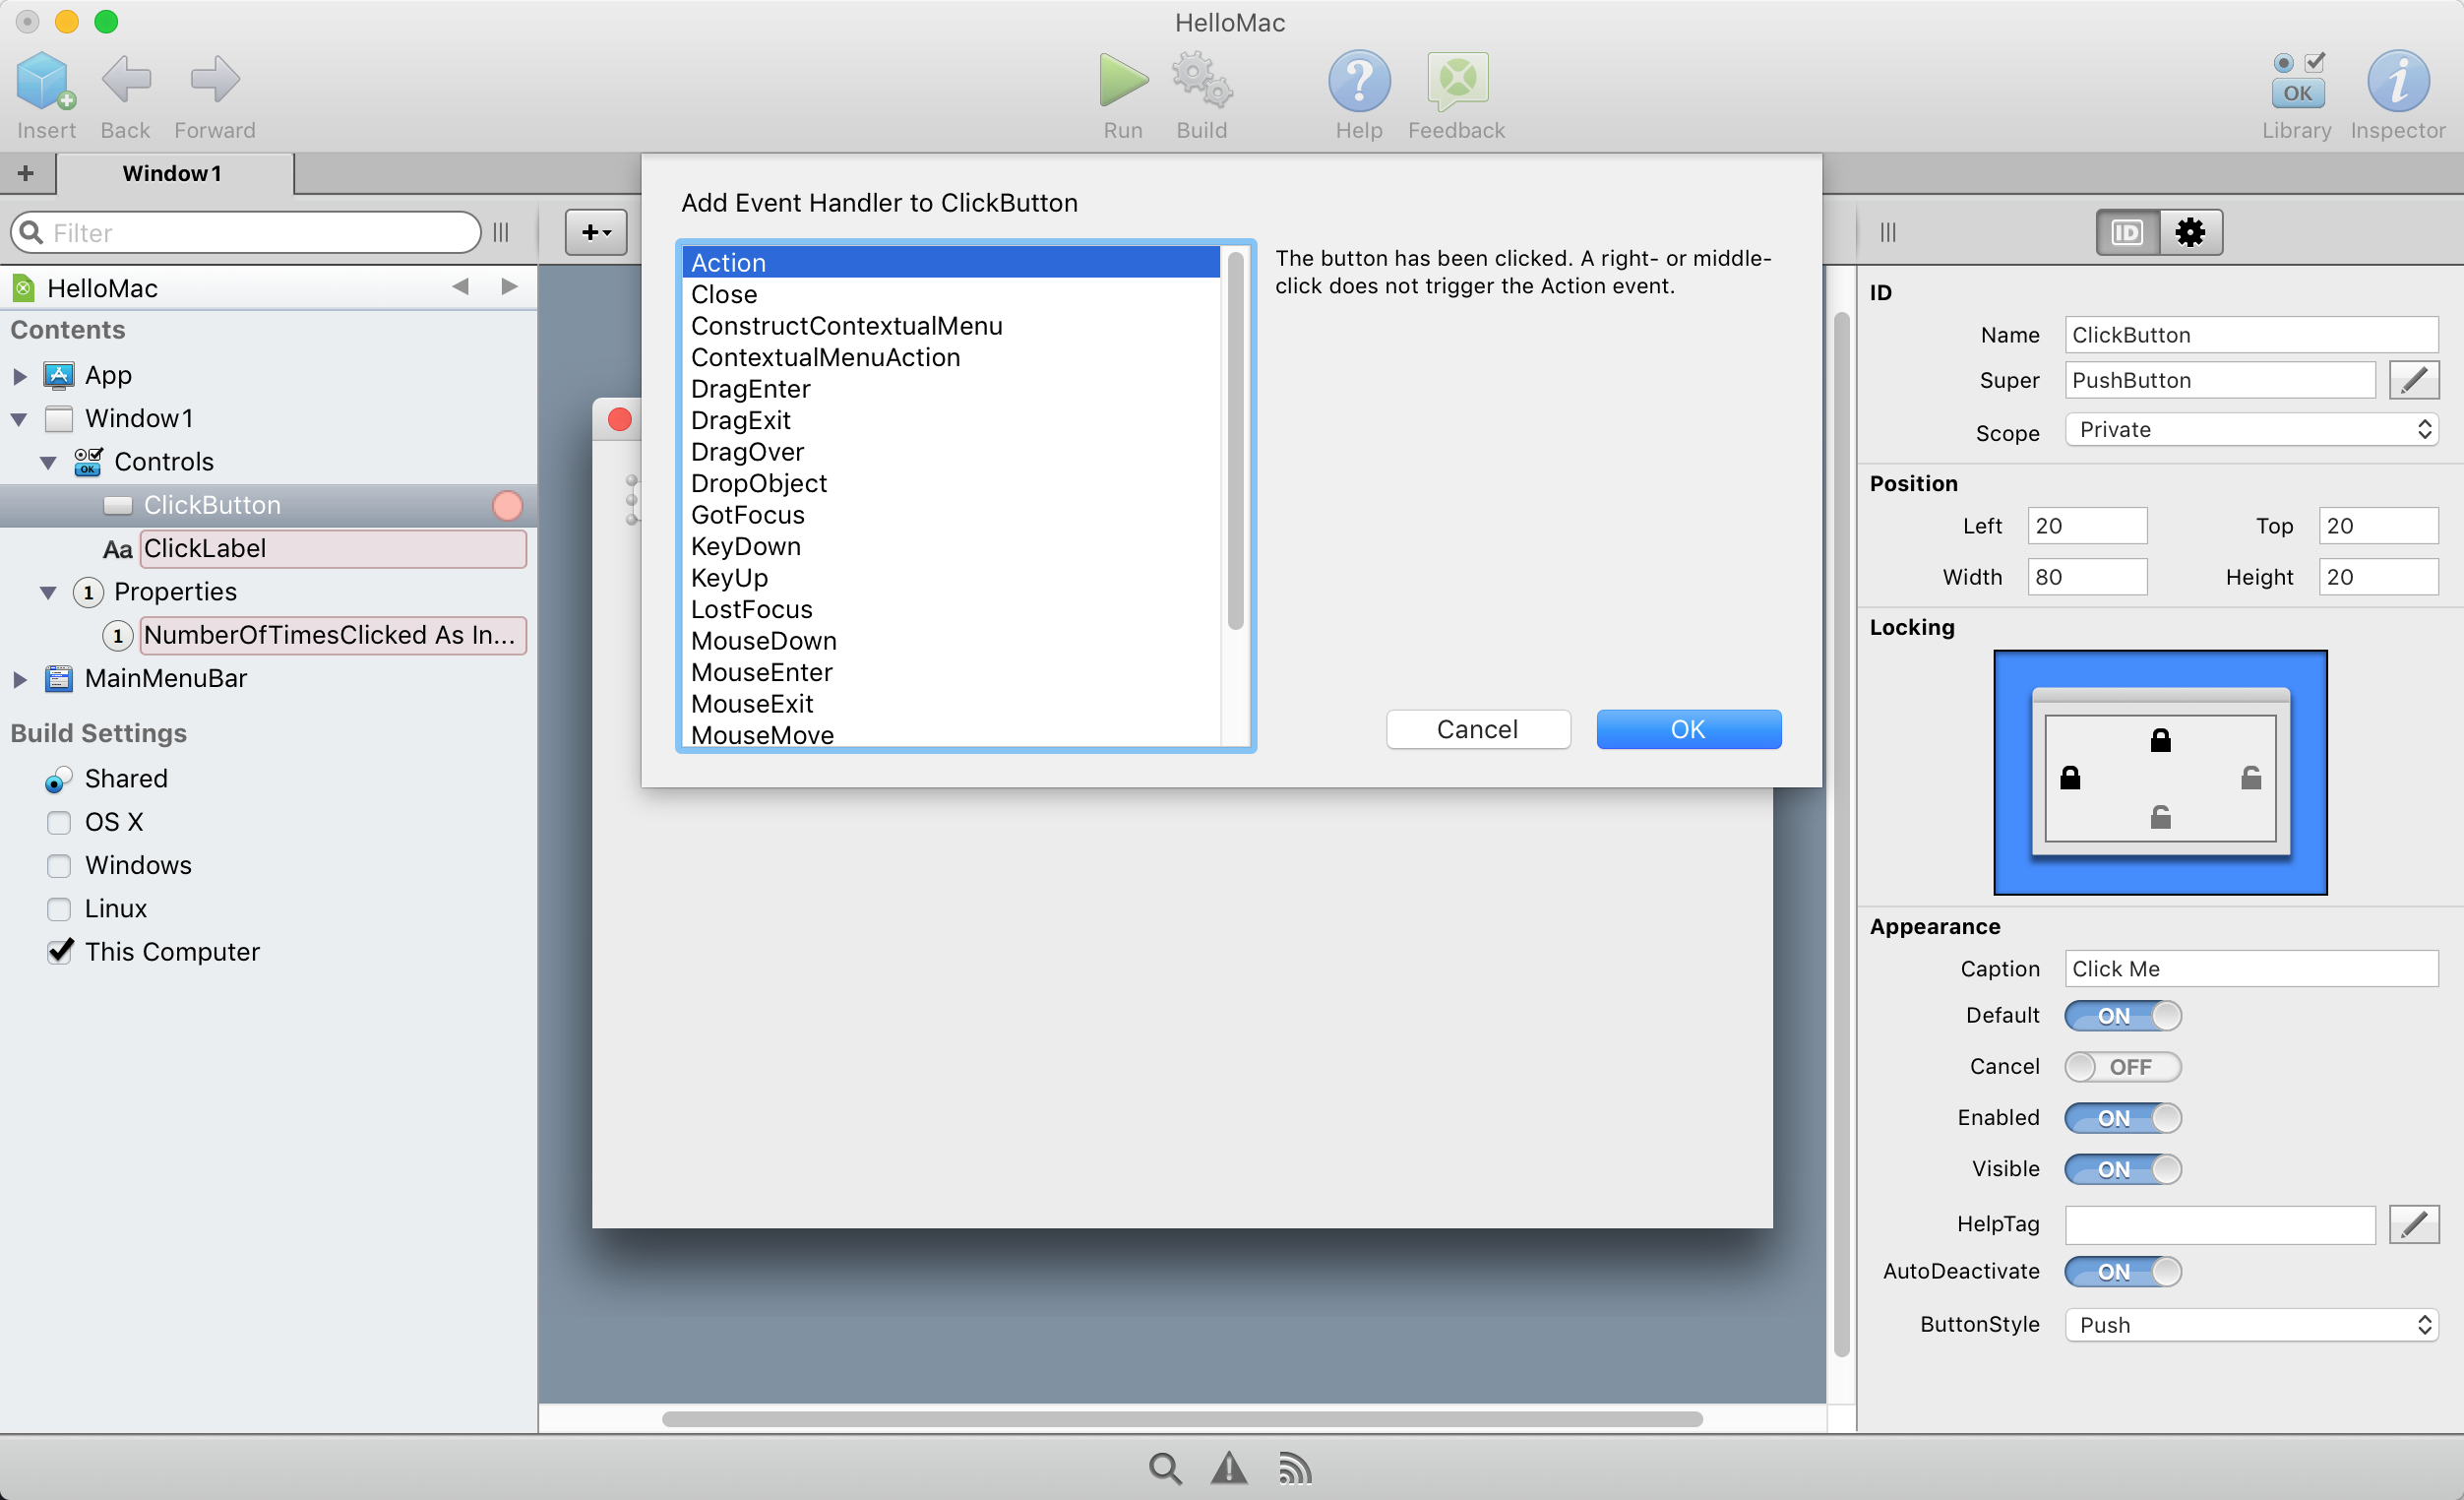 Click on Action and then OK. This displays a blank Code Editor where you’ll put this code to run when the button is clicked:
NumberOfTimesClicked = NumberOfTimesClicked + 1

Dim buttonText As Text = "The button has been clicked {0} time{1}."
buttonText = buttonText.Replace("{0}", NumberOfTimesClicked.ToText)
buttonText = buttonText.Replace("{1}", If(NumberOfTimesClicked > 1, "s", ""))
ClickLabel.Text = buttonText
The Xojo programming language resembles Visual Basic, but has an OOP model that is similar to C#.
You should now save your project.
Testing
To test your project and test the app, just click the big Run button on the toolbar. Click the button to see the label get updated.
Although this is a ridiculously simple app and is really designed just to give you a quick feel for the development environment, it should be pretty obvious that Xojo is much, much simpler to use than Visual Studio for Mac when it comes to creating Mac desktop apps. There is less overhead and you don’t have to use Xcode at all.
But Xojo has one other huge advantage when it comes to desktop apps: you can just click a button or two to get native apps for other platforms! Go back to Xojo and look at the Navigator and the section called “Build Settings”.
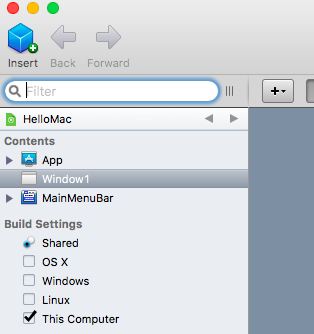
There you can check the boxes for “Windows” and “Linux” to also build this project as native apps for both Windows and Linux in addition to Mac. Just transfer the files over and they’ll run as is because they do not rely on any external frameworks.
This capability is a tremendous time-saver and is a major reason why so many people choose Xojo to make cross-platform desktop apps. If Visual Studio for Mac is something that interests you, then you should definitely be considering Xojo so that you can make truly cross-platform desktop apps faster than you ever thought possible.