Xojo 2020r1 brings a highly requested feature to the Xojo IDE: the ability to create PDF documents from code! Now you can use the already familiar methods in Xojo’s Graphics class to create Standard PDF 1.4 documents with the PDFDocument class.
This is the first iteration of the PDFDocument class and we are very aware of the things that we will be adding in future releases that are not in 2020r1. Nevertheless, this first set of features will let you create many of the documents you need in Desktop, Web and Console.
In addition, you’ll be glad to know that both the text and the geometric forms you add to your PDF documents are vectorial! Except those generated when “printing” PDF documents from your Reports; those will be vectorial once we add Obejct2D support to the PDFDocument class.
The fact that both text and geometric forms are vectorial in your PDF documents means that these will be rendered with 100% quality, independently the scale factor you (or your users) may be using once they display them with any PDF viewer utility or App.
In addition, because the text is vectorial it will be searchable using any PDF utility with text search capabilities; and, for example, when using the Preview app on macOS, the data detector’s technology will be able to catch and act on some specific data like telephone numbers or postal addresses.
Creating a PDF Document
As when using any other class from the Xojo framework, start by creating a new instance for the PDF document. So, in this case you only need to use:
Var MyPDF As New PDFDocument
It will use the by default constructor, creating a document with a letter size blank page.
If you want to specify a concrete page size, you may use any of the included Enumeration values, for example:
Var MyPDF As New PDFDocument(PDFDocument.PageSizes.A4)
Or any other arbitrary size:
Var MyPDF As New PDFDocument(500, 500)
So, in this case, the PDF document will be created with a 500 width x 500 height pixels for the page.
Drawing into the PDF Document Page
You’ll be able to include text, Pictures and some geometric forms like Lines, Circles/Ovals, Rectangles/Rounded Rectangles (both in their filled or outline variants). For that you can use the same methods and properties you use when drawing over any regular Graphics context.
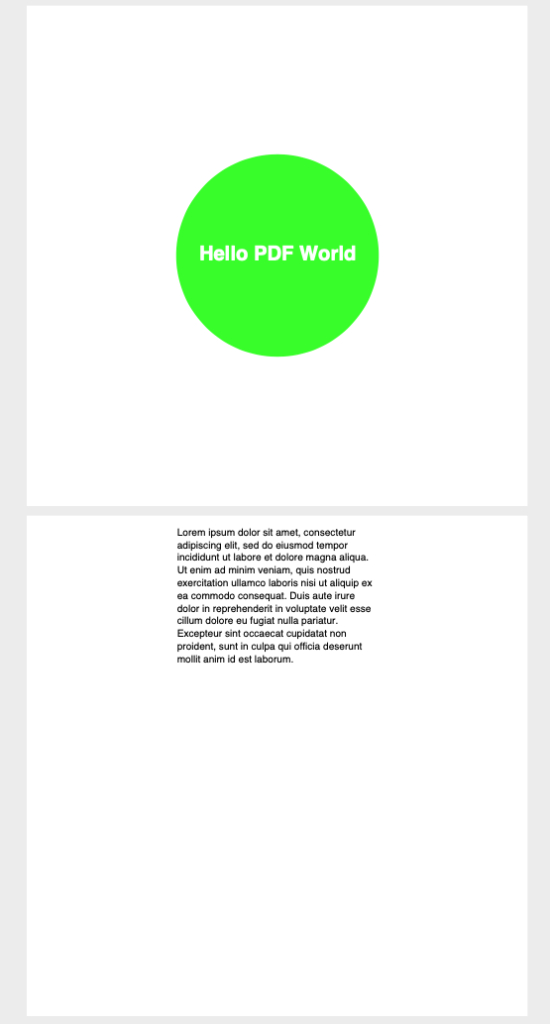
For example, the following code snippet will draw a filled circle centered on the PDF page:
Var g As Graphics = MyPDF.Graphics

g.DrawingColor = &C00ff00

Var x, y As Integer

Var size As Integer = 200
Var offset As Integer = size / 2
x = MyPDF.Graphics.Width / 2
y = MyPDF.Graphics.Height / 2

g.FillOval(x - offset, y - offset, size, size)
While the next one will draw the “Hello PDF World” text centered on the page and over the previously drawn circle.
Var helloWorld As String = "Hello PDF World"

g.FontUnit = FontUnits.Pixel
g.FontSize = 20
g.Bold = True
g.DrawingColor = &cffffff

Var textWidth As Integer = g.TextWidth(HelloWorld) / 2
Var textHeight As Integer = (g.TextHeight / 2) - g.FontAscent

g.DrawText(helloWorld, x - textWidth, y - textHeight)
Adding New Pages to the PDF Document
In order to add a new page to your PDF document you only need to call the NextPage method on its graphic context:
g.NextPage
And that means that, from now on, all the drawing commands will be made on the new page. For example, let’s use some large fragment of text so it will be centred on the new Page (this one will be the classic “Lorem Ipsum” text, stored in this case by the kLoremIpsum Constant):
Var textWrap As Integer = 200

x = g.Width / 2 - textWrap / 2
g.FontSize = 10
g.Bold = False
g.DrawingColor = &c000000
g.DrawText(kLoremIpsum, x, 20, 200)
At this point, our PDF document will be as the one displayed in the following screenshot:
Adding Pictures
Let’s say we did add the “Trees” Picture to our Xojo project. We will be able to draw it on the desired coordinates (and with the desired size of 50 x 50 pixels) over the PDF document page using the following sentences:
g.DrawPicture(Arboles, 20, 20, 50, 50)
g.DrawPicture(Arboles, g.Width - 70, 20, 50, 50)

Metadata
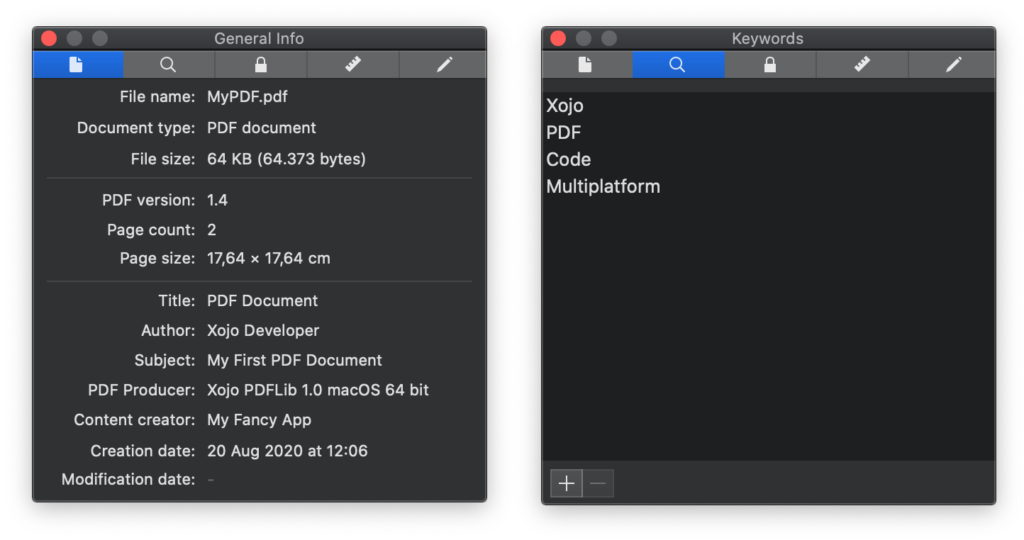
You can set the usual metadata to the PDF documents using Xojo. For example:
MyPDF.Author = "Xojo Developer"
MyPDF.Creator = "My Fancy App"
MyPDF.Title = "PDF Document"
MyPDF.Subject = "My First PDF Document"
MyPDF.Keywords = "Xojo, PDF, Code, Multiplatform”
Once you save the document to disk, this information will be available (and displayed) as part of the PDF properties- for example, using the Preview app on macOS:
Saving a PDF Document to Disk
In order to save the PDF documents created with Xojo to disk, you’ll need a valid FolderItem instance. Next call the Save method on the PDF document instance and give to it the FolderItem instance as the parameter. For example:
Var f As FolderItem = SpecialFolder.Desktop.Child("MyPDF.pdf")
MyPDF.Save(f)

f.Open
In this case, the last line of code will open the PDF document using the default app or utility set on your OS.
Included PDF Examples
These are just some of the basics when creating and working with PDF Documents in Xojo, and I encourage you to explore the PDF project examples you’ll find inside the Example Projects > PDF folder. For example, there you can find how to create PDF documents that look the same both when using a regular Graphics context and the PDFDocument instance, including composing documents with data retrieved from a database or any dynamic data source, both in Desktop and Web.
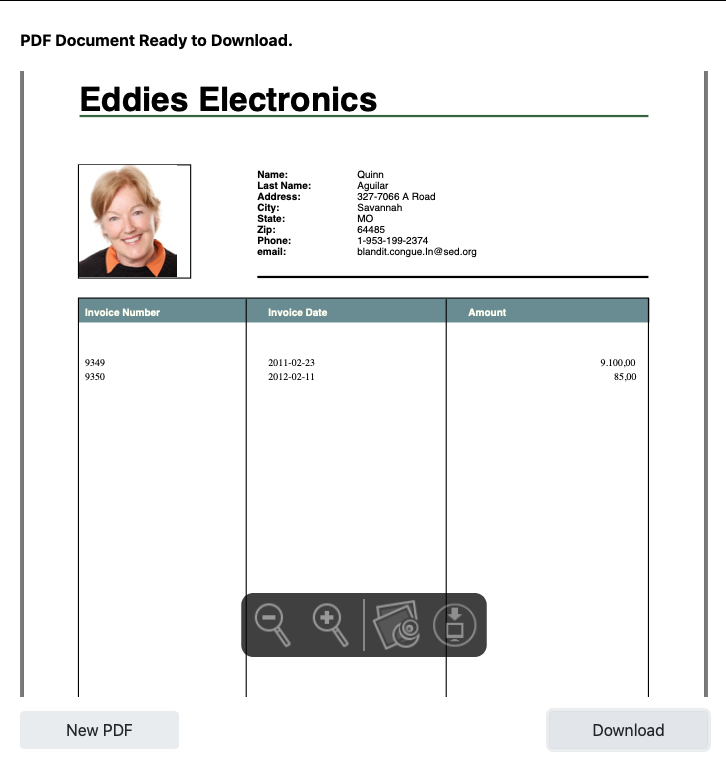
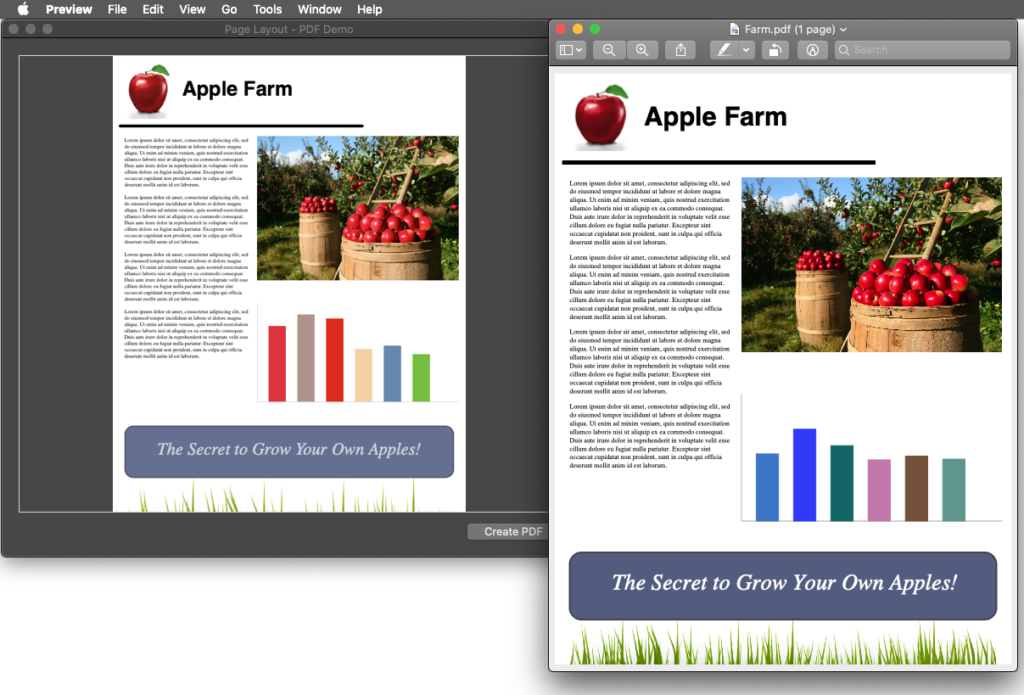
In addition, you can find how to create PDF documents with more complex layouts, combining text, geometric figures and pictures, or even creating a basic graphic chart using rectangles.
Coming Next!
We are well aware of all the possibilities offered by the PDF standard! Future features coming to the PDFDocument class include support for Object2D, full Unicode text support, hyperlinks, document ciphering, and much more! We also intend to support PDFDocument with iOS in the future.

