
Xojo’s Library offers a good amount of UI controls ready to use: buttons, input text controls, lists, popup menus, progress bars, panels, labels, a control to play movies, etc. However, sometimes we need to display exactly the same combination of controls, using the same layout, in several windows of an app. What’s the best approach in these cases?
Obviously, adding the same bunch of controls again and again on each window is not the best solution; even less so when we consider the need to add the exact same code in each of these controls.
The ContainerControl is your best bet to avoid these repetitive tasks. The ContainerControl is a component half way between the available controls in the Library (inherited from the Control class) and a Window. If you look at the properties, methods and events offered by the ContainerControl you’ll find many of these are the same ones available in the Window class.
ContainerControl Layout
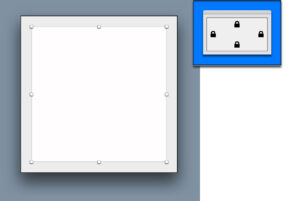
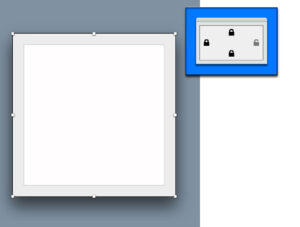
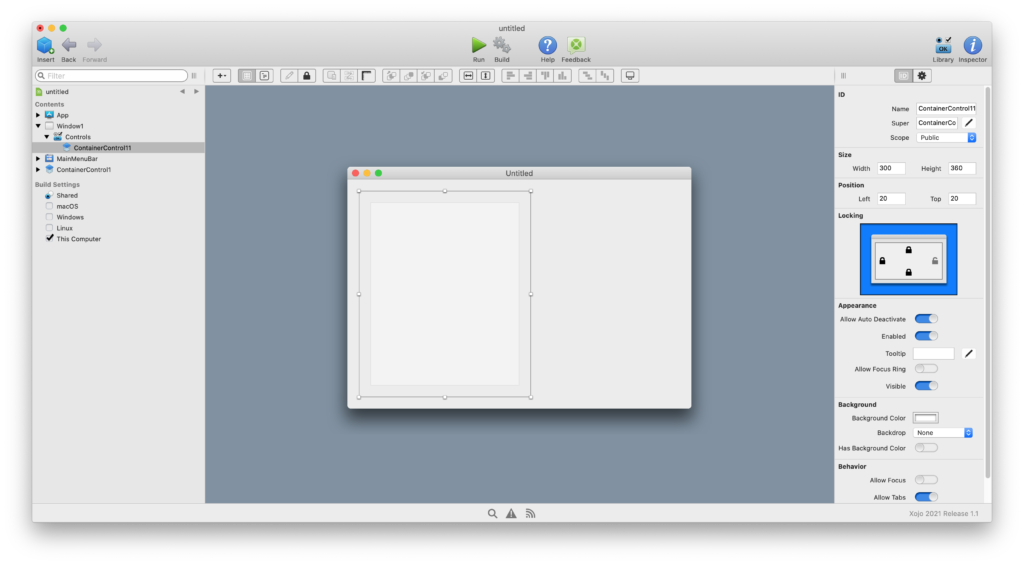
Adding other controls to a ContainerControl couldn’t be simpler. Start by adding a new ContainerControl from the Library to the Navigator (by default, it will be named ContainerControl1), select it in the Navigator to access the Layout Editor. You can use the Inspector Panel to setup the properties. Please note, control’s locks will act on the top, left, right and bottom sides of the ContainerControl they are embedded on; as opposed to using the locks on the ContainerControl itself which locks the position of the container over the top, left, right and bottom sides of the Window where the container is used.
Using ContainerControls in the Window Layout
Now that the layout of the ContainerControl is done, it’s time to add it to the Windows or Panels. Select a Window to access the associated Layout Editor and then drag the ContainerControl from the Navigator to the desired position onto the window frame displayed on the Layout Editor. Once done, that instance will be added under the Controls section for the Window in the Navigator (by default it will be named ContainerControl11 because is an instance from ContainerControl1).
Something interesting to observe is that once you add the container to the Window, you won’t be able to change the position or behavior of the embedded controls in the container from the Window Layout Editor. The controls embedded in the container are displayed as “disabled”.
Select the item ContainerControl1 in the Navigator to change the layout, add new UI controls, and change the position, size or behavior.
Since we only can add Event Handlers to the controls added to ContainerControl1, but not when those containers are added to a window or panel, how do you “communicate” with the windows using these containers? There are several approaches to achieve this. In this example, set the Scope to Public so the Window can access the controls added to a ContainerControl.
If we had added a ListBox control (default name ListBox1) to our ContainerControl1, setting its Scope property as Public in the Inspector Panel, it can be accessed using the usual dot notation. For example, from the Open Event Handler added to the Window1 item:
Me.ContainerControl11.ListBox1.AddRow("New Item")
This solves one of the communication problems; but, how can the controls embedded in a container “communicate” with the Window containing the container? That is, how do we send the value of the selected row in the ListBox1 control to the Window?
Let’s think about that scenario for a moment: the Window Window1 knows the name of the ContainerControl added to it (ContainerControl11), and also the names of the controls added to that container because their Scope has been set to Public. On the other hand, the controls know about the ContainerControl they are embedded in, but they don’t know in advance the name of the Window where such ContainerControls can be added as part of the layout. In addition, the ContainerControl knows the name of the controls added to it, but it doesn’t know in advance the name of the Window or Panels where the container can be displayed. Moreover, it is possible to add ContainerControls to a Window or Panel layout in Design Mode (in the IDE), as well as at runtime!
Considering all of this, the simple solution to communicate between the controls added to a ContainerControl and the Window or Windows that will be using that container is by adding new methods and new Event Definitions on that ContainerControl (in this example, the one named ContainerControl1). There are other techniques, but we are going to use this one in this tutorial.
Continuing with our example, add a new method to ContainerControl1 using the following method signature:
RowSelected(value As String)
Next, with ContainerControl1 still selected in the Navigator, choose the Insert > Event Definition option in order to create a Event using the following signature:
RowSelected(value As String)
Click on the method added previously to access the associated Code Editor and type the following line of code:
RaiseEvent RowSelected(value)
The method will simply raise the defined event passing along the received value as the argument.
Now, select the ListBox1 item on the ContainerControl1 item, and add the Changed Event Handler. This is the event raised every time the user changes the selected row in the ListBox. Type the following code in the associated Code Editor:
If Me.SelectedRowIndex <> -1 Then
    Self.RowSelected(Me.SelectedRowValue)
End if
Add the Open event to the ListBox1 item, type the following code in the associated Code Editor:
For n As Integer = 0 To 10
    Me.AddRow(n.ToString)
Next
Now, add the defined event in ContainerControl1 to the ContainerControl11 instance added to the Window1 layout. Select that item and choose the Add > Event Handler option. Choose the SelectedRow event handler and confirm the selection clicking the “OK” button.
Type the following line of code in the associated Code Editor:
MessageBox("Selected value: " + value)
Of course, you can do something more useful with the received value; but this is useful enough to show how the values can be sent from the ListBox control to any window where the container can be used.
Subclassing ContainerControl
Some projects may require using several ContainerControls, and many of them may be using a ListBox. As it is when using any other class, it would be great to have both the SelectedRow method and the SelectedRow Event Definition in their own ContainerControl subclass, and they are available by default to any ContainerControl added to the project and embedding a ListBox. The good news is that it is also possible to create a subclass for a ContainerControl, as it is explained in the User Guide.
Add a new Class to the project and use the Inspector Panel to change its name to MyContainerClass and the Super field to ContainerControl.
Next, select the SelectedRow method and the Event Definition with the same name in ControlContainer1, cut them (Edit > Cut), select MyContainerClass and paste them (Edit > Paste). Both the method and the event definition are now available under MyContainerClass.
Select ContainerControl1 in the Navigator and use the Inspector Panel to change its Super field to MyContainerClass. Add a second ContainerControl from the Library to the Navigator (by default it will be named ContainerControl2). With the new item selected in the Navigator, use the Inspector Panel to change its Super field to MyContainerClass. Add the ListBox control from the Library to the layout of the new container and type the following code in the Open event for the ListBox1 item:
For n As Integer = 0 To 10
    me.AddRow(n.ToString)
Next
Add the Changed event to ListBox1 and type the following code:
If Me.SelectedRowIndex <> -1 Then
    Self.SelectedRow(Me.SelectedRowValue)
End If
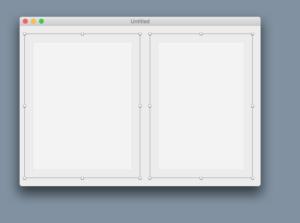
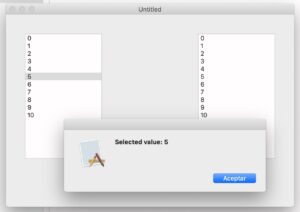
Next, add the second container ContainerControl2 to the project window Window1. The layout could be similar to that of this screenshot:
Select the ContainerControl21 item under Window1 > Controls and add the SelectedRow event handler. Add this line of code to display the received value in a message box:
MessageBox("Selected value: " + value)
As you can see, both ContainerControl1 and ContainerControl21 do not include the SelectedRow method. These are inherited from their super class: MyContainerClass.
Adding ContainerControls at Runtime
Xojo also lets you add ContainerControls at runtime, something that is really interesting and makes Xojo apps flexible and powerful. Let’s do that in a simple example:
Select the Window1 item in the Navigator and delete the ContainerControl11 and ContainerControl21 items. With Window1 still selected, add a new property using the following values in the Inspector Panel:
- Name: Containers()
- Type: MyContainerClass
Add the Open event to Window1, type the following code in the associated Code Editor:
Var leftContainer As New ContainerControl1

leftContainer.Width = 200
leftContainer.LockTop = True
leftContainer.LockRight = False
leftContainer.LockBottom = False
leftContainer.LockLeft = True

leftContainer.EmbedWithin(Me, 20, 20)

Containers.Add(leftContainer)

Var rightContainer As New ContainerControl2

rightContainer.Width = 200
rightContainer.LockLeft = True
rightContainer.LockTop = True
rightContainer.LockBottom = True
rightContainer.LockRight = True
rightContainer.EmbedWithin(Me, Me.Width - 20 - rightContainer.Width, 20)

Containers.Add(rightContainer)
Run the app, change the window size and you’ll notice how the container at the right side adjusts its height and width to match the changes made in the window while the container at the left side keeps its original position.
Try to change the selected row in any of the ListBoxes. Nothing happens! As you may remember, in order to “forward” the selected row value from the ListBox to the window we needed to add the SelectedRow event handler. This is something we can’t do when adding new container instances at runtime. In order to do that we need to use the AddHandler keyword. This lets us redirect an event handler to a delegated method. Quit the app to return to the IDE and, with Window1 still selected in the Navigator, add a new method using the following signature:
ListBoxSelectedRow(item As MyContainerClass, value As String)
Notice that the first parameter will contain a reference to the instance of the MyContainerClass raising the event, while the second parameter will contain the value itself.
The only thing left is to associate the event name with the memory address of the method that will handle it for each of the Container instances added at runtime. Again, select the Open event tied to the Window1 item and change its code like so:
Var leftContainer As New ContainerControl1

leftContainer.Width = 200
leftContainer.LockTop = True
leftContainer.LockRight = False
leftContainer.LockBottom = False
leftContainer.LockLeft = true

AddHandler leftContainer.SelectedRow, WeakAddressOf ListBoxSelectedRow

leftContainer.EmbedWithin(Me, 20, 20)

Containers.Add(leftContainer)

Var rightContainer As New ContainerControl2

AddHandler rightContainer.SelectedRow, WeakAddressOf ListBoxSelectedRow

rightContainer.Width = 200
rightContainer.LockLeft = True
rightContainer.LockTop = True
rightContainer.LockBottom = True
rightContainer.LockRight = True
rightContainer.EmbedWithin(Me, Me.Width - 20 - rightContainer.Width, 20)

Containers.Add(rightContainer)
The lines of code really are interesting:
AddHandler leftContainer.SelectedRow, WeakAddressOf ListBoxSelectedRow
AddHandler rightContainer.SelectedRow, WeakAddressOf ListBoxSelectedRow
As you can see, through AddHandler we are instructing the SelectedRow event from every container instance to be handled by the ListBoxSelectedRow method added to Window1.
On the other hand, WeakAddressOf is a Xojo programming language operator allowing us to get a “weak” reference to the memory address where the ListboxSelectedRow is found so it can be invoked.
Summary
Through this tutorial we practiced some of the basics of using ContainerControls in Desktop projects: adding them to the project, using them at design time, how to forward values from the container’s controls to the window where these can be added, how to create a ContainerControl subclass that shares its method and events with any ContainerControl subclassed from it, how to add new ContainerControl instances to a window at runtime, and also how to delegate the execution of a event so it can be handled by a window method.
Questions? Ask me on Twitter @XojoES or on the Xojo Forum.