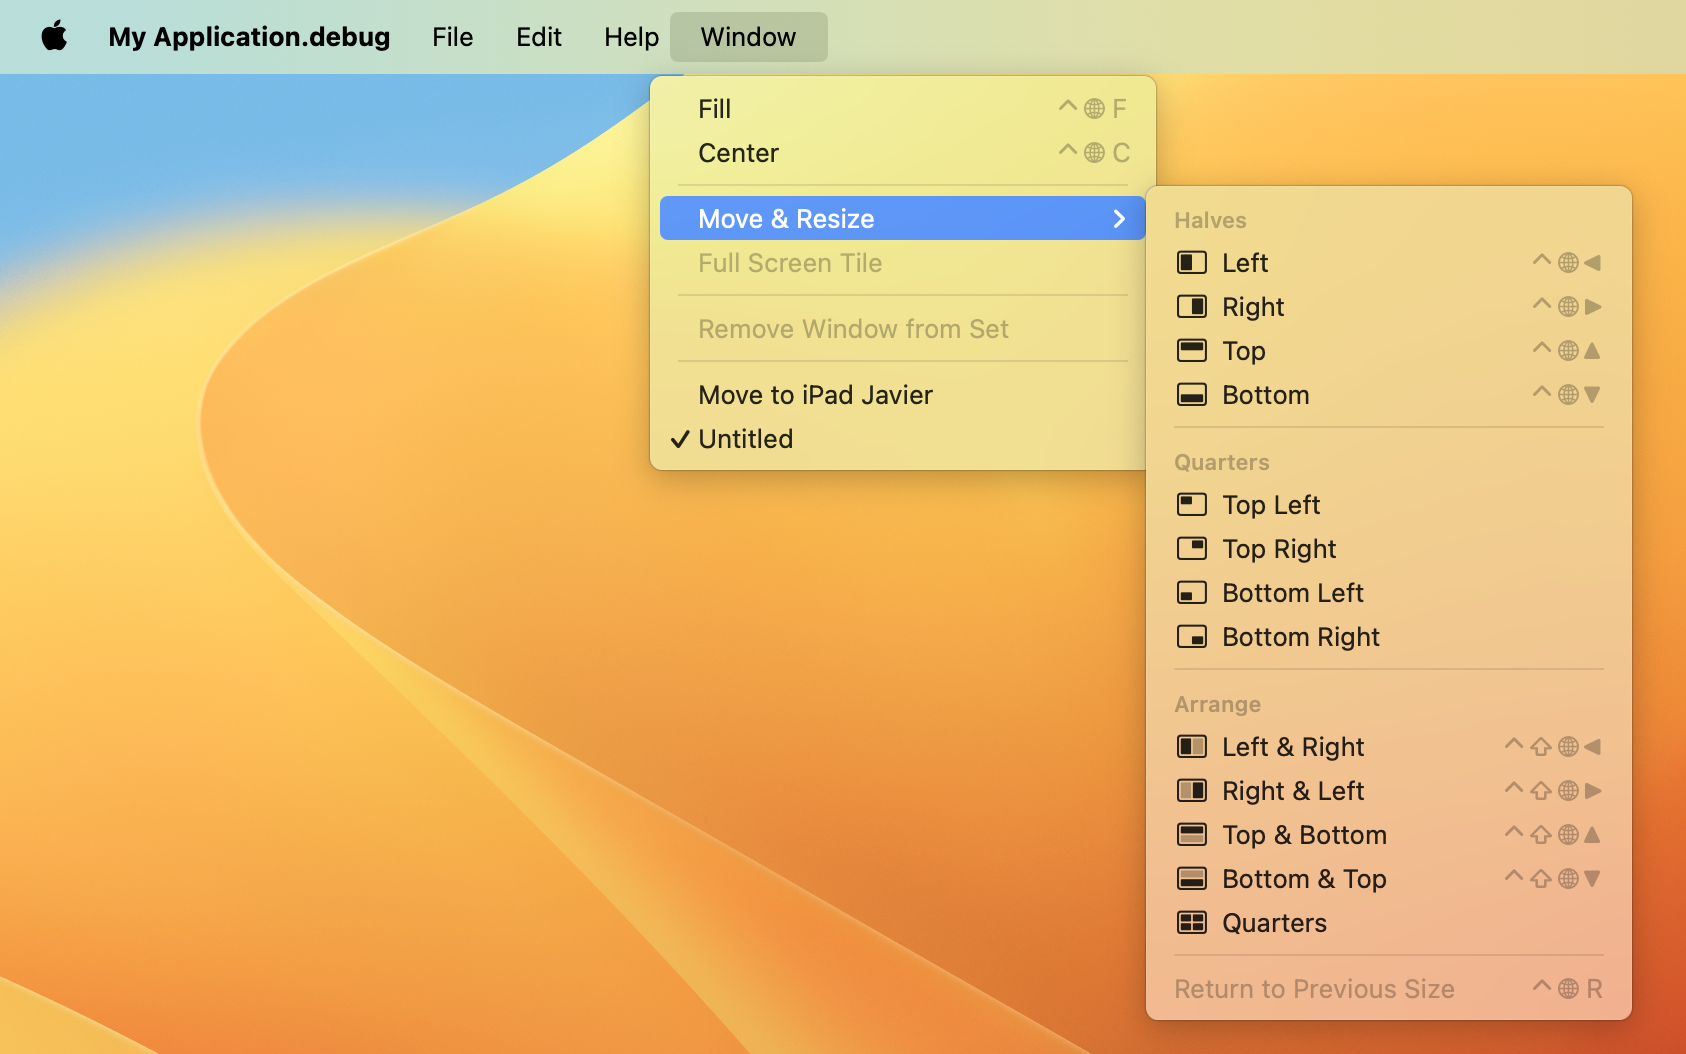
By default, macOS adds several menu options to the Window menu of any Desktop app. Those options have been getting more interesting in the latest releases of the operating system, allowing, among other things, to set the position and arrangement of the Window on the screen, split the screen between the Window of one app and another app, or even sending a window of an app to an iPad as an “extended” screen in your macOS setup. Read on, adding these options to your Xojo-built macOS apps is just a few Declares away!
Once you add this ability to your macOS apps, they will fit better when compared with other apps running alongside them. Even better, you don’t need to write additional code in order to handle these additional menu options.
Create a new Desktop project and add a new Module to it called “macOSExtra”. Then add a new method to it using the following signature, make sure to set the Scope of the property to Global:
AddMacOSWindowMenu(item as DesktopMenuItem)As you can see, this method expects to receive a DesktopMenuItem instance; but before we write a line of code for this method, select the MainMenuBar item in the project Navigator.

The previous action will bring up the Menu Editor. Click on the toolbar button in charge of adding a new first level menu item to the menu bar:

Next, with the new menu item selected in the Navigator, change the following properties in the associated Inspector Panel:
- Name: WindowMenu
- Text: Window
Now, let’s go back to the AddMacOSWindowMenu method in the “macOSEXtra” module, type the following code in the associated Code Editor:
// This code will be only executed when compiling the project
// for the macOS target

#if TargetMacOS then

  // We declare the function allowing us to get the reference to a class
  // from the macOS framework (Foundation, in this case), from the parameter passed
  // to it as a String (the class name we want to get the reference to).
  // You can get additional information about this from the Apple Documentation at: https://developer.apple.com/documentation/foundation/1395135-nsclassfromstring?language=objc
  Declare Function NSClassFromString Lib "Foundation" ( name As CFStringRef) As Ptr
  Var theClass As Ptr = NSClassFromString("NSApplication")

  // Now that we have the reference to the class
  // we will use it to call the shared method / selector from the NSApplication
  // class in charge or returning a reference to the running app (that is "our" app in this case).
  // You can get additional information about this from the Apple Documentation at:
https://developer.apple.com/documentation/appkit/nsapplication/shared?language=objc

  Declare Function GetSharedApplication Lib "AppKit" Selector "sharedApplication" (Application As ptr) As Ptr
  Var theApp As Ptr = GetSharedApplication(theClass)

  // Now that we have a reference to the app object, we need to get a reference to the "submenu" hanging from the menu instance received as parameter by the method. For that
  // we need to call the method / selector "submenu" passing along the underlying native
  // menu object retrieved via the "Handle" property from DesktopMenuItem.

  Declare Function GetSubmenu Lib "AppKit" Selector "submenu" (menuReference As Ptr) As Ptr
  Var subMenu As Ptr = GetSubmenu(item.Handle)

  // The last step is to assign the previous reference to the window property from the app reference.
  // You can get additional information about this from the Apple Documentation at: https://developer.apple.com/documentation/appkit/nsapplication/windowsmenu?language=objc

  Declare Sub setWindowMenu Lib "AppKit" selector "setWindowsMenu:" ( appReference As Ptr, menuReference As Ptr)
  setWindowMenu(theApp, subMenu)

#EndIf
Testing it!
In order to see how this new method works, select the App item under the IDE Navigator and add the Opening event. Then, type the following line of code in the associated Code Editor:
AddMacOSWindowMenu(WindowMenu)
Run the app and click on the Window item in the main menu bar. You should see that the operating system has added several menu options, similar to the ones displayed in this screenshot (they will vary depending the macOS version the app is running on):

Choose any of the options added and you will see how macOS handles them, without the need to write a line of code in you Xojo project to do it.
Localizing the Window Menu
At this point, the Window menu with the added menu options will look great, but if your app is localized to other languages, then it will be a bit odd to read “Window” for the menu (as well as the English text in the added menu items). To improve this experience, let’s localize the WindowMenu item too!
Let’s add a new Constant to the “macOSExtra” Module and name it “kWindowName” setting its default value to “Window” and switching on the “Localized” field in the Inspector Panel:

Then, use the associated Constant Editor to add new entries (in as many as languages you support). In this case we will just add the entries to support both English and Spanish:

Next, select the WindowMenu item hanging from the MainMenuBar item in the Navigator, and change the value of the Text property to use the new constant:

Change the macOS Settings > General > Idiom and Region so the Spanish language is the main language. Then run the Xojo project again from the IDE and you will see how the “Window” menu entry now reads “Ventana”. Moreover, macOS will add the right localizations for the added menu items so they are in Spanish too.


In Brief
As you have seen, using just a few Declares we have been able to add the expected options for the Window menu to our macOS apps, without the need to write the code in charge of handling them! This doesn’t just mean more options for your users, it also means your Xojo apps will look and feel better when running on macOS.
Javier Menendez is an engineer at Xojo and has been using Xojo since 1998. He lives in Castellón, Spain and hosts regular Xojo hangouts en español. Ask Javier questions on Twitter at @XojoES or on the Xojo Forum.
