
Your macOS app is finished and ready to go. But unless you plan to run it only on your own machine, there’s one essential step before sharing it with others: code signing with certificates.
This blog series provides a clear, practical overview of how certificates work, with a focus on signing and distributing macOS applications. Some concepts apply to digital certificates in general, while others are specific to the macOS code signing process. By the end of the series, you’ll understand what certificates are, why they matter, and the role they play when building and distributing a macOS app.
The Developer ID field in the Build Settings > macOS > Sign Inspector Panel is our starting point:
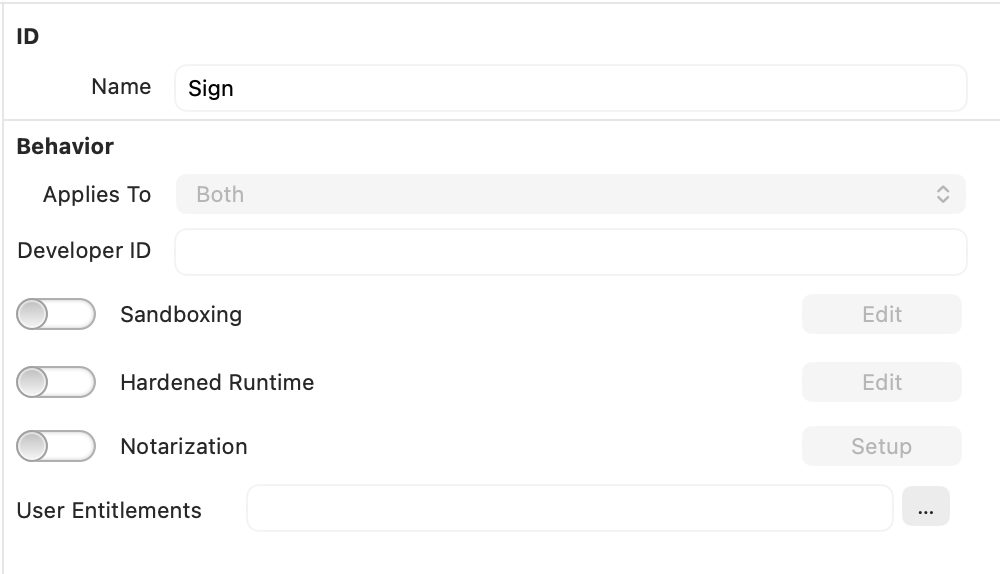
By default, this field is empty. When you click Build, the app bundle (and its contents) is signed using a more relaxed security configuration. This does not require an explicit developer certificate and does not verify that the app comes from a known, trusted developer.
This type of signing is called Ad-Hoc signing. It is perfectly fine when debugging from the IDE or when building apps you intend to run locally.
In earlier versions of macOS, it was even possible to distribute and run Ad-Hoc–signed apps on other Macs, as long as the user explicitly chose to trust them. While this is still technically possible on recent versions of macOS, Apple has continued to tighten security, making it increasingly difficult for users to launch Ad-Hoc–signed applications.
In most cases, Gatekeeper will intervene and prevent the app from launching. Since the system cannot verify the identity of a trusted developer, it treats the app as unverified. With Ad-Hoc signing, macOS can only confirm that the app has not been modified since it was signed, it cannot validate who created it.
Under the hood: How “Ad-Hoc” signing works
Every time an app is signed (including all the contents inside its bundle) macOS uses Apple’s codesign tool. When Ad-Hoc signing is applied, the simplified process works roughly like this:
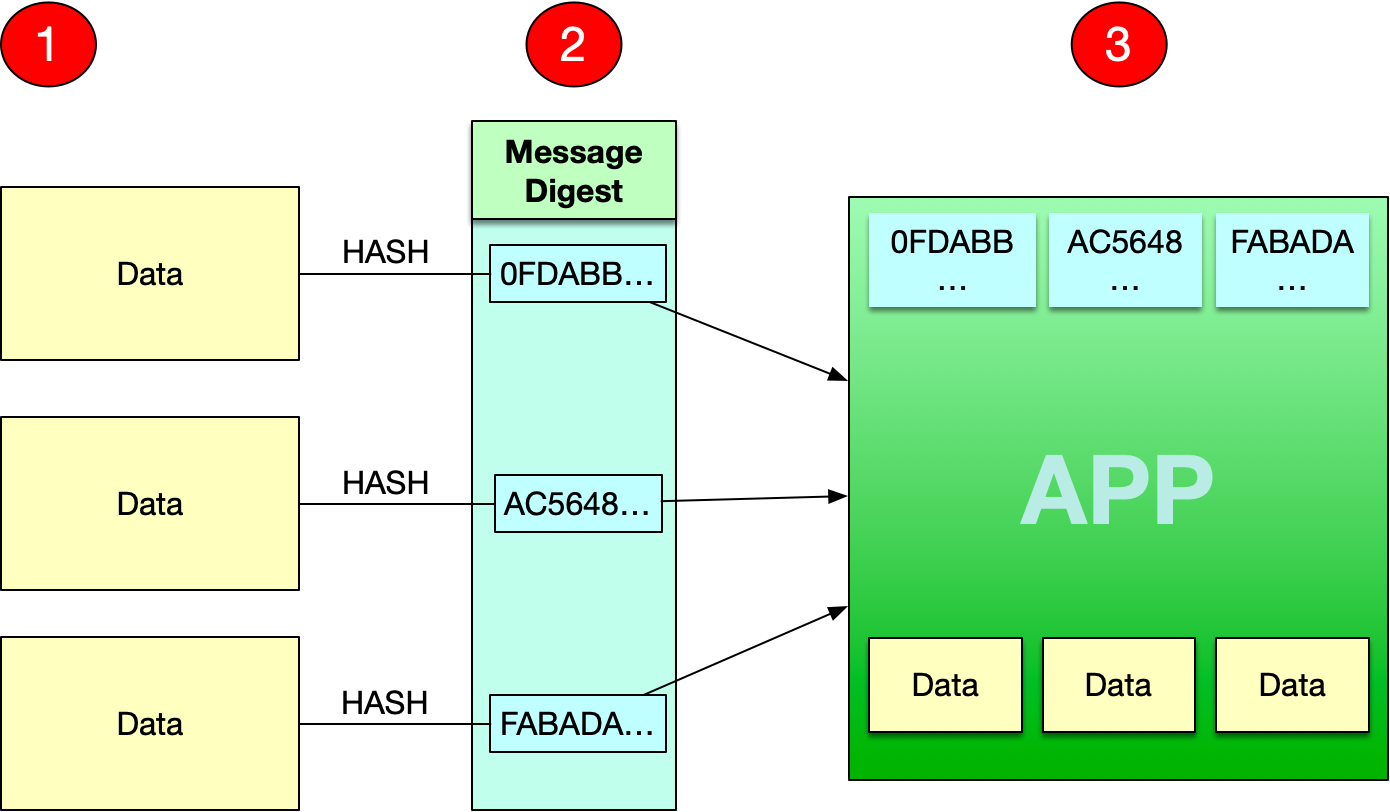
- A hash value (a unique digital fingerprint) is calculated for every file in the app bundle, whether it is executable or not, as well as for the bundle itself.
- These hash values are stored inside the app bundle, in the
_CodeSignaturefolder. - If the app contains multiple architectures (for example, x86 and ARM), the process is repeated for each supported architecture.
When a user double-clicks the app to launch it, macOS performs a similar verification process:
- It recalculates the hash value for every file in the bundle.
- It compares the newly calculated values with those stored in the
_CodeSignaturefolder and if any hash differs from the stored value, macOS determines that the bundle has been modified since it was signed and it will refuse to launch the app.
Want to see this in action? Create a new Desktop project in the Xojo IDE, save it to your Documents folder, and build it for macOS.
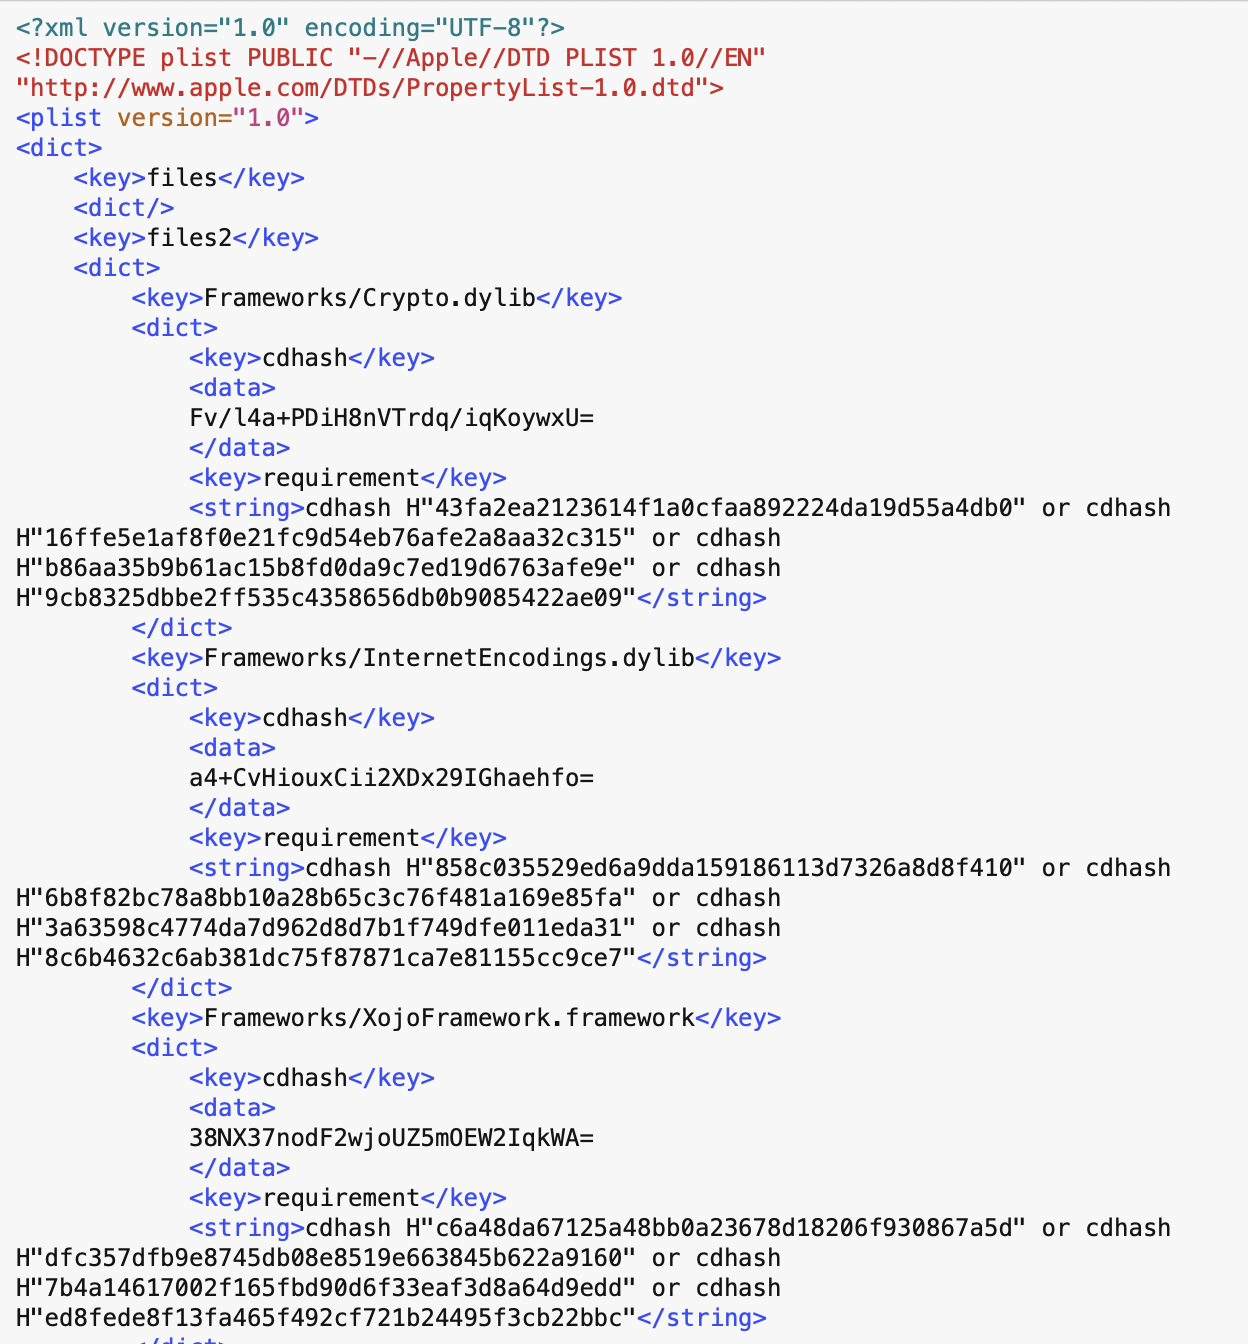
Next, locate the built app in Finder. Control-click it and choose “Show Package Contents.” Then open the Contents > _CodeSignature folder and inspect the CodeResources file using your favorite text editor. You’ll see a list of hash values and digests corresponding to every file in the app bundle.
Apple Developer Certificates: Establishing Trust on macOS
What must you do so your apps are recognized as first-class citizens on macOS and can be distributed without Gatekeeper intervening? The answer is likely familiar: enroll in the Apple Developer Program (currently US $99 per year).
Among its many benefits, membership in the Apple Developer Program allows you to create your own Developer ID certificates. When you use these certificates to sign your apps, macOS can validate the signature and identify you as the verified developer distributing the software.
But how is this trust established and verified? To answer that, we need to start at the very root, literally!
Every computer, smartphone, tablet, and many other devices come with preinstalled Root Certificates. These certificates are issued by trusted organizations known as Root Certificate Authorities (CAs), including Apple. They serve as the foundation of a chain of trust, allowing other certificates issued by those authorities to be verified.
Technically speaking, a Root Certificate Authority (CA) is the top-level trusted entity in a public key infrastructure (PKI). It issues self-signed root certificates that act as the trust anchor for verifying other digital certificates. In other words, it is the foundation upon which the entire certificate trust model is built.
It is easy to take a look to these installed on your Mac:
- Open Keychain Access.
- Select Certificates at the top of the window.
- In the sidebar, choose System Roots.
- You will then see the complete list of root certificates trusted by macOS.
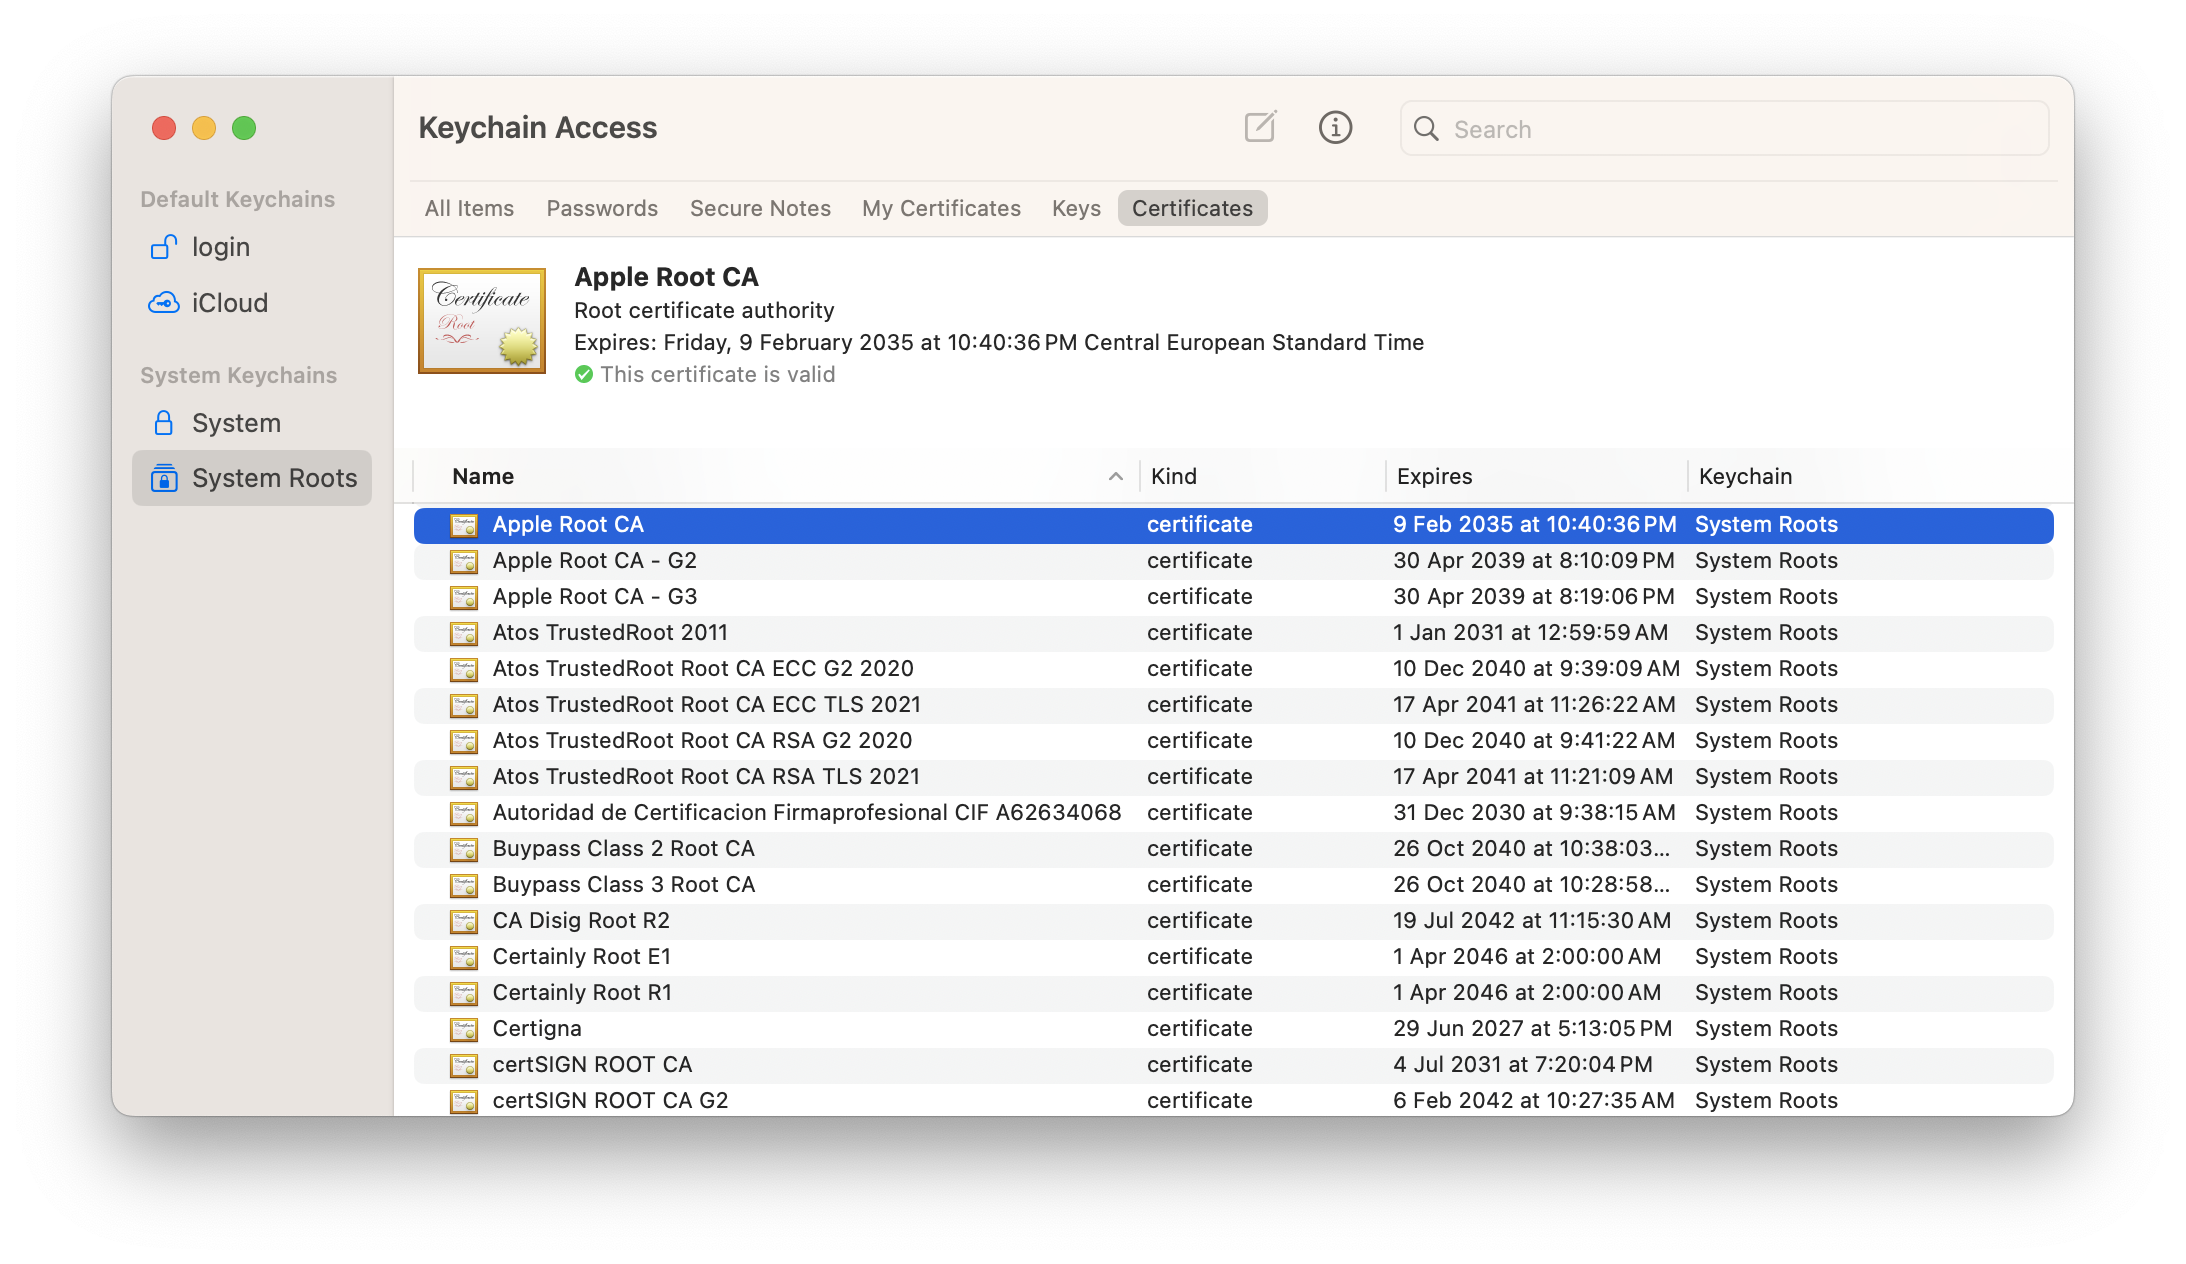
You’ll notice that there are three different Apple Root CA certificates. Why?
Each X.509 certificate contains detailed metadata defining its cryptographic properties and permitted usage. This includes the key type (such as RSA or ECDSA), the public key length, and the signature algorithm used.
- Apple Root CA: Is a RSA type, with a public key length of 2048 bits that uses the SHA-1 algorithm.
- Apple Root CA-G2: Is a RSA type, with a public key length of 4096 bits that uses the SHA-384 algorithm.
- Apple Root CA-G3: Is a ECDSA type, with a public key length of 384 bits that uses the SHA-384 algorithm.
Intermediate Certificates and the Chain of Trust
Root certificates are highly valuable and sensitive, so they are rarely used directly to sign end-user certificates (also called “Leaf” certificates). In the case of macOS app development, the developer’s certificate is the Leaf. This is where Intermediate Certificates come into play.
In simple terms, Intermediate Certificates are signed by Root Certificates and, in turn, are used to sign Leaf certificates. This protects the Root certificate from direct exposure. Together, the Root, Intermediate, and Leaf certificates form what is called the “Chain of Trust.”
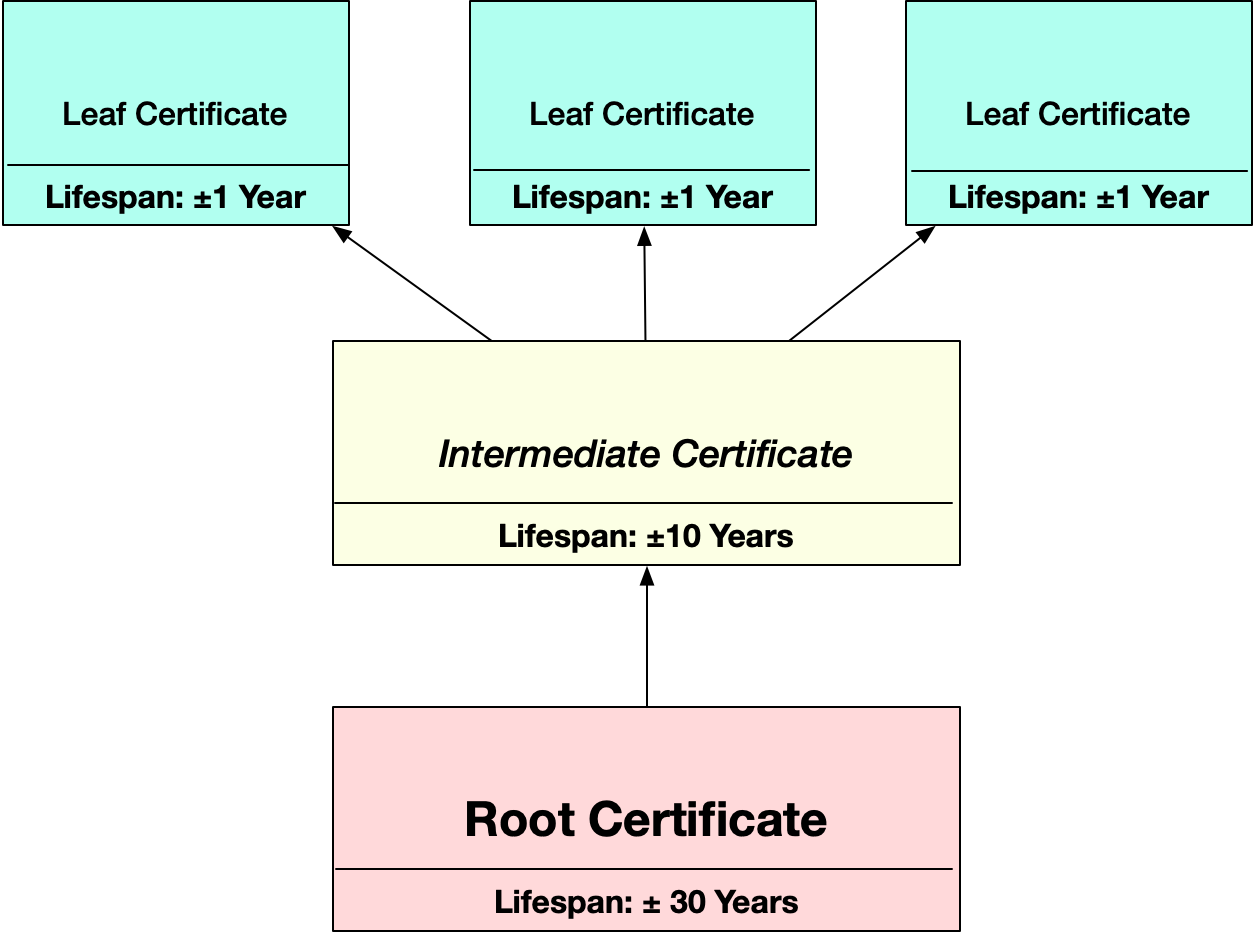
The Chain of Trust verification starts with the Leaf certificate and works upward through the Intermediate to the Root. This same process occurs whenever you visit a secure website, make an online payment, or transmit sensitive data securely.
For example, the Leaf certificate is validated against its Intermediate certificate. If the Intermediate certificate is missing or expired, the Leaf certificate is considered invalid. Similarly, the Intermediate certificate itself must be validated against the Root certificate. If the Root certificate is missing or expired, the Intermediate is invalid, and all Leaf certificates signed by it are also invalid.
The same process happens when you sign your macOS apps: macOS validates the entire certificate chain before allowing the app to run.
Finally, certificates closer to the Root generally have longer validity periods. Leaf certificates must be renewed more frequently, while Root certificates are valid for many years.
Wrapping up
In this first article, we covered the fundamentals of digital certificates and their role in macOS app security. In the next article, we will focus specifically on Apple Developer certificates and how they enable trusted app distribution.
Javier Menendez is an engineer at Xojo and has been using Xojo since 1998. He lives in Castellón, Spain and hosts regular Xojo hangouts en español. Ask Javier questions on Twitter at @XojoES or on the Xojo Forum.
Code Signing on macOS: What Developers Need to Know