
Xojo includes a good amount of UI controls available from the Library for Desktop, Web, iOS and Raspberry Pi targets. These are the pieces that allow you to layout the user interface of your apps: properties, methods and events that, when combined, define the specific behavior of the project at hand.
Sometimes, subclassing the available controls is the answer to add specific behaviors you need. But what happen when none of the controls offer what you need, whether visually or functionally? The answer is the Canvas class (for Desktop projects), WebCanvas class (for Web projects) and iOSCanvas class for iPhone and iPad devices. But how do you create your own UI controls from scratch? Read on to learn…
Before starting with this basic tutorial about customized UI controls, there is much more to take into consideration about providing the same behavior on your designed controls for multiplatform deployments. For example, in the case of desktop projects, we should add to the mix some things like HiDPI / Retina detection and adaptation on the fly (specially in the case of Windows deployment, with multiple dpi / Windows OS version combinations), and Dark Mode support for macOS. A well as other performance hints and differences when it’s about doing desktop multiplatform layouts; for example, when to set the Transparent or DoubleBuffer properties to True or not.
As the name implies, the Canvas control acts like a painting canvas and you can set its look for all the supported states based on the available events. This is done through the Paint Event and all the Graphic classes availables in the Framework. In fact, the Paint event provides as a parameter the graphical context (canvas height and width) you can paint on. In addition, you can combine these graphic classes (or completely substitute them) with any prepared Picture of your choice as the customize control background (ImageSet recommended, so it supports all the needed resolutions based on display dpi). In addition, and as you can do with the drawing via the Graphic class and functions, you can choose to use a different Picture as the control background based on several events, for example, when the mouse pointer is entering or exiting the control limits in a Desktop or Web app, or as response to the user clicking on it.
Canvas: A matter of Events
The Canvas class provides all the needed Events you probably would want to implement in order to react to the user interaction. These are listed and described in the available documentation online and as part of the Xojo IDE interactive Help.
While you can drag and drop a Canvas instance directly to your project layout window or view, implementing and writing the code associated with any of the available Events, the recommended way to go is to create your own subclass taking as its parent the Canvas class. This way, you can implement and fine-tune every aspect that makes you control unique and, most importantly, re-use your customized UI controls as many times you want both in current and future projects (or even offer them to the Xojo community or sell them to other developers!).
As you probably already know, in an OOP programming language, subclassing is the method to get a specialized behavior from an existing Class: We get for free all the available properties, methods and events from the parent (and all its parent hierarchy), including also the code executed in the Paint event to truly paint or provide its look on screen; so we just need to implement the specific behavior and/or control drawing/painting we need over these.
This is also the way to go when you are in the inital stages of designing your own customized UI control: will you need to create even more specialized behaviors based on a “parent” or base customized control? Maybe variations on the behavior? In cases like these, you should define your UI control base class at the bare-minimum set of painting, behavior (events and methods) and properties that will be shared from all the future UI Controls inherited from your base/parent UI Control class. (i.e: more specialized or with behavior variations).
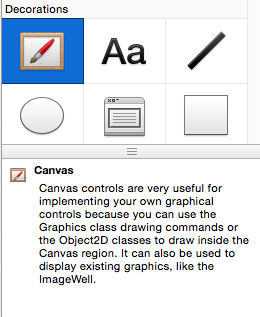
Creating a subclass in Xojo is truly simple: just drag and drop the Canvas icon from the Library to the Navigator (the leftmost column in the Xojo IDE), or choose Insert > Class from the Insert menu.
Points vs Pixels: HiDPI and Retina
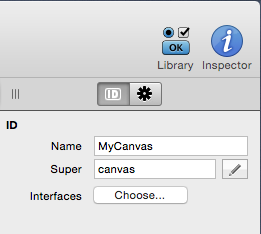
Once you have added the new Class to your project, select it, go to the Inspector and set the name you want to use for your new Class (using a “company” or personal prefix it’s always a good idea to avoid collision with other existing or future classes in the Xojo Framework, or when using third party classes). Then, in the Super field of the Inspector Panel, type Canvas and confirm the entry. You’ll see how your class icon changes to the one that uniquely identifies Canvas based classes and instances. The most important thing: your new subclass will have all the properties, events and methods you may expect from a Canvas.
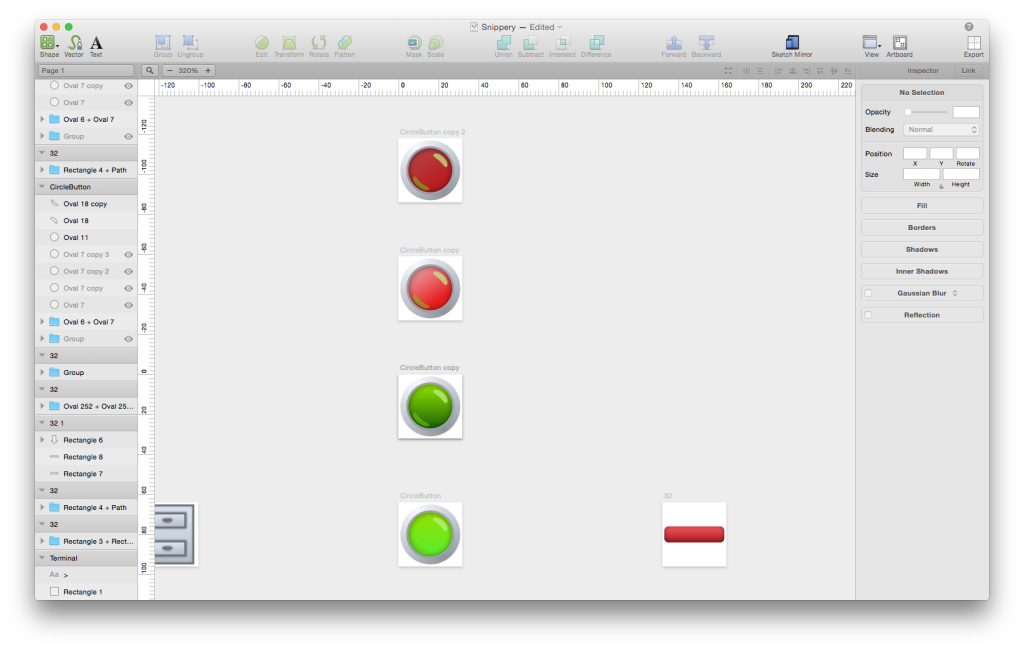
This will be the base class in our short tutorial for creating a customized button that will change its associated image (picture) when the mouse pointer is inside the button area, outside the button bounds or when the user click on the control. In the last case, the button will change both the image and its internal state represented by a property as a Boolean value (named Status).
As our customized UI control will not draw itself via the Paint event, we will need to design the images so these precisely fit in the size we want to use for our button. In this example a size of 32 x 32 points.
In general, when designing images to use in our Xojo projects we need to change our mindset from thinking in pixels to points. That’s because Xojo apps do support HiDPI on Windows/Linux and Retina on macOS; that is: hi-def graphics. Thus, it’s important to use a design tool that simplifies the process. Personally, I use the vectorial app Sktech on macOS because it automates the 2x creation of the final images. (Remember that HiDPI/Retina is enabled by default in the Building Settings on every new Desktop project.)
How do you support HiDPI/Retina if you want to draw the control look on the fly? Avoid the use of pixels in your calculations or when setting the values of the existing Graphic class properties, and use Points instead. If you really need to access the Pixels values underneath, then you can resort to the RGBSurface class (if available) and make use of the ScaleFactorChanged event available on the Canvas class. This way, your class will be notified on every change between displays with or withour Retina/HiDPI support.
Good rule of thumb: do all your control drawing inside the Paint event! And, when you need to update or redraw it (maybe as consequence of some change in the app behavior, or from the change made in other UI control), invoke the method Invalidate instead of Refresh. In general, this will speed up the drawing and, thus, the main app performance.
If you use an existing Event… Define the Event again
As our customized class makes use of the Open, MouseEnter, MouseExit and MouseDown Events, we need to make sure we define these events again to the class, so they are also available for the developer using our canvas-based UI subclass. After all, it’s very probable he needs or wants to add extra code on top of ours! This is something we can do choosing Add to "class_name" > Event definition when our subclass icon is selected in the Navigation Browser.
Thus, once we have created the same events (using the same parameters and returning the same kind of Type values as the original ones), we need to make sure we call them; usually as the last line of code for the already used Event. For example, this is the code for our implementation of the MouseDown event in our Canvas subclass:
me.Backdrop = if(me.Status = false, ShellRunSelected, ShellRun)
me.Status = not me.Status
return RaiseEvent MouseDown(X, Y)
Note how, in this case, our implementation of the MouseDown event returns the value returned by the consumer of our subclass instances, called with the RaiseEvent statement. Just remember that returning the True value from this event means that such events will not be propagated further along the Events Chain.
Putting it all Together
With this information at hand, and the basic concepts explained, this video (in Spanish) shows how you can join all the needed pieces: pictures, events, definition of already consumed events by the subclass; creating a new very basic control from scratch. Obviously, from this point on, you can find in the available documentation all the information needed to create more complex UI controls based on the Canvas class (WebCanvas or iOSCanvas). The possibilities are limitless!
Other useful topics:
Javier Rodriguez has been the Xojo Spanish Evangelist since 2008, he’s also a Developer, Consultant and Trainer who has be using Xojo since 1998. He manages AprendeXojo.com and is the developer behind the GuancheMOS plug-in for Xojo Developers, Markdown Parser for Xojo, HTMLColorizer for Xojo and the Snippery app, among others.