
This guide is going to walk you through the steps to set up in-app purchases in your iOS apps. It may be best to get things set up first on Apple’s side, following with the app configurations in Xojo.
Apple Developer
- Go into Certificates, Identifiers, & Profiles.
- Select Identifiers on the left.
- Click the plus sign to add a new identifier.
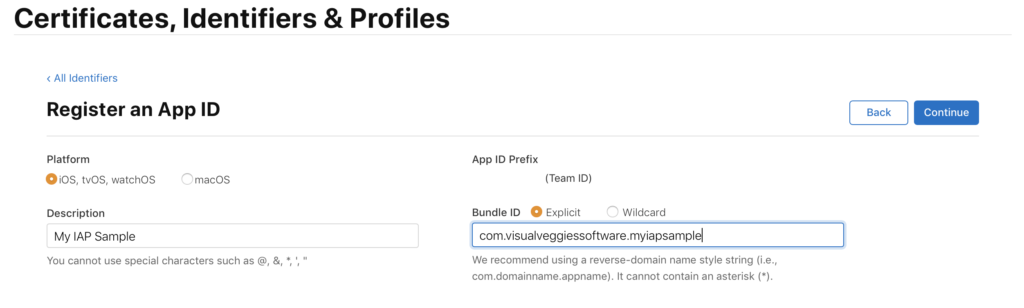
- Select App ID and hit Continue to Register an App ID.
- Choose iOS under Platform, enter a Description, and enter an ExplicitBundle ID. This must be the same as your Xojo project’s Bundle Identifier. Make sure In-App Purchase is checked (it should be by default).
- Click Continue, then click Register on the next screen after you verify the information.
- Back in Certificates, Identifiers, & Profiles, make sure you have a physical device listed. This will be used for the IAP test purchase since you cannot test a purchase in Simulator.
- Select Devices on the left. If your device is not listed, click the plus sign to add it.
- Select iOS as the Platform, enter in a name for the device, and enter in the Device ID (UDID). You get the UDID by connecting your phone to the computer, opening Xcode, choosing Window >> Devices and Simulators, right-click on your device listed on the left and select Copy Identifier.
- Copy this into the UDID box in Apple Developer Register a Device.
iTunes Connect
In the Agreements, Tax, and Banking section, make sure you have active agreements for Free Apps and Paid Apps. The process of getting these agreements set up can take a couple of days.
Set up the new app:
- Go to My Apps and create a new app using the plus sign on the left.
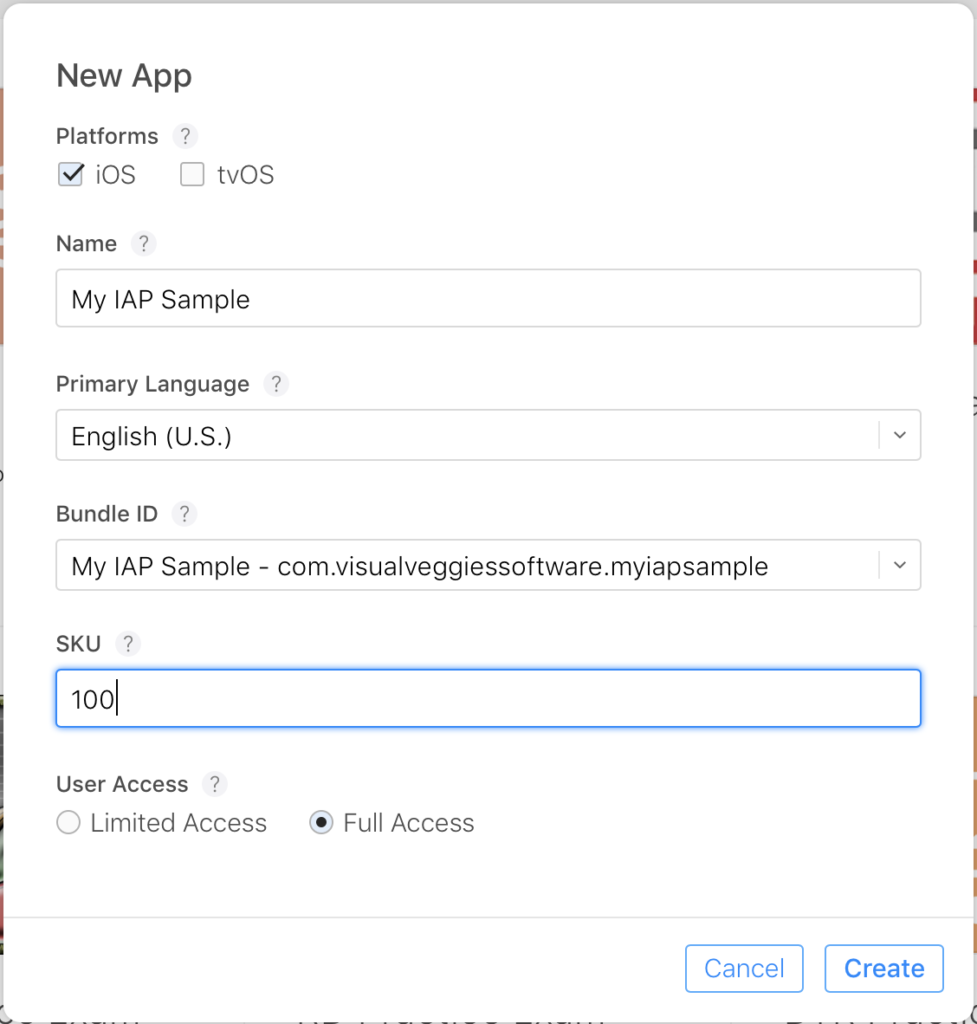
- In the New App box that appears, check the box for iOS.
- Enter a unique name for the app.
- Choose the primary language.
- Choose the Bundle ID created in Apple Developer.
- Enter a SKU number.
- Choose Full Access.
To set up the in-app purchase product select Features at the top, then In-App Purchases on the left. Click the plus sign next to the In-App Purchases and choose which IAP you are using in your app then click Create.
There are 3 options when choosing which IAP is right for your app:
- Consumable: Think of tokens to buy in a game. Once they’re spent, you need to buy more.
- Non-Consumable: A one-time purchase to unlock a feature
- Subscriptions: Auto-renewing or non-renewing
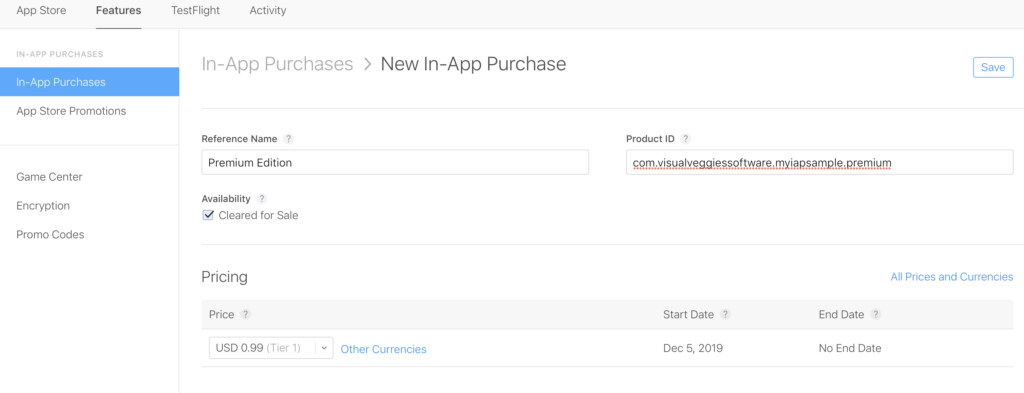
Fill out the necessary data on the following screen:
- Reference Name: This is a name that is not displayed to the user. It is only for your reference.
- Product ID: Enter in the Bundle ID you made in Apple Developer but also include an end tag of the in-app purchase product name. For example, your Product ID might look like com.mycompany.myapp.myinappproduct.
- Check the box for Cleared for Sale (this should be checked by default).
- Choose a pricing tier.
- Scroll down, under App Store Information enter in a Display Name and a Description. These will be shown to the user.
- Scroll down to Review Information. You can include a screenshot of your app now or you can save your IAP product and add in a screenshot later. If you skip adding a screenshot, you will see a message saying Missing Metadata. This message will go away after you add a screenshot. The screenshot needs to be at least 640×920, which is the size of the iPhone 5s. The screenshot I used is a display of my purchase view in the app. Not sure if that is what they expect, but the app and IAP got approved.
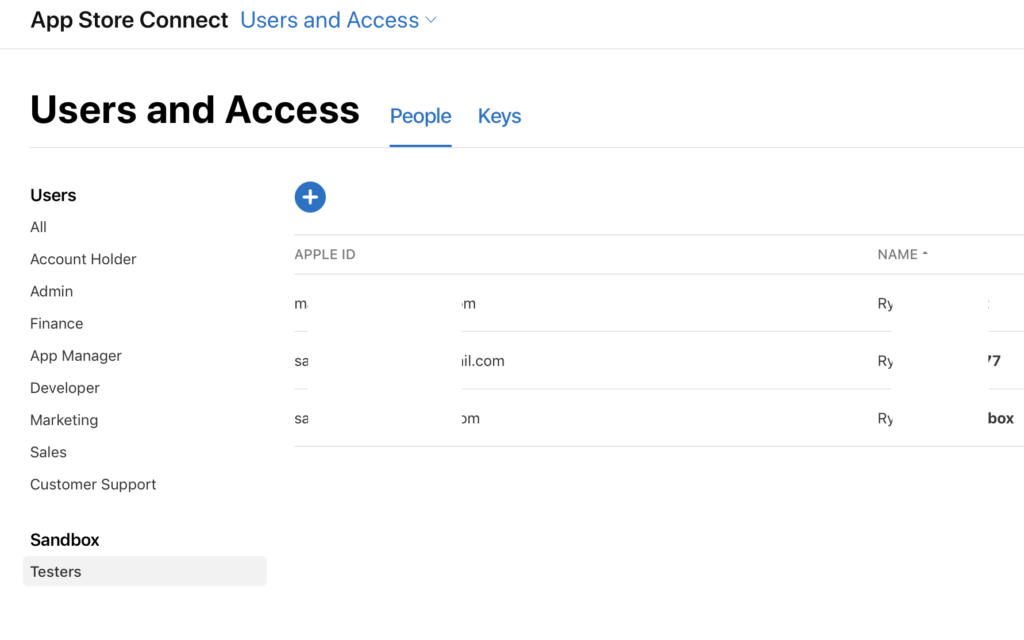
Next set up your sandbox testers. Choose Users and Access from the top drop-down menu then select Testers on the left under Sandbox. Add at least one sandbox user for testing, preferably two or three so you can try a purchase more than once. Your sandbox user accounts cannot be tied to an Apple ID account. Use a personal email address for yourself that is not with Apple or make a new account in Gmail or Yahoo. After you create a sandbox user, you will need to verify the account in the email box you created, so it is best to create the email account first to make sure it hasn’t been taken.
Turn on In-App Purchases Xojo
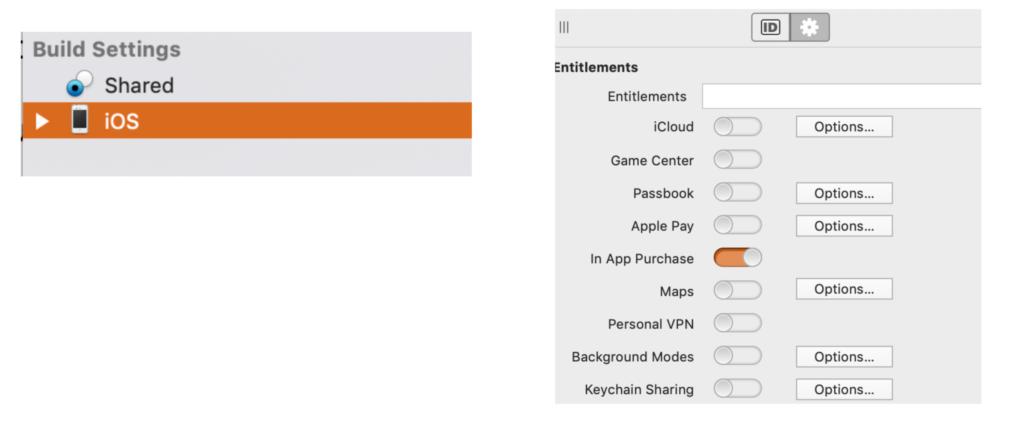
- Under Build Settings in left panel, click iOS.
- Then, in the Inspector, click the Entitlements (gear icon) and move the switch for In-App Purchases to on.
- Include Jason King’s iOSKit folder.
- In my sample project, I have a ModalPurchaseView to handle the purchase/restore pieces. If you want to activate this the same way, add to your project Jeremie Leroy’s iOSExtensions which has the method to call the modal in a neat way. The ModalPurchaseView from the sample project can be copied to your project and used to cover the purchase/restore functions. Be sure to change the pieces in the code that points to your in-app purchase product, such as com.mycompany.myapp.myIAPproduct
- Build your app with all features, then choose which features you want to be included in your premium version. I have a boolean property ActivatePremium in Module1 to be set to true if the premium is purchased.
Testing the In-App Purchase
You won’t be able to test the IAP in Simulator, so don’t even try. Instead, you will need to test on a physical device.
- Build the completed project in Xojo.
- Connect your device to the computer and open Xcode.
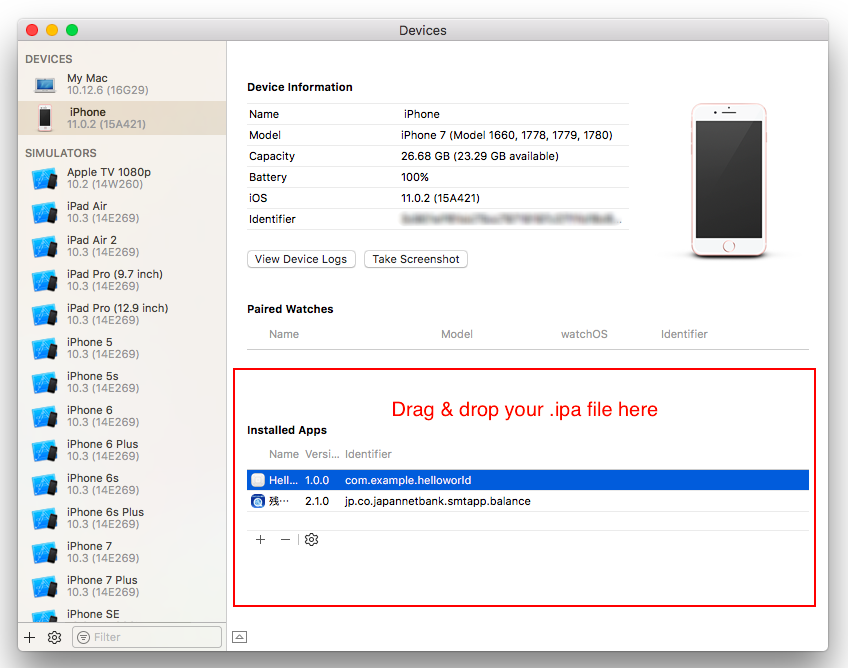
- In Xcode, select in the top menu Window >> Devices and Simulators.
- Drag the app from your Builds folder to the bottom pane of the Devices and Simulators window in Xcode. It’s the one with that looks crossed out.
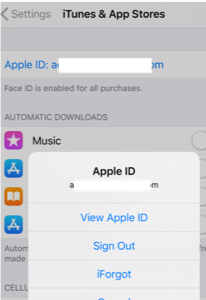
- You will need to sign out of your Apple ID on your device. In the Settings of your device, go into the iTunes & App Store section, click your Apple ID at the top, then click Sign Out.
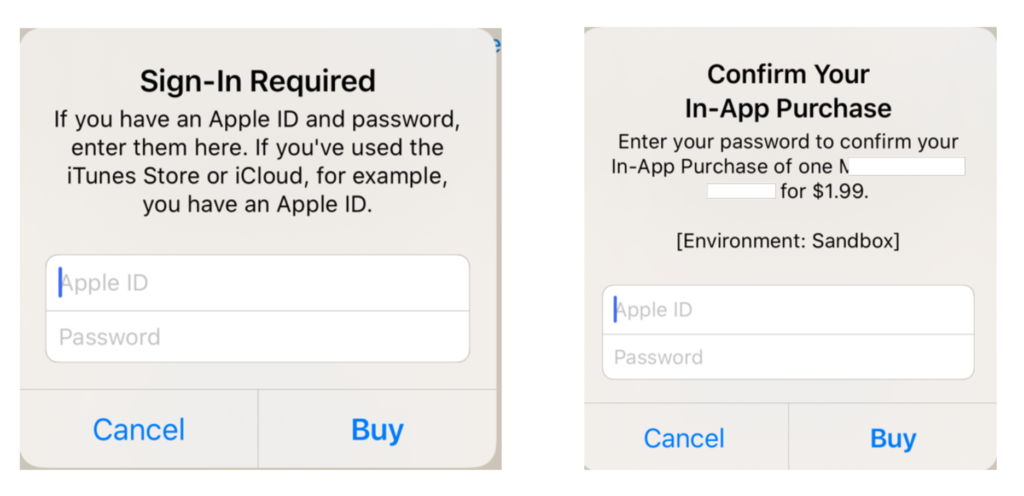
- Open your app and click the Purchase option. You will be asked to sign in. Sign in with your sandbox account you created. After you sign in, you should see a Confirm Purchase [Sandbox Environment] box. Enter in your password and see what happens.
- If you need to test it again, go back into Settings >> iTunes and App Store, scroll to the bottom, and sign out of the sandbox test account. Try with another account.
- You should also test the Restore function of your IAP. It might be best to test this before testing a purchase to make sure you don’t end up getting the app for free without “purchasing”. When testing your Restore after purchasing, you will need to delete the app from the device and add it back through the Xcode method above in steps 2 through 4.
Credit to Jason King for creating iOSKit and to Jeremie Leroy for his personalized help with helping me get my first iOS app with in-app purchases off the ground. I hope you found this tutorial useful. You can download the project here.
Ryan Hartz has been a Xojo user for over 10 years. He is a registered dietitian with no formal education in software development, illustrating that anyone can learn development in Xojo with its ease of use and understandable language. In 2005, Ryan started his company, Visual Veggies Software, which offers software study guides to young nutrition students preparing to become registered dietitians.