
It’s always a good time to learn something new! And maybe you have some free time on your hands now? We know our screen time is up this year, so let’s put that extra screen time to good use and learn a new skill – programming. If you are going to add programming to your skillset, it’s logical to begin with a language that makes it simple to learn the basics of programming. Let me show you a learning path you can follow over 14 days that is aimed at giving you a confident and capable to start to programming.
Day 1: Wet your Feet!
Download Xojo to your platform of choice, Mac, Windows or Linux. Xojo is free for learning and development, you can write, run and debug your apps all without a license. Everyday in the 14 Day Guide can be done without a Xojo license. So go ahead and download Xojo to get started!
Tip: You can find the Xojo System Requirements for your operating system (OS) of choice here.
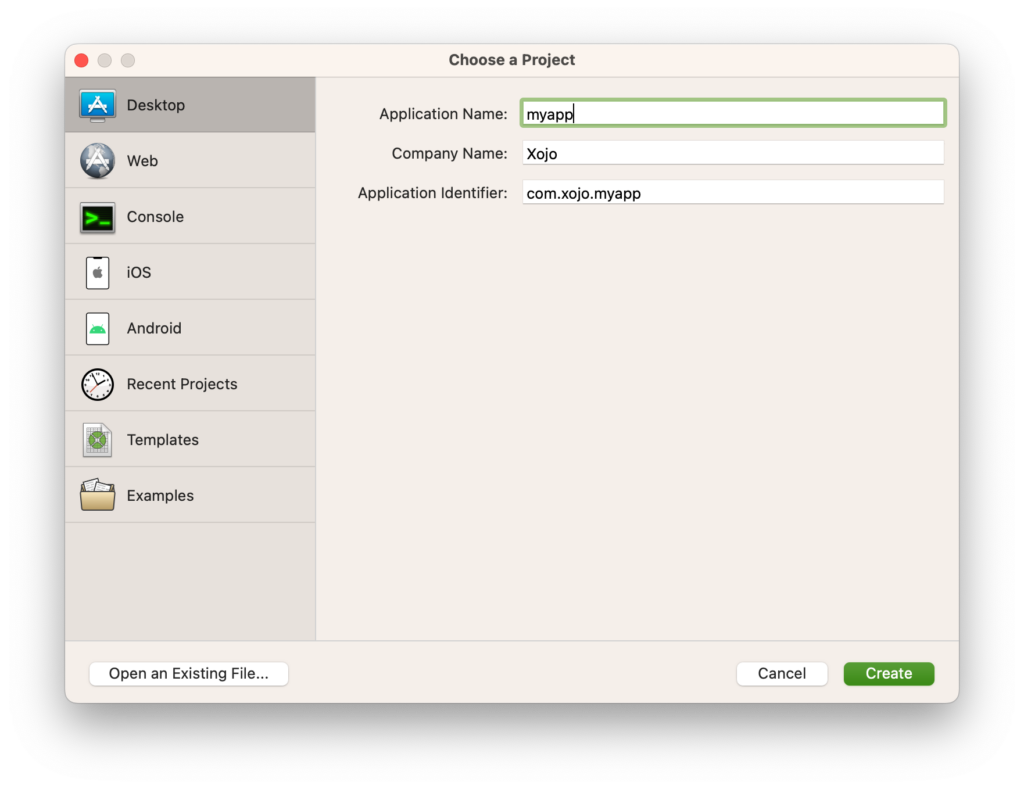
Once downloaded, launch the Xojo IDE (Independent Development Environment, i.e. the Xojo app) and you will be presented with a window pointing you to many of Xojo’s resources. I’ll show you where to start this time, so go ahead and click Start Using Xojo in the bottom left corner to get to the Project Chooser.
If you’re interested in developing Desktop apps, point your browser to the Xojo Desktop QuickStart and follow the steps to build a simple desktop application with Xojo in 30 minutes or less. You can do the same both for Web and iOS projects if you are interested in starting there. You can find resources in other languages in the International section of the Xojo Dev Center.
Video: If you prefer to video, there are videos you can listen to as your follow the QuickStarts on Xojo’s YouTube channel.
The QuickStarts will introduce you to main concepts and have you writing your first lines of code in Xojo! If you have extra time today, try the Tutorials next. They are just a bit more in depth than the QuickStart and will likely take you less than an hour to complete. The tutorials focus on further familiarizing you with the main areas in Xojo like the Editors and how to layout and interact with some of the native controls.
Tip: After completing these, try to reproduce the projects without relying on the documentation. Doing is a great way to learn, so try to do your own simple project from scratch.
Day 2: Getting Programming Basics
Whether you know other programming languages or if Xojo is your first language to learn, understanding the fundamentals of programming will give you a leg up. For day 2, I recommend that you download the Introduction to Programming with Xojo textbook (available in PDF and iBooks formats) and work along with the first 2 chapters.
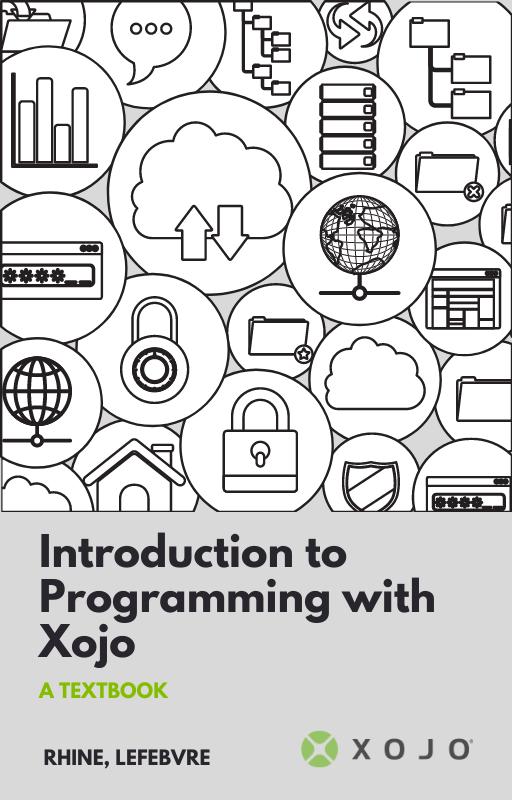
This book will introduce you to more of the Xojo language and walk you through writing projects complete with code snippets that will help you grasp the basic concepts behind: variables, programming structures like loops, functions and parameters, plus you’ll get your first contact with the Xojo Debugger (the Debugger allows you to find and fix bugs in your app).
Tip: Don’t get discouraged if you don’t know a word or concept. You are learning a new language after all. Take a moment to Google it, yep, Google it, programmers Google things all the time or search the Xojo Documentation.
It will take some time to get through the content and all the examples in the textbook. The important thing is not how much you advance in one day, but to understand and retain what you learned! Don’t get down if you feel like you still don’t understand what the code does; it’s only day 2!
Day 3: Find Out More
On Day 3, continue with the Introduction to Programming with Xojo textbook. Try and get through chapter 5 today. Perhaps some broader aspects of coding are coming into focus. While going through the chapters of the textbook, you might have questions or want more information.
As with the Introduction to Programming with Xojo book, you will not read the Documentation in one day! But it will help you as you develop your own apps that put into practice what you have learned from the QuickStart, Tutorials and textbook.
Watch The Video: Watch the first video in our Programming with Xojo Course. It’s a on-going series of videos focused on taking you from zero coding knowledge to writing your own apps. And it’s just another way you can learn how to code with Xojo.
Day 4: Get Object-Oriented!
There are many Object-Oriented programming languages and OOP languages offer many advantages. As you have hopefully already learned, the Xojo language is OOP and that is one of the reasons it can be easy to grasp and start using.
Tip: Object-Oriented programming (OOP) is a style of programming based on “objects”, which are data structures that contain data (properties) and code (methods). These data structures are called “classes”. Classes are the fundamental building blocks of all Xojo applications.
To speed up that way of thinking, today I recommend you that you watch the Understanding Object-Oriented Programming with Xojo video. It’s 1 hour long so you should be able to also get through chapter 9 of the textbook 🙂
You want to start thinking and writing code so you can reuse it and evolve it without breaking what you have already done. Here is a good (and short!) tutorial that puts this into practice. It will teach you how to do one of the first things most developers want to do – modify the behavior of an existing control so it fits a specific need or create your own controls.
Day 5: Look at the Examples!
At this point you should feel pretty comfortable using Xojo and writing simple apps using the Xojo language.
There are 400 project examples included with Xojo. If you are looking for an example about how to do something specific, these are a great starting point. Use the example code “as-is” then modify the code to adapt it to your particular needs or simply to learn a particular technique.
Tip: Not quite comfortable yet? Take an extra day and do a Tutorial if you didn’t already, or try the Programming with Xojo Video Course.
Day 6: Databases
Modern apps make use of a wide variety of technologies and one of the most common you will hear about is databases. For a lot of projects, databases are a must. A database is “an organized collection of data generally stored and accessed electronically from a computer system.” Xojo comes bundled with the SQLite database and supports PostgreSQL, MySQL, Microsoft SQL Server and Oracle databases. Plus, you can use ODBC to connect to other databases such as Access, FoxPro, FileMaker, Firebird and even IBM iSeries.
The Xojo framework is large enough so you can find the classes you need, ready to use. Since Xojo comes bundled with SQLite, that’s a great place to start. Today, I recommend you do the “SQLite Basics” and “SQLiteDatabase and iOSSQLiteDatabase for Beginners” lessons that will teach you from the ground up, no previous experience working with databases is required.
Using Other Databases: In addition, there are videos in the Xojo Database playlist, topics range from designing a database, to the creation of a database based application, PostgreSQL, ODBC, or even creating REST web services in order to work with remote databases from mobile devices.
Day 7: Create Your Own Project
Doing is an excellent way to learn so today let’s start to create your own project from scratch. Start simple, something basic that can grow with you as a developer – a notes app, a shopping list, a time tracker…
Today is not about reproducing examples, but rather putting together all the pieces you’ve learned so far to make a new app. Sure you’ll may have questions about how to do something, so try using the multiple help features in the Xojo IDE. For example:
- Autocompletion: Start typing and the IDE will help you to autocomplete the name of a function, method, class or object instance. You don’t have to remember every class or object property, press the tab key and a popup menu will list them for you.
- Controls: Remember that the lower area of the Library panel offers information about the purpose of every user interface (UI) control, and that they are grouped by functionality; you only need to put the mouse pointer over to get a description about what they do.
- Event Handlers: Not sure about the Event Handler you need to implement in a control so it reacts to the user’s actions as you expect? The Add Handler panel is very descriptive about the mission of every supported Event for a particular control. Just go through them and read the provided information.
- Contextual help is everywhere: put the mouse pointer over the name of a function and you’ll see the expected parameters and their types.
- Global Help: Of course you can access the global help to get to the documentation for all the available Classes, concepts, datatype and language keywords among other topics. In addition, the documentation is full of example code snippets you can simply copy and paste in the Code Editor to implement (probably with some modifications to adapt it to your app).
Day 8: Get Stuck Unstuck
How’s your first project going? Don’t be down if it’s rough. It’s inevitable that you will reach a point when the information available is not enough to solve a particular problem. When that happens, I recommend joining the Xojo Forum and post your question there. Don’t be shy, the Xojo community is one of the best developer groups around. It’s likely you’re not the first one facing a particular problem and you may find your question and the answer already in the Forum! With the right search the solution could be in front of you in a few seconds!
Also check out this blog post on various ways to Get Unstuck.
Pro Tip: Ask for help after you tried everything you already know and after looking for the answer in the Xojo Dev Center! People appreciate that you have tried to figure it out on your own first and it helps to let them know what you have already tried that didn’t work.
Day 9: Be Cross-Platform
Remember that Xojo is a cross-platform development tool. That means that you can develop for any platform from your preferred development platform, Mac, Windows or Linux.
Note: A Mac is required to compile your apps for macOS. You can develop your desktop app on a Windows or Linux computer but ultimately, testing and compiling for macOS must be done from a Mac. A Mac is required for developing and compiling an iOS application.
The ability to write one app, with one set of code, and deploy it for 3 operating systems is pretty excellent! Of course, you will likely need to do some amount of testing (and debugging) on each OS. There are several solutions that let you create virtual machines running on other operating systems. For example, you can choose between Parallels, VMware Fusion or VirtualBox on macOS. Any of these will let you install Windows and/or Linux on your Mac computer.
Creating a cross-platform app also means that you will need to make sure that the user interface behaves as expected on each different operating system. At some point, your app might need to change slightly for a particular operating system. For example, on Windows you might want to use the Registry, but on Mac you might want to use a plist. You can handle these special cases using conditional compilation. You can also use Target Attributes in the Attributes section of the Inspector Panel for items like classes, methods or properties, to decide what should be compiled for a particular target.
If you haven’t already try and finish the textbook today.
Day 10: Make the Xojo IDE Fit You
As you spend more time using Xojo, you’ll feel the need to change some preferences so they best fit the way you use it. Take a deep look at the Preference panels; you can chose your code font of choice, the keyboard shortcuts you prefer to use, the Navigator behavior, you can even choose your theme for the IDE.

These preferences, among others, will let you feel more comfortable and even code faster! For example, what if you prefer to have the Inspector Panel and Library in their own floating panels? Would that make a difference for you? And what if you edit the keyboard shortcuts so they fit better with the layout of your keyboard?
More From the Xojo Blog: Menu Shortcut Editor and Xojo Navigator Tip- Show or Hide
Day 11: Advanced Topics
As you move on in your 14 day learning path, let’s focus on more advanced topics for the development of more complex products. For example, XojoScript lets you execute new Xojo code dynamically in an already compiled application.
From the code and language sides, you should definitely learn about Design Patterns. The Xojo Blog has some great introductory posts about the Singleton and Observer Design Patterns, among others.
Take a look at Modules, Interfaces, Delegates, Enumerations, Declares and the related Xojo data types that let you access external libraries from your code. Is also a good point in time to explore differences like Internal or External project Items, adding your own properties to the Inspector Panel, and the use of Git, SVN or other source control solutions.
In addition to debugging your apps, Xojo includes a feature that will Analyze and Profile the execution of your project, letting you know where your app bottlenecks are (if any) so you can put your efforts on optimizing that portions of code.
From the Xojo Blog: The Xojo Blog has a lot of posts that offer examples on more advanced concepts and topics.
Day 12: Let’s Review
You’ve learned a lot in the last 12 days, so let’s take a breath today. Take some time to review, maybe look up in the Documentation that question you were thinking about in the shower yesterday. Or watch some of the videos in the Programming with Xojo Video Course. Take today to reinforce and refine the skills you have acquired. And don’t forget to pat yourself on the back for a job well done!
Day 13: Refactorization
Compare the code you wrote the first days with the one you’re writing now with all the acquired knowledge. I bet you’ll find something that can be done better. Do it! Don’t hesitate to rewrite your code and optimize it so it runs faster, better and is more reusable, making it easier to maintain and evolve.
This is known as refactorization, aka spit and polish, and there are many books focused on the topic. Xojo includes some options that will help you to do that, mostly from the contextual menu, every time you select an item in the Navigator a block of code or even using the Search and Replace panel.
Day 14: Keep Learning!
Don’t stop here, coding is a journey! As you advance writing code, you’ll feel the need to learn new things, and there are tons of resources at your disposal!
A good place to visit is the Community Portal and also the Open Source section of the Xojo Dev Center. Here you’ll find a number of ready-to-use libraries from other reputed Xojo developers, ready to download, inspect and, thus, to learn from!
We hope you have enjoyed our 14 day coding adventure. Tweet to us @xojo and let us know how it’s going and if you have any questions, reach out to us at hello@xojo.com.