
There is something that is even better than using Cell Renderers from third parties- building them yourself. In this second part, you will learn how to create your very own controls using Xojo’s WebSDK.
In case you missed it, the previous article explains in detail what Cell Renderers are and how to use them. Anything you can imagine can be done inside your WebListView control cells. In order to do so, be prepared to write some JavaScript code. Today we will create a very basic example, a Custom Cell Renderer capable of showing Bootstrap Badges.
If we think about it, in a nutshell, what we want to achieve is to inject this HTML (coming directly from Bootstrap’s docs) into our cells:
<span class="badge badge-pill badge-primary">Primary</span>
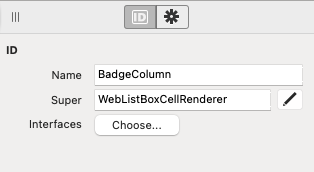
The first step is to create a new class in our Xojo project. Let’s call it BadgeColumn, for example. It will be a child of WebListboxCellRenderer Superclass.
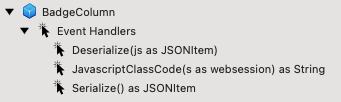
Extending WebListBoxCellRenderer will allow our class to listen to some events that Xojo will emit, used to render our badges inside the table. There are three: Deserialize, JavascriptClassCode and Serialize.
We will ignore all of them for the moment, except JavascriptClassCode. But it is important to know that Serialize must return an instance of a JSONItem class, or you will get a NilObjectException, as soon as you add a new row using this renderer.
Let’s add this code to the Serialize event, we will come back to this event later:
Return New JSONItem
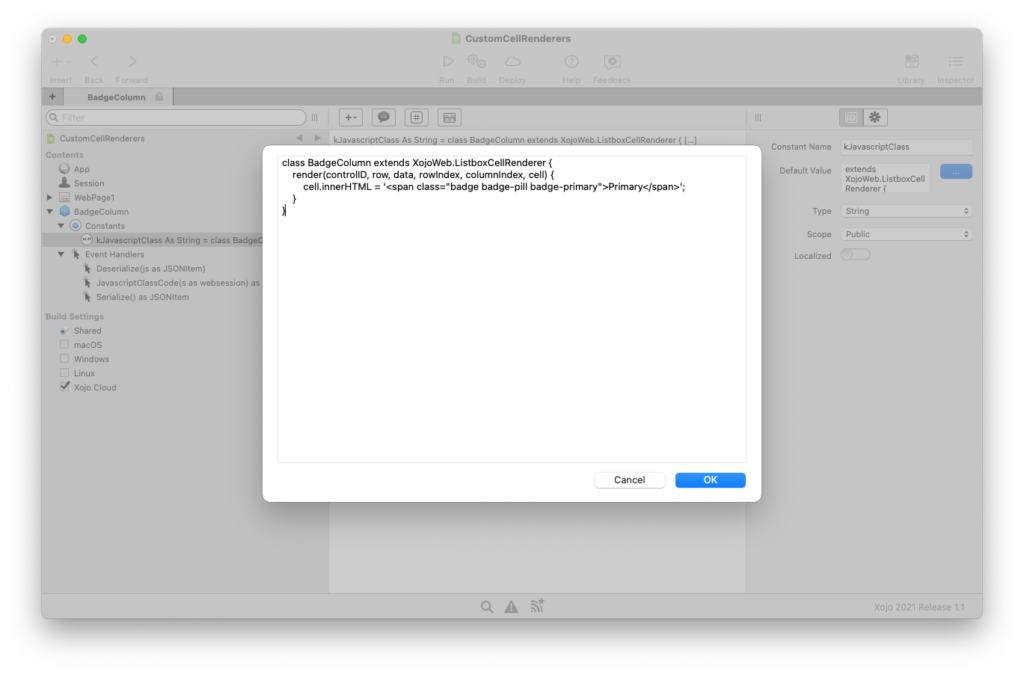
JavascriptClassCode event will be executed only once, no matter the amount of instances of our renderers we have. It must return a String containing a JavaScript class that extends XojoWeb.ListboxCellRenderer, containing a render() method inside (remember that JavaScript is case-sensitive).
In render(), we will simply replace the contents of the cell DOM element with the badge HTML code snippet provided by the Bootstrap docs that we just saw.
In order to keep it as readable as possible, what I prefer to do is to create a String Constant called “kJavascriptClass” (the name is arbitrary, use anything you want), with the JavaScript code inside:
class BadgeColumn extends XojoWeb.ListboxCellRenderer {
    render(controlID, row, data, rowIndex, columnIndex, cell) {
        cell.innerHTML = '<span class="badge badge-pill badge-primary">Primary</span>';
    }
}
Having our raw JavaScript as a String constant, our JavascriptClassCode event can just return it:
Return kJavascriptClass
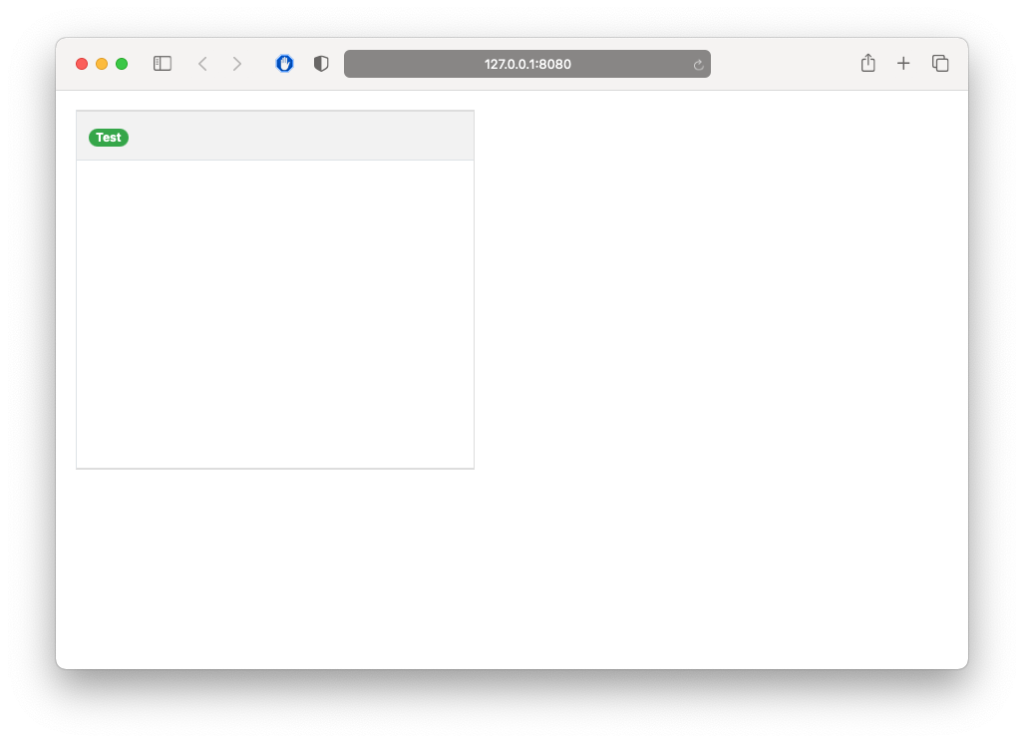
Congratulations! That’s your first Cell Renderer. It won’t do a lot of things, but that’s the basic plumbing needed to start creating lots of them. With this new class, following the steps you’ve learned on the first part of this tutorial, you will be able to use it in your tables. Drop a WebListView into your WebPage and add a handler for the Opening event. Then add this code:
Me.AddRow("Hello, World!")
Me.CellValueAt(0, 0) = New BadgeColumn
It will add a row to the control, and then it will make use of our new Cell Renderer to replace the first cell of the first row. If you run your project, you will see a website that looks like the following screenshot:
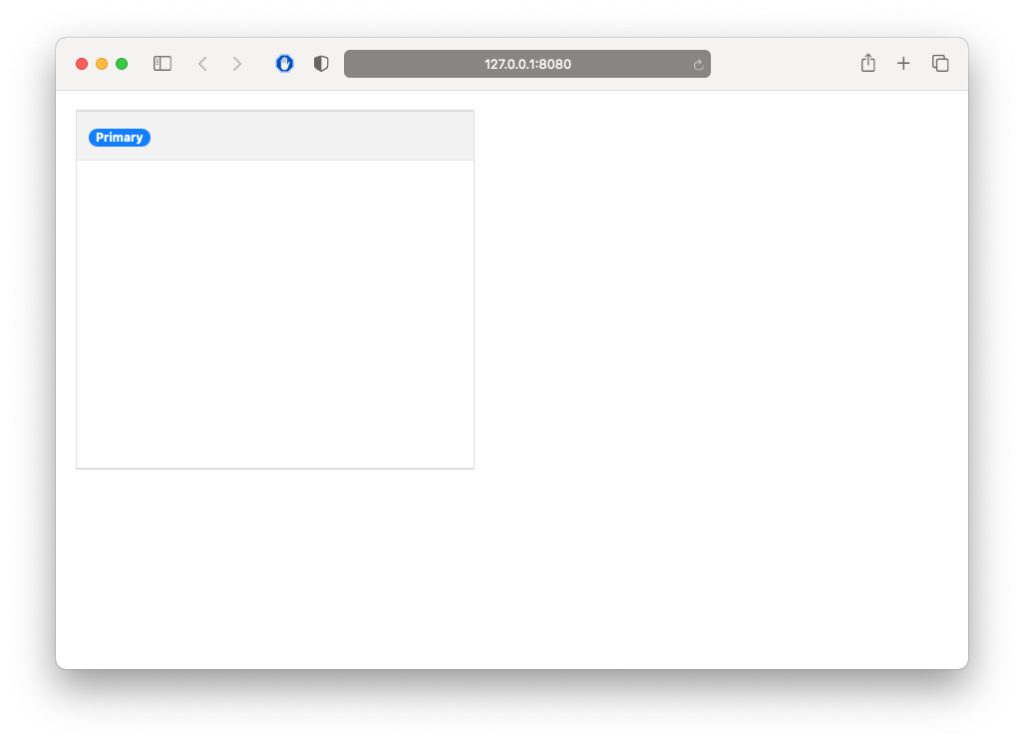
While promising, you will notice the badge says “Primary” instead of the “Hello, World!” message we want. Looking at the render() method, within our Javascript, you will find “data” as one of the parameters it receives. It is a JSON object that comes from (I’m sure you’ve guessed it already) the Serialize event we saw a few paragraphs ago.
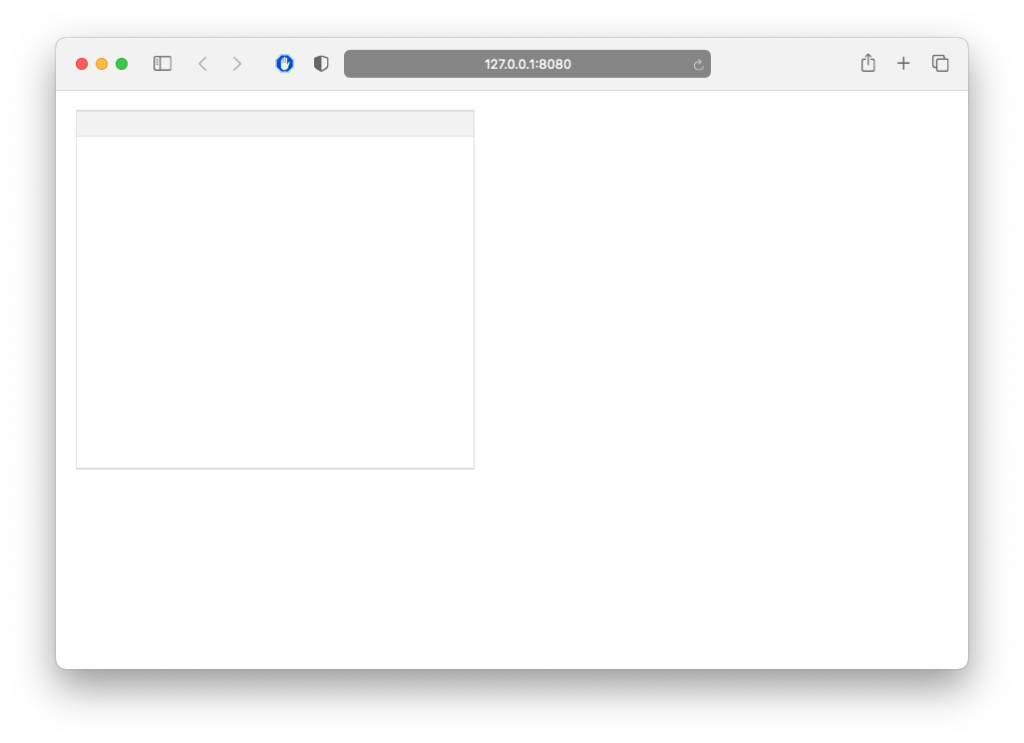
Edit the Serialize event handler. This time, instead of returning an empty JSONItem, we will fill it with some data.
Var json As New JSONItem
json.Value("content") = "Test"
json.Value("appearance") = "success"
Return json
Next, update your kJavascriptClass constant with the following snippet of code. Notice we are making use of the values we have in the data parameter, coming as a Javascript object:
class BadgeColumn extends XojoWeb.ListboxCellRenderer {
    render(controlID, row, data, rowIndex, columnIndex, cell) {
        cell.innerHTML = '<span class="badge badge-pill badge-' + data.appearance + '">' + data.content + '</span>';
    }
}
Running the web application again will make you smile a bit:
Nearly there! Now that we know how to communicate between Xojo and the cell that is running in our browser, we just need to find a way to create instances of these BadgeColumn classes, using real content.
My preference is to create a Constructor with the parameters I want, and some class properties. This is completely up to you.
Create a few properties for our BadgeColumn class:
- Content As String
- Appearance As String
Then a Constructor with the following parameters:
- content As String
- appearance As String
Inside our new Constructor, you will need to call its Superclass Constructor, wiring the internal properties of the instance with the parameters, as following:
Super.Constructor
Self.Content = content
Self.Appearance = appearance
The Serialize event handler can be updated now to make use of our new properties, instead hardcoded data:
Var json As New JSONItem
json.Value("content") = Content
json.Value("appearance") = Appearance
Return json
Finally, we need to update the Opening event we used in our ListBox. Just remember thtat BadgeColumn now needs to be instantiated with some parameters:
Me.AddRow("")
Me.CellValueAt(0, 0) = New BadgeColumn("Hello, World!", "warning")
Run the application again and see what happens:
Whoops! That doesn’t looks right, does it? We are missing one important step.
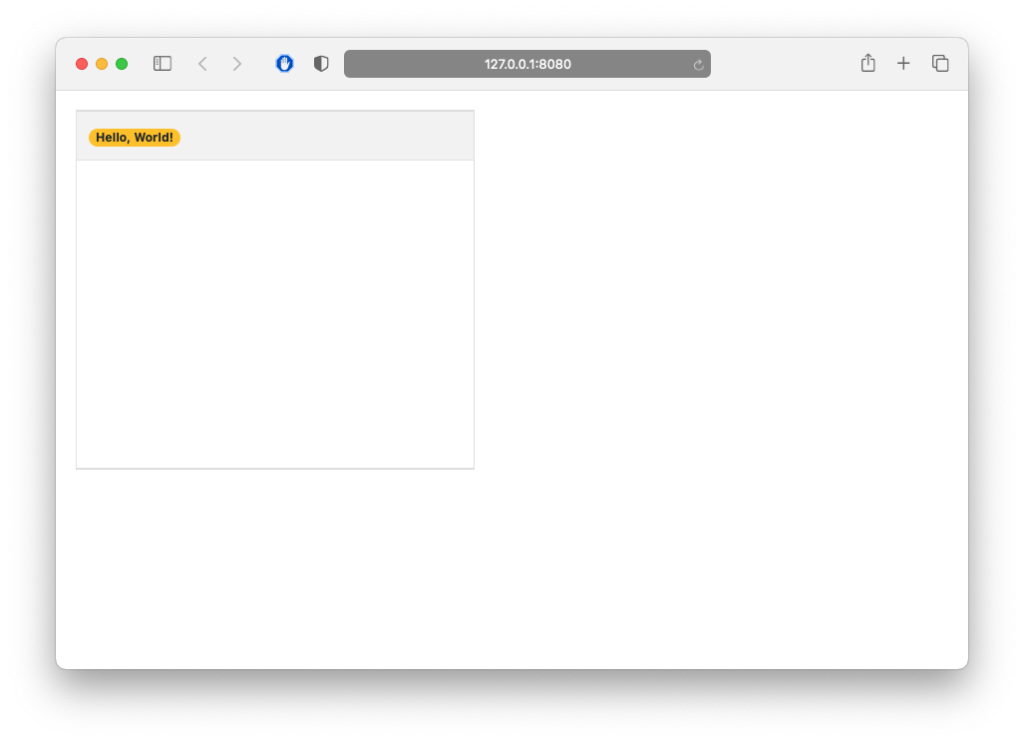
The communication between Xojo and the control that lives inside JavaScript is bidirectional. This way, “Data” can be modified while running in your browser, and it will be sent back to Xojo. In order to fix our issue, we just have to take care of the Deserialize event handler we’ve completely ignored until now, with the following code:
Content = js.Value("content")
Appearance = js.Value("appearance")
This will recreate our instance using fresh data coming from JavaScript. Run the project again and voilà!, your table looks perfect now:
This is not the end, but the beginning of your journey. With this little recipe you already have a lot of knowledge and hours of fun ahead, building your Cell Renderers. Once you feel comfortable, the next step I recommend is to learn how to emit custom cell actions from your JavaScript that you can handle from the CustomCellAction event of your WebListBox controls. In order to see how this works, check some of the examples coming with Xojo, under Web > WebSDK > WebListBox Cell Renderers. The open source repository we saw in the previous article, xojo-web-cell-renderers, also makes use of this event in some of the included Cell Renderers.
Conclusion
While we had to get our hands dirty with JavaScript, it’s really fun to create Cell Renderers for our Xojo projects. They are super easy to share and reuse, and will make your tables look so much better. The source code for this example project can be downloaded here.
I hope you find this tutorial useful, if you have any question, please feel free to ask them in the forum.
Ricardo Cruz helps companies with large websites to optimise and secure them, making them reliable and ensuring they are always online. He uses Xojo for building internal tools, but he is starting to explore the desktop software market, with apps like Today and Beauty Shot. As a hobby, during his free time, Ricardo has been teaching Scuba Diving for more than 10 years.