
Starting with Xojo 2022r3 it is possible to create and add tables to PDF documents using Xojo’s PDFTable class and the PDFTableDataSource class interface. Among other things, your code will not need to be in charge of calculating rows sizes in order to decide if it needed to add a new page or not, or even complex calculations in order to draw the content on every cell of every row/column pair in the table.
You can download the example project from this link.
Features of Tables in PDFDocument
The main features available with tables in PDFDocument are:
- PDFTable / PDFTableDataSource is compatible with Desktop, Web, Console and RaspberryPi projects
- Variable height rows
- Automatically add new pages to the PDF
- The ability to repeat (or not) the table header at the start of every new page added
In order to achieve this, the PDFTable class works side by side with the PDFTableDataSource class interface. This class interface declares the methods that will be called by a given PDFTable instance in order to generate the table on the fly.
- PDFTableDataSource
Because it is a class interface, you will be able to add it to any window/web page or any class/subclass you create, so it can work as the provider of the data in the drawing of a given PDF table.
The PDFTableDataSource has these five methods:
- AddNewRow(rowCount As Integer) As Boolean– The rowCount parameter contains the value of the rows already added to the table. Returning True from this method will add a new row to the table; otherwise it will end the creation of the associated table.
- HeaderHeight As Double– In the implementation of this method you will set the height value used in order to draw the table header.
- PaintCell(g As Graphics, row As Integer, column As Integer)– This is the method called by the PDFTable instance in order to draw the cell for the row/column pair stored in the associated parameters. The method receives its own graphic context in the ‘g’ variable, so you can use any of the supported methods and properties of the Graphic class to draw the contents in the table cell.
- PaintHeaderContent(g As Graphics, column As Integer)– This is the method called by the PDFTable instance every time it needs to draw the header of the table. As you can see, it receives as parameters the column number and its own graphic context.
- RowHeight As Double– This is the method called by the PDFTable instance so your code can set the height for the current row.
PDFTable
This is a really simple class exposing a total of four properties:
- ColumnCount As Integer– This is the property that sets the number of columns for the table to be drawn.
- ColumnWidths As String– This is the property that sets as a string the width of every column in the table, separated by the comma character.
- DataSource As PDFTableDataSource– This is the property that sets the object acting as the data source object for the table. Remember that such an object needs to implement the methods declared in the PDFTableDataSource class interface.
- HasRepeatingHeader As Boolean– Use this property to instruct the PDFTable instance if it needs to repeat the header on every new page that is added to the document as the table is generated.
For example, the following fragment of code will create a table with a total of three columns that have the same size. The table will be drawn horizontally centered in the page. The object acting as the data source for the table will be the same where this snippet of code has been added, that is: ‘Self’:
Var d As New PDFDocument

Var tTable As New PDFTable
tTable.ColumnCount = 3
tTable.ColumnWidths = "150,150,150"
tTable.DataSource = Self
tTable.HasRepeatingHeader = True
The way to add a PDFTable instance to the current page of the PDF document is through the AddTable(table As PDFTable, x As Double, y As Double) method; for example:
Var x As Double = d.PageWidth/2 - 450/2

d.addTable(tTable,x,20)
PDFTable in Practice
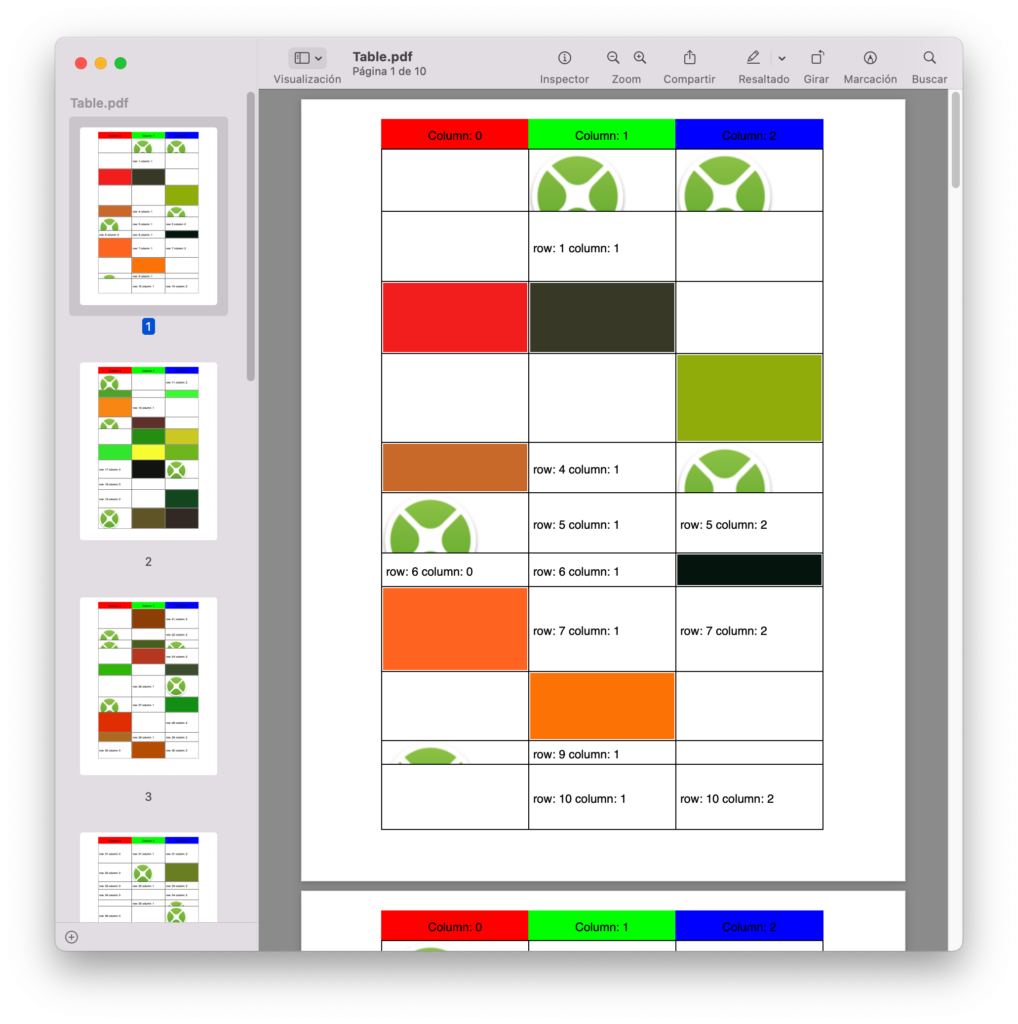
In this example, you can see how to create a PDF document with a table added to it (horizontally centered on the pages). This table will have three columns equally sized and a total of 100 rows with a variable —random— height—, and giving the option to the user so they can choose to repeat the table header on every new page added to the document or not.
The cell contents of the table will be chosen randomly, varying between filling the cell with a random color, drawing text with the row and column numbers for the cell, rendering an image that has been added to the project, or keeping the cell empty.
Create a new Desktop project. With the Window1 selected in the Navigator, click on the “Choose…” button found in the associated Inspector Panel under the Interface section. This action will open a new window displaying all the available Class Interfaces. Select the PDFTableDataSource entry and confirm the selection click the Ok button.
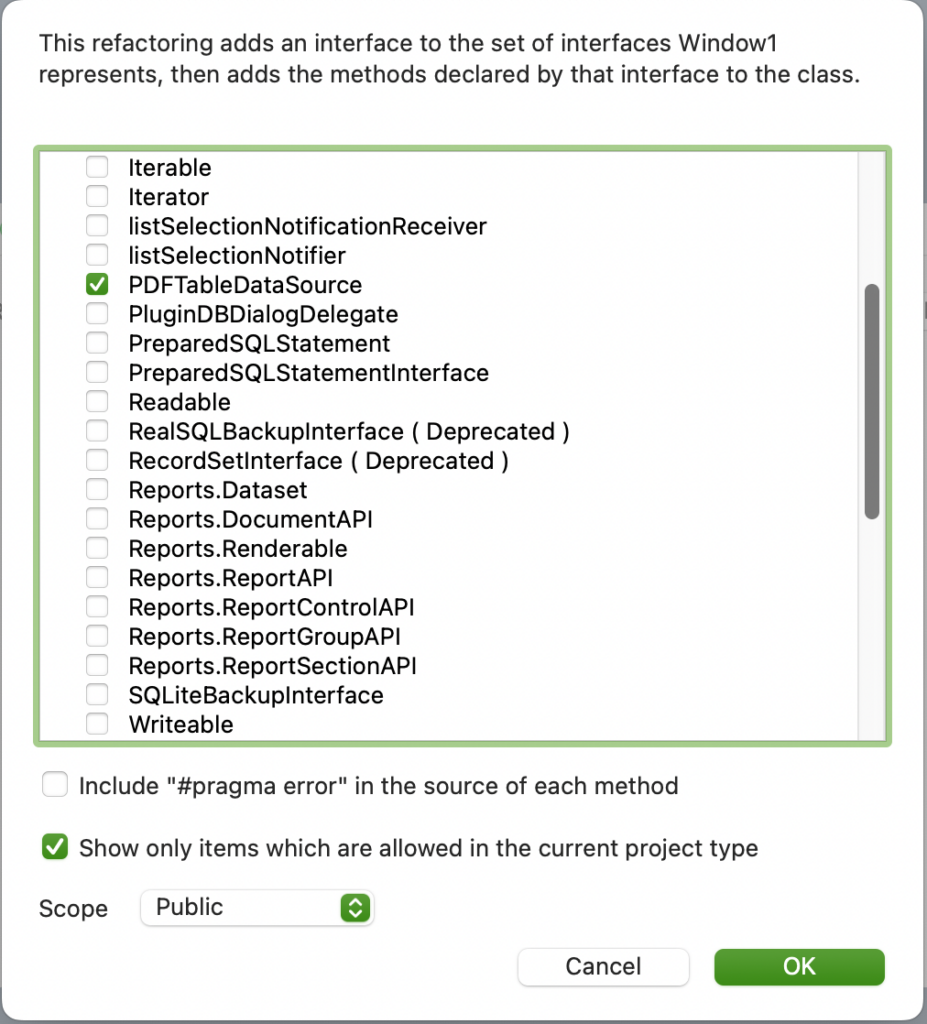
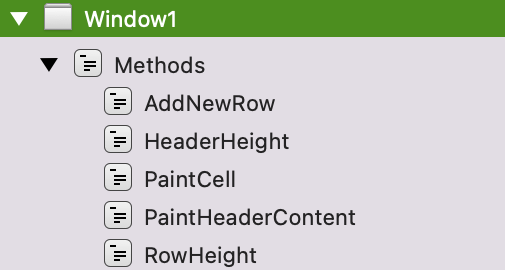
As result, the methods declared by the PDFTableDataSource are now added to the Window1 item.
Grab a CheckBox control from the Library and drop it in the upper-left corner of the window in the Layout Editor. Use the associated Inspector Panel to change the following values:
- Name: RepeatHeaderCB
- Visual State: Checked
In order to complete this basic user interface, drag a Button control from the Library and drop it in the upper-right corner of the window in the Layout Editor. With Button1 selected in the Navigator, choose the Add to “Button1” > Event Handler… option from the contextual menu. Next, select the Pressed event from the resulting window and confirm the selection so it is added to the Window1 object.
With the Pressed event selected in the Navigator, add the following fragment of code in the associated Code Editor:
Var d As New PDFDocument

Var tTable As New PDFTable
tTable.ColumnCount = 3
tTable.ColumnWidths = "150,150,150"
tTable.DataSource = Self
tTable.HasRepeatingHeader = RepeatHeaderCB.Value

Var x As Double = d.PageWidth/2 - 450/2

d.addTable(tTable,x,20)

d.Save(SpecialFolder.Desktop.Child("Table.pdf"))
Drop any image you want to use from your computer drive into the Xojo’s IDE Navigator. Our example uses an image named “XojoLogo100”. When adding your own image, you can opt to rename it to the name name used in the code of this example, or changing all the references where “XojoLogo100” is referenced to the name of your image.
Now it is time to implement the code in every one of the five methods required by the PDFTableDataSource class interface.
In the AddNewRow method:
Return rowCount < 100 // Our example table has a total of 100 rows.In the HeaderHeight method:
Return 30 // This is the height for the cells of the header in the table.In the PaintCell method:
Var rd As New Random

Var option As Integer = rd.InRange(1,4)

Select Case option

Case 1

  Var s As String = "row: " + row.ToString + " column: " + Column.ToString
  Var h As Double = g.Height/2 + g.TextHeight/2
  g.DrawText s,5,h

Case 2

  g.DrawPicture(XojoLogo100,0,0)

Case 3

  g.DrawingColor = Color.RGB(rd.InRange(0,255), rd.InRange(0,255), rd.InRange(0,55))
  g.FillRectangle(2,2,g.Width-4,g.Height-4)

Case 4

 // Empty cell
End Select

g.DrawingColor = Color.Black
g.DrawRectangle 0,0, g.Width,g.Height
And this is the code we will use in order to draw the content of the table Header cells in the PaintHeaderContent:
Var tRandom As New Random

Var c As Color

Select Case Column
Case 0
  c = color.Red
Case 1
  c = Color.Green
Case 2
  c = Color.Blue
End Select

g.DrawingColor = c
g.FillRectangle 0,0,g.Width,g.Height

Var s As String = "Column: " + Column.ToString

Var x, y As Double
x = (g.Width/2) - (g.TextWidth(s)/2)
y = (g.Height/2) + (g.TextHeight/2)

g.DrawingColor = color.Black
g.DrawText s,x, y
Now add the code responsible for setting the height of every new row added to the table in the RowHeight method. As you can see, this value is a random value between 25 and 100 points:
Var rd As New Random

return rd.InRange(25,100)
Running the App
Run the app, click on the button and you will see how a new PDF document named “Table.pdf” is created in your computer desktop. The number of pages of the PDF document may vary because the height of the table rows vary on every iteration.
This time, unselect the checkbox and click the button to create the PDF document again. Now, the table header is only rendered in the first page of the document.
Javier Menendez is an engineer at Xojo and has been using Xojo since 1998. He lives in Castellón, Spain and hosts regular Xojo hangouts en español. Ask Javier questions on Twitter at @XojoES or on the Xojo Forum.