
In order to test the Android apps you create in Xojo, you either need to have an actual Android device (Xojo supports on-device testing/debugging) or you need to set up an Android Emulator in Android Studio. Read on or jump over to Xojo YouTube Channel to watch this process in our Creating an Android Emulator video.
- If you haven’t already downloaded and installed Android Studio, do that now.
- Launch Android Studio.
- If you have already created a project in Android Studio, you can open that project. Otherwise, click the New Project button.
- In the dialog box that is displayed, choose the default project type.
- Click the Next button then click the Finish button.
- Once you have a project open, choose Tools > Device Manager. The Device Manager pane appears on the right side of the project window.
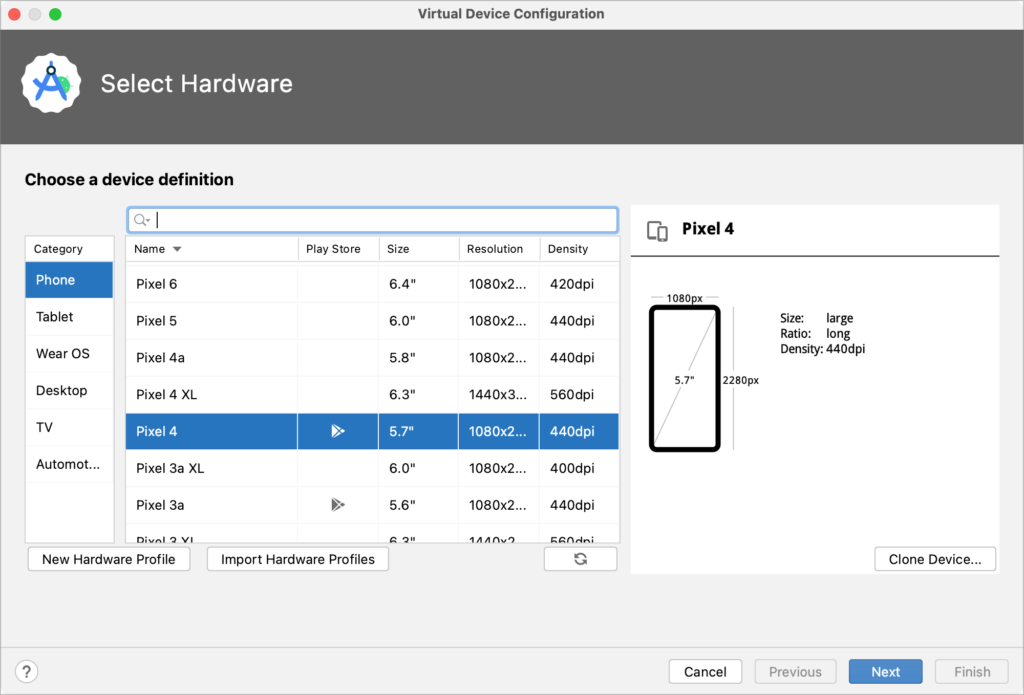
- Click on the Create Device button. The Virtual Device Configuration dialog box appears.
- Choose the category for the type of emulator you need. Phone is chosen by default.
- Scroll through the list of devices to find one that suits you. We recommend choosing one that has the Google Play Store icon in the Play Store column.
- Click the Next button.
- On the System Image page the appropriate system image for the device you selected should be automatically selected for you. Just make sure the version of Android is at least the minimum version supported by Xojo.
- Click the Next button.
- On the final page you can rename the device if you’d like. If you’re going to be creating a lot of Android apps, consider increasing the storage in your emulator by clicking the Show Advanced Settings button and then scrolling the lefthand pane down a bit until you see the Internal Storage field. It defaults to 2048MB so you might want to increase that a bit.
- Click the Finish button. Your emulator appears in the Device Manager pane.
- Quit Android Studio and go to Xojo. Android Studio cannot be running while you use emulators in Xojo.
Now you’re ready to use the emulator you created.
In Xojo, open an Android project, in the Navigator click on Android under Build Settings and you’ll see the Android Debugging section. If you have only created one emulator, it will be selected by default. If you’ve created several, they will all be listed.
The first time you use a new emulator it takes Android Studio it takes a bit longer than normal for it to launch. These emulators also sometimes stop working. When that happens, launch Android Studio, open a project or create a new one, go to Tools > Device Manager to display the Device Manager pane, delete the bad emulator and create a new one.
Don’t forget that Xojo supports on-device debugging (Video: Setting Up On-Device Debugging on Your Android Device) as well so if you have an Android phone or tablet, you can run your apps directly on the device which you may find to be a better overall experience for testing and debugging.
Learn more about using Xojo Android in the Android category in the Xojo Programming Blog.