
A few days ago, I received a request from a user about how to solve a problem he was facing in a control for one of the desktop applications used by his company. This is the scenario:
- The control should show previews of images and PDF documents.
- The documents to be displayed can be dragged and dropped onto the control, or opened from the standard file selection dialog.
- In the case of images, they can also be added to the control using Copy and Paste.
- In any of the above cases, the path of the file in question must be received so that future actions can be carried out.
As an additional point, since we are using Xojo, the control will be cross-platform and functional on macOS, Windows and Linux.
Preparation
Taking into account these requirements, as well as considering that the same problem may have more than one solution, this tutorial will show you how to create a control using the Composition technique. Using this technique, several graphical interface controls will be used internally and their use will be transparent to users who use it globally, either when creating their own applications or when using the control on any desktop platform.
When it comes to creating a control using the Composition technique, the DesktopContainerControl is the best candidate. A new ContainerControl-based class would internally use the following core controls:
- The DesktopImageWell control which is ideal for displaying images.
- The DesktopHTMLViewer control which is ideal for displaying the preview of PDF documents.
Now, while DesktopImageWell supports displaying images directly using Drag and Drop, this is not the case with the DesktopHTMLViewer control; so if the user of the control tried to drag and drop a PDF document or image when the HTMLViewer is displaying the control, it wouldn’t work.
To solve this situation it is common to add a third control. We’ll use a DesktopCanvas that will be, at all times, the top layer regardless of which underlying control (either the ImageWell or the HTMLViewer) is displayed. Thus, the DesktopCanvas would capture the event corresponding to the user dragging a file onto the global control (the class based on ContainerControl). Since it is transparent, it will not prevent the preview of the image or PDF file to be seen in the bottom layer control, at least on macOS.
But the Canvas is not transparent on Windows, in this case we need to use conditional compilation at various points in the class to modify the user interface of the main ContainerControl so that it adds a special area located under the controls preview (ImageViewer or HTMLViewer), and which will be used by the user of the control to drag and drop the corresponding files. For this we will use an additional DesktopCanvas.
Of course, we will also have to add a button to our control that will be responsible for opening the standard file selection dialog box so that the user can choose the file to preview.
To deal with another small difference between macOS and Windows, we will add a DesktopRectangle to be used as the base layer of the control (Z axis), so that it displays the typical Focus ring when the control is active and selected.
Designing the Control
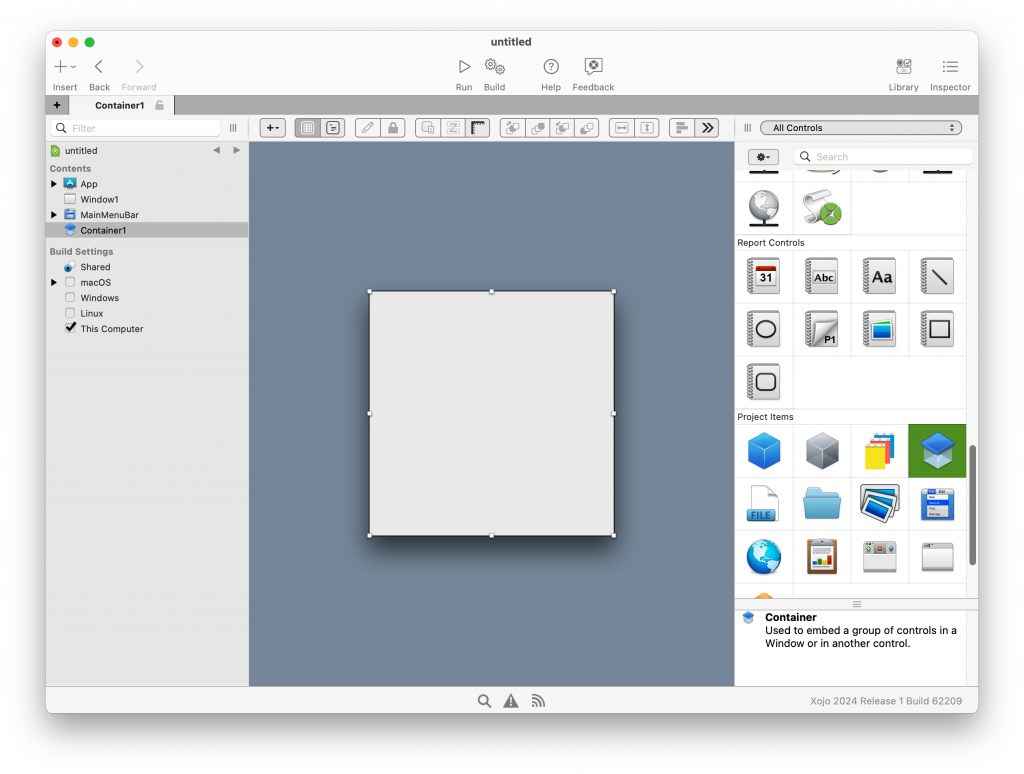
With all that in mind, start a new Desktop project in Xojo. Drag a DesktopContainer from the Library onto the Navigator. It will look like this:
With the new Desktop Container1 instance selected in the Navigator, use the Inspector Panel to change the following values:
- Name: ImagePDFContainer
- Size > Width: 220
- Size > Height: 200
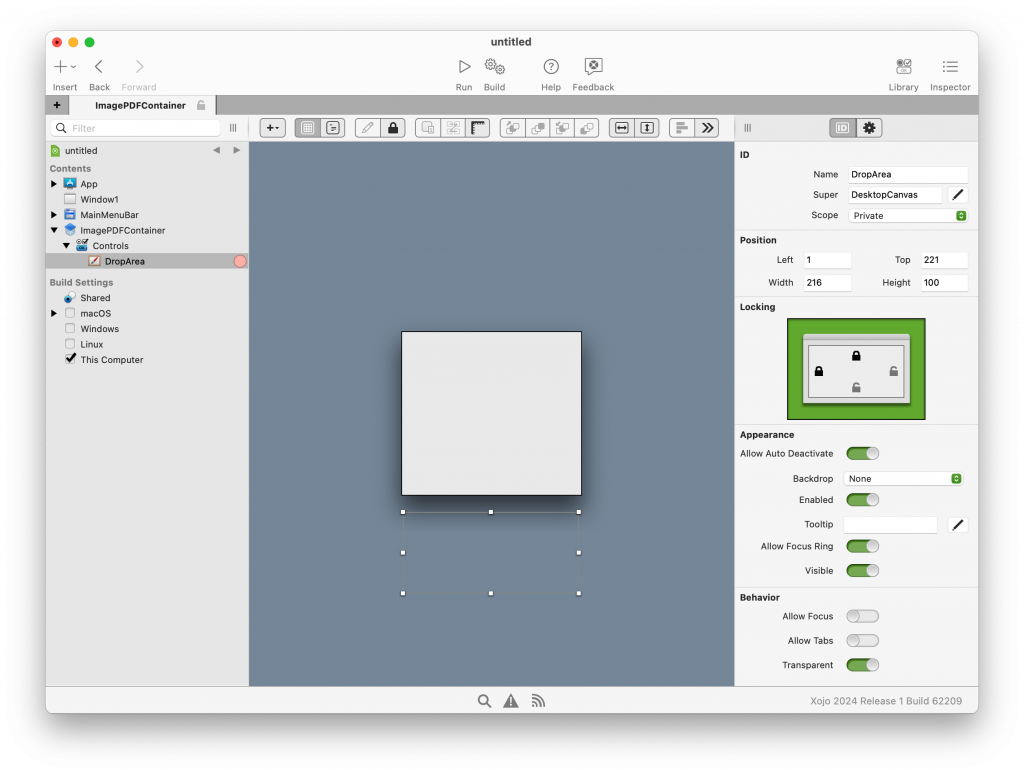
Next, add the Drag and Drop area which, remember, will be shown only when the control is executed on Windows. To do this, drag a DesktopCanvas from the Library and drop it in the area of the Layout Editor corresponding to the Design Editor, placing it right under the container for our own convenience.
With Canvas1 selected, use the Inspector Panel to change the following values:
- Name: DropArea
- Position > Left: 1
- Position > Top: 221
- Position > Width: 216
- Position > Height: 100
The design should look like this:
Now, add the background layer. This is the layer that will be in charge of displaying the focus ring for the control in Windows. To do this, drag a DesktopRectangle from the Library and drop it on the ContainerControl in the Layout Editor. The ContainerControl should show a red box indicating that the dragged control will be contained as a child control in the Container itself. Next, with DesktopRectangle1 still selected in the Layout Editor, use the Inspector Panel to modify the following values:
- Name: BacktroundRect
- Position > Left: 0
- Position > Top: 0
- Position > Width: 220
- Position > Height: 200
- Locking: Lock all four padlocks.
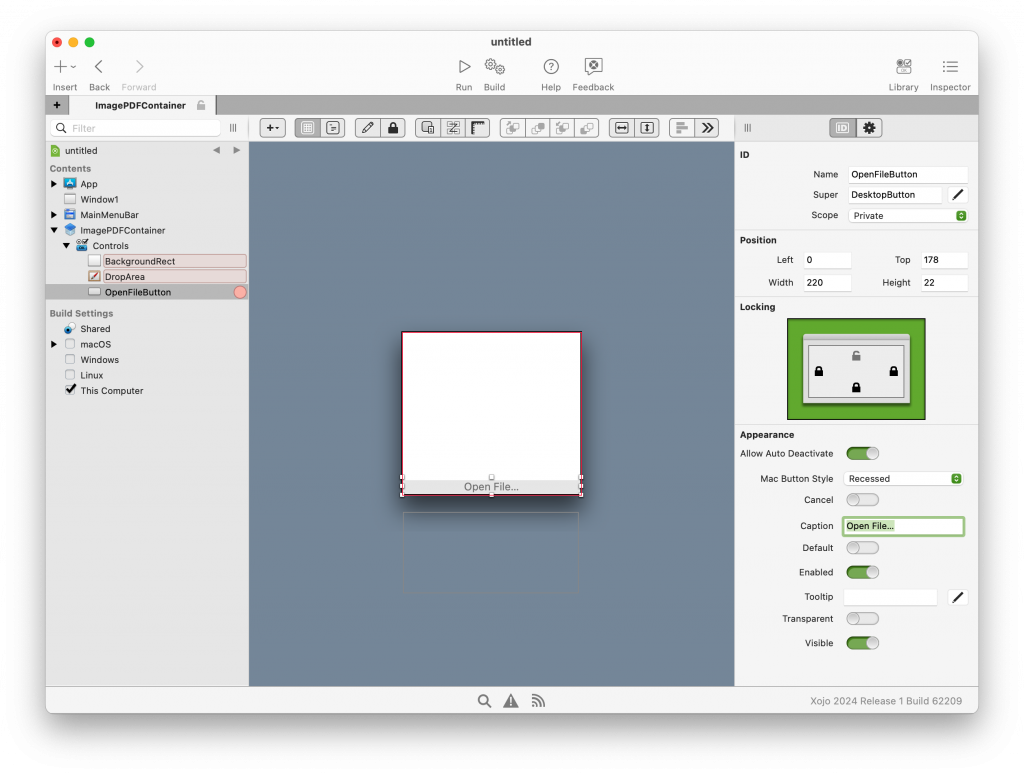
Next, add the button responsible for displaying the standard dialog box for selecting the file to preview. Drag a DesktopPushButton from the Library and drop it onto the bottom of the Container in the Layout Editor. The Container should display a red box to indicate that the button will be added as a child control in the Container itself.
Then, with Button1 still selected in the Layout Editor, use the associated Inspector Panel to change the following values:
- Name: OpenFileButton
- Position > Left: 0
- Position > Top: 0
- Position > Width: 178
- Position > Height: 22
- Locking: Closes the left, right and bottom locks. Open the lock on the top edge.
- Mac Button Style: Recessed
- Caption: Open File…
At this point, the control layout should look something like this:
Now, add the instance of the DesktopImageViewer control responsible for previewing the images. As in previous steps, drag the DesktopImageViewer control from the Library and drop it on the Layout Editor, in the upper right part of the Container; then, with ImageViewer1 still selected, use the associated Inspector Panel to change the following values:
- Name: ImagePreviewer
- Position > Left: 238
- Position > Top: -219
- Position > Width: 218
- Position > Height: 198
- Locking: Lock all four padlocks.
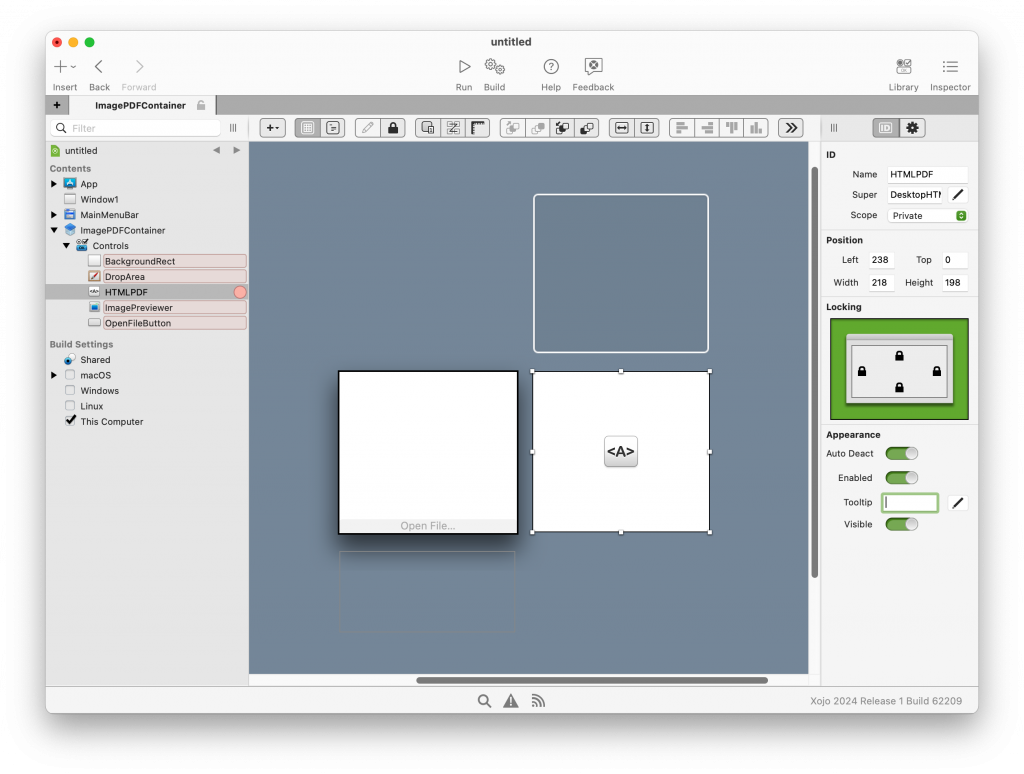
Drag a DesktopHTMLViewer from the Library onto the free area of the Layout Editor, just below the ImageViewer added in the previous step; Then, with HTMLViewer1 still selected in the Layout Editor, use the associated Inspector Panel to modify the following values:
- Name: HTMLPDF
- Position > Left: 238
- Position > Top: 0
- Position > Width: 218
- Position > Height: 198
- Locking: Lock all four padlocks.
At this point, the control layout should look something like this:
Finally, add the overlay to be used only when the control is executed on macOS and that is responsible for capturing the action of “Drag and Drop” files by the user. Drag a new DesktopCanvas over the Container in the Layout Editor. The Container should display a red box to indicate that the new control is being added as a child of the Container itself. With Canvas1 still selected in the Layout Editor, use the associated Inspector Panel to modify the following values:
- Name: CanvasOverlay
- Position > Left: 1
- Position > Top: 1
- Position > Width: 218
- Position > Height: 179
- Locking: Lock all four padlocks.
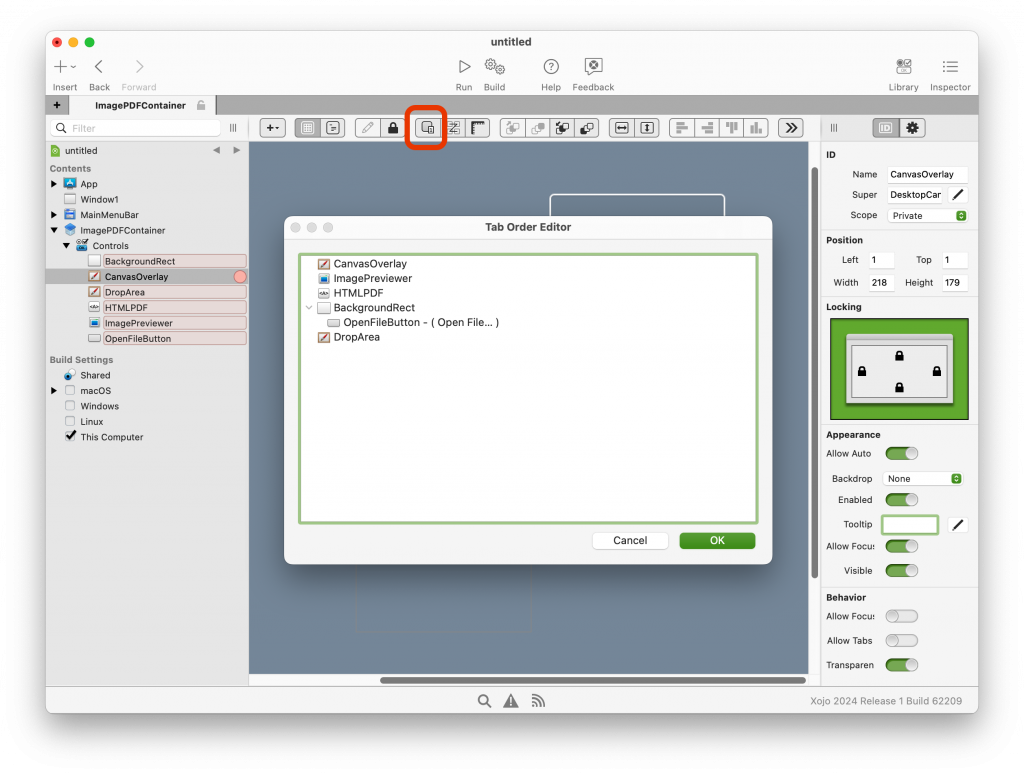
To make sure that all the “layers” (order of the controls on the Z axis) are as we expect, click on the “Show Tab Order” button in the Layout Editor toolbar. If they do not match the order shown in the image below, drag and drop each element to the correct position in the list:
Add Functionality
With the design of the control now complete, it is time to add its functionality. To do this, select ImagePDFContainer in the Navigator and add the following properties along with the values indicated in the Inspector Panel:
The first will be in charge of containing the message to be displayed in the “Drag and Drop” area:
- Name: DropFileMessage
- Type: String
- Scope: Public
The second will be the property in charge of storing the reference to the file (FolderItem instance) whose image/PDF is being previewed:
- Name: FileDropped
- Type: FolderItem
- Scope: Private
The last property will be responsible for containing the color to be used as the focus ring:
- Name: FocusColor
- Type: Color
- Scope: Public
Next, add the events that the control needs to consume for its operation. With ImagePDFContainer still selected in the Navigator, add the following Event Handlers along with the associated code:
Opening:
HTMLPDF.Visible = False
ImagePreviewer.Visible = False

#If TargetWindows Then
  DropArea.Top = Me.Height - 50
  DropArea.Height = 50
  DropArea.Width = BackgroundRect.Width
  DropArea.Left = BackgroundRect.Left
  BackgroundRect.Height = BackgroundRect.Height - 50

  HTMLPDF.Height = BackgroundRect.Height - 2
  ImagePreviewer.Height = BackgroundRect.Height - 2
#EndIf

RaiseEvent Opening
MouseDown:
Me.SetFocus
Return True
FocusReceived:
#If TargetWindows Then
  FocusColor = Color.Blue
  BackgroundRect.BorderColor = FocusColor
  DropArea.Refresh
#EndIf
FocusLost:
#If TargetWindows Then
  FocusColor = Color.Black
  BackgroundRect.BorderColor = FocusColor
  DropArea.Refresh
#EndIf
Since the Opening event is used by our ImagePDFContainer subclass, add an event definition with the same name so that instances created from it can also add their own Opening event handler and include any additional code to execute as desired.
Then, add an additional event definition (FileDropped) that will be the one sent by the ImagePDFContainer subclass to the instances created from it, and that implement it, to pass them as a parameter the FolderItem corresponding to the file opened / dragged and dropped / or , in the case of images, that have been pasted on the control.
- Name: FileDropped
- Parameters: file As FolderItem
Since we want to support pasting images onto the control, we also need to add a MenuHandler to the ImagePDFContainer subclass. To do this, with ImagePDFContainer still selected in the Navigator, select the option Add to “ImagePDFContainer” > Menu Handler…
Use the following values in the associated Inspector Panel:
- MenuItem Name: EditPaste
And add the following code in the Code Editor associated with the Menu Handler:
Var pb As New Clipboard
If pb.PictureAvailable Then
  Var f As FolderItem = SpecialFolder.Temporary.Child("temp-pict.png")
  If f.Exists Then f.Remove
  If f <> Nil Then
    pb.Picture.Save(f, Picture.Formats.PNG)
    FileDropped = f
    PreviewFile(FileDropped)
  End If
  Return True
End If

Return False
To complete this section, add a new method to ImagePDFContainer and use the following values in the associated Inspector Panel:
- Method Name: PreviewFile
- Parameters: f As FolderItem
Add the following code in the associated Code Editor:
FileDropped = f

If f <> Nil Then

  If FileDropped.Name.EndsWith(".pdf") Then
    ImagePreviewer.Visible = False
    HTMLPDF.Visible = True

    HTMLPDF.Top = BackgroundRect.Top + 1
    HTMLPDF.Left = BackgroundRect.Left + 1

    #If TargetWindows Then
      HTMLPDF.Height = BackgroundRect.Height - OpenFileButton.Height
    #Else
      HTMLPDF.Height = Self.Height - OpenFileButton.Height
    #EndIf

    HTMLPDF.LoadPage(FileDropped)

  Else

    Var p As Picture = Picture.Open(FileDropped)

    If p <> Nil Then
      ImagePreviewer.Top = BackgroundRect.Top + 1
      ImagePreviewer.Left = BackgroundRect.Left + 1

      #If TargetWindows Then
        ImagePreviewer.Height = BackgroundRect.Height - OpenFileButton.Height
      #Else
        ImagePreviewer.Height = Self.Height - OpenFileButton.Height
      #EndIf

      ImagePreviewer.Image = p
      HTMLPDF.Visible = False
      ImagePreviewer.Visible = True

    End If

  End If

  RaiseEvent FileDropped(FileDropped)

Else
  HTMLPDF.Visible = False
  ImagePreviewer.Visible = False
End If
Add Functionality to Controls
Now it’s time to add functionality to the controls. Select the CanvasOverlay item in the Navigator and add the following Event Handlers along with the code given below:
Opening:
Me.AcceptFileDrop("application/pdf")
Me.AcceptFileDrop("image/png")
Me.AcceptFileDrop("image/jpg")

#If TargetWindows Then
  Me.Visible = False
#EndIf
DropObject:
#Pragma Unused action

If obj.FolderItemAvailable Then
  PreviewFile(obj.FolderItem)
End If
MouseDown:
#Pragma Unused x
#Pragma Unused y

Self.SetFocus
Now select the DropArea item in the Navigator and add the following Event Handlers along with the code indicated below:
Opening:
Me.AcceptFileDrop("application/pdf")
Me.AcceptFileDrop("image/png")
Me.AcceptFileDrop("image/jpg")

#If TargetMacOS Then
  Me.Visible = False
#EndIf
DropObject:
#Pragma Unused action

If obj.FolderItemAvailable Then
  PreviewFile(obj.FolderItem)
End If
Paint:
#Pragma Unused areas

g.DrawingColor = FocusColor
g.PenSize = 2.0
g.DrawRectangle(0, 0, g.Width, g.Height)
g.PenSize = 1.0

If DropFileMessage <> "" Then

  g.DrawingColor = Color.Black

  Var textLength As Double = g.TextWidth(DropFileMessage)
  Var x, y As Double

  x = Me.Width / 2 - textLength / 2
  y = Me.Height / 2 + g.TextHeight / 2

  g.DrawText(DropFileMessage, x, y)

End If
Now select the HTMLPDF item in the Navigator and add the Event Handlers along with the code indicated below:
MouseDown:
#Pragma Unused x
#Pragma Unused y

Self.SetFocus
Next, select the ImagePreviewer item in the Navigator and add the following Event Handlers along with the code below:
MouseDown:
#Pragma Unused x
#Pragma Unused y

Self.SetFocus
Finally, select the OpenFileButton item in the Navigator and add the following Event Handlers along with the code indicated below:
Pressed:
Var f As FolderItem = FolderItem.ShowOpenFileDialog("")

If f <> Nil Then
  Self.PreviewFile(f)
End If
Testing the ImagePDFContainer Control
We have completed the design and added the required functionality to our control, now it is time to add an instance to the project window so we can test its operation.
Select Window1 in the Navigator so that the associated Layout Editor is displayed. Next drag ImagePDFContainer from the Navigator and drop it onto the Layout Editor, using the following values in the associated Inspector Panel:
- Size > Width: 220
- Size > Height: 200
- Locking: Lock all four padlocks
- Appearance > Allow Focus Ring: Enabled
- Behavior > Allow Focus: Enabled.
- Behavior > Allow Tabs: Enabled.
With ImagePDFContainer1 selected in the Navigator, add the following Event Handlers along with the code below:
Opening:
Me.DropFileMessage = "Drop Files Here"FileDropped:
LastFolderItemNameLabel.Text = file.NativePathAs you can see, this is referring to the LastFolderItemNameLabel control that we have not yet added to the window layout yet; So, let’s do that.
Select Window1 in the Navigator to access the associated Layout Editor. Drag a Label control from the Library and drop it onto the bottom of the window in the Layout Editor, then use the following values in the associated Inspector Panel:
- Name: Label1
- Position > Left: 28
- Position > Top: 360
- Position > Width: 150
- Position > Height: 20
- Locking: Lock the left and bottom padlock. Unlock the top and right locks.
- Text: Last FolderItem Path:
Add a second Label from the Library to the right of the previous one, using the following values in the associated Inspector Panel:
- Name: LastFolderItemNameLabel
- Position > Left: 190
- Position > Top: 360
- Position > Width: 390
- Position > Height: 20
- Locking: Locks the left, bottom and right padlocks. Unlock the top lock.
- Text: (empty)
Run the Application
Ready! Run the application and try dragging and dropping image files (JPEG or PNG), as well as PDF files on the control. You should see the change on the fly, showing the most appropriate viewer for each type of file. It will also display the path of the file at the bottom of the window.
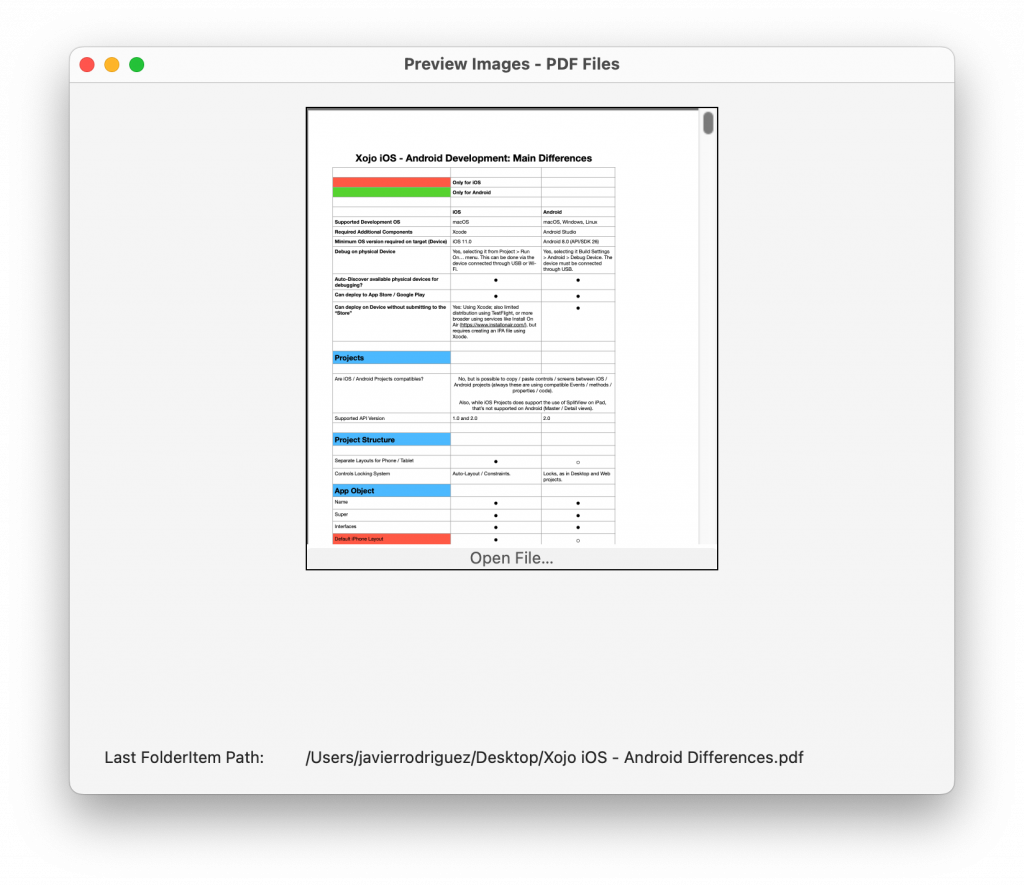
You can also click on the button to select the file to display or try copying images and pasting them directly on the control. If you do this, a temporary file will be created so that one of the initial requirements is satisfied: being able to continue working with the file corresponding to the image or PDF document.
As I mentioned at the beginning, this is just one of the possible implementations. I hope you have learned a few things along the way in, for example:
- Redefine Events consumed by a base class.
- Create your own Class Events and how to launch them to “pass” information to the instances created from said class.
- Capture and work with Menu Handlers.
- Use of Conditional Compilation so that certain sections of code run only on one platform or another.
- And, of course, how to make several UI controls cooperate and present themselves as a single control to the developer and end user who are going to use them.
I hope you found it interesting. You are welcome to modify and expand the project to better suit your purposes!
Have fun and keep coding with Xojo!
Javier Menendez is an engineer at Xojo and has been using Xojo since 1998. He lives in Castellón, Spain and hosts regular Xojo hangouts en español. Ask Javier questions on Twitter at @XojoES or on the Xojo Forum.