
When you’re working on small to medium-sized projects, Xojo’s default IDE window view is probably all you need: all the elements of the project are in plain view and you can easily switch between them. However, things inevitably get more complex when dealing with larger projects. You may need to locate and edit several related items, larger projects likely include multiple methods, events, properties and modules, all of which may be be in their own folders created to organize their functionality or components.
In this article we will highlight several functions provided by the Xojo IDE that allow you to speed up and improve productivity in your large projects.
Filter the Navigator
The Navigator filter field allows you to limit the number of visible items in a section to those matching the typed text. This can filter a list to include only the objects used, such as controls, or even items that match the names of events, methods, properties, constants, etc. -practically any of the items added to the project except the code itself.
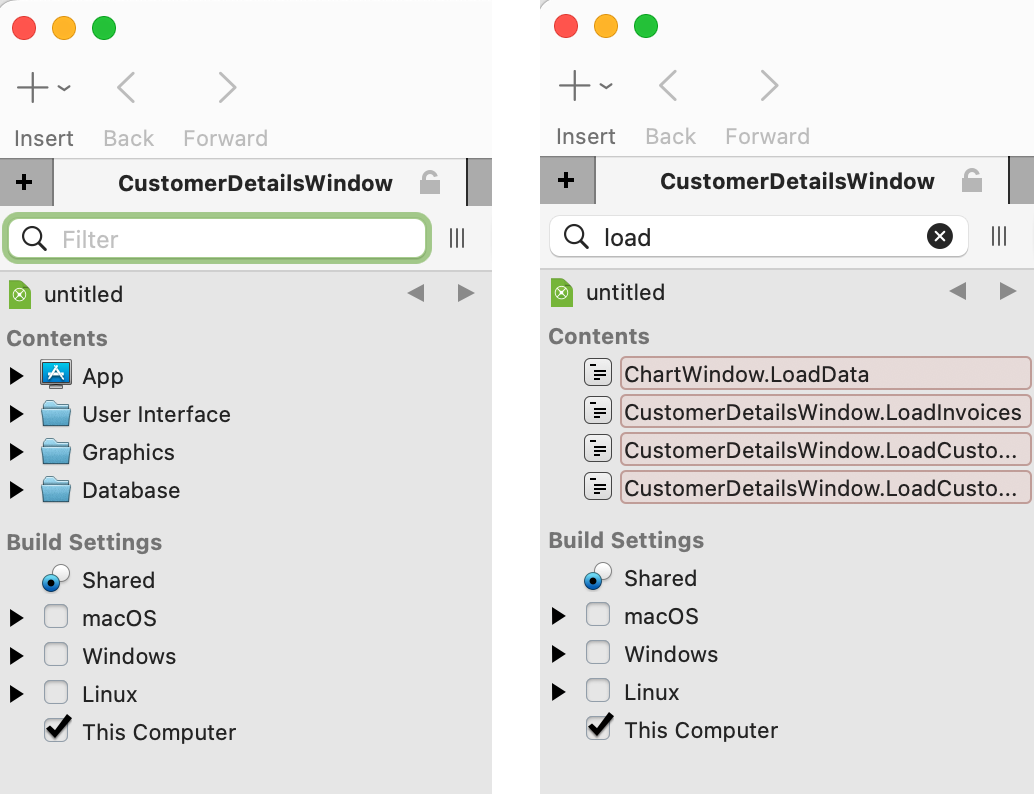
If you need to keep all elements of your project visible while browsing through matching results, it is preferable to use the standard search which you can access using Command + F (on macOS) or Control + F (Windows and Linux).
Going Directly to a Project Item
However, there are many times when you know the exact name of the item you want to select/display; whether it’s the name of a method, event, or even a control itself. In these cases, it is much quicker to use the Project > Go to Location option (Command + Shift + L on macOS; Control + Shift + L on Windows and Linux).
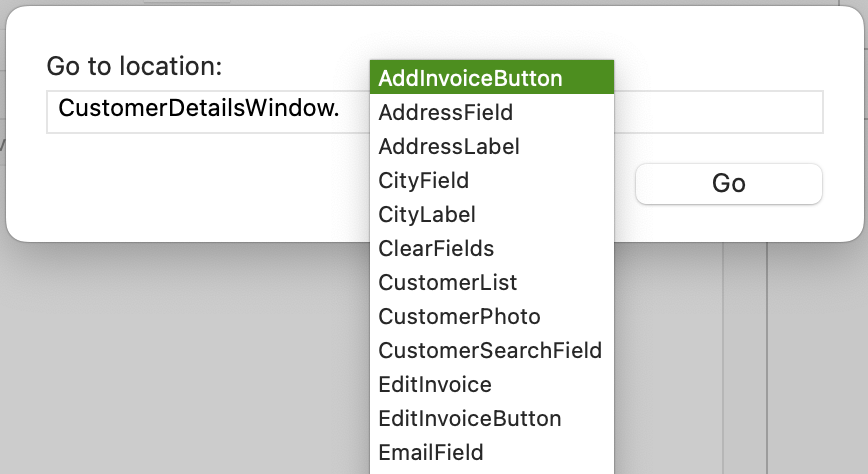
When you select this command, a dialog box will appear where you can type the path of the item you want to select. So, for example, if you want to go to the method “myMethod” found in the window “MyWindow” you would type: “MyWindow.myMethod”. The text field in that dialog offers auto-completion which means that, in most cases, you will only have to start typing the name of the main item and use the Tab key to access the menu displaying all the matches to select any sub-item you wish to select.
Additionally, and unlike the filter field, the hierarchy of the project elements will remain visible in the Navigator as they are.
Powerful Searches
This is undoubtedly the most powerful option that you can access using the keyboard shortcut Command + F (on macOS) or Ctrl + F (Windows, Linux), or by clicking on the magnifying glass icon in the bottom bar of the IDE.
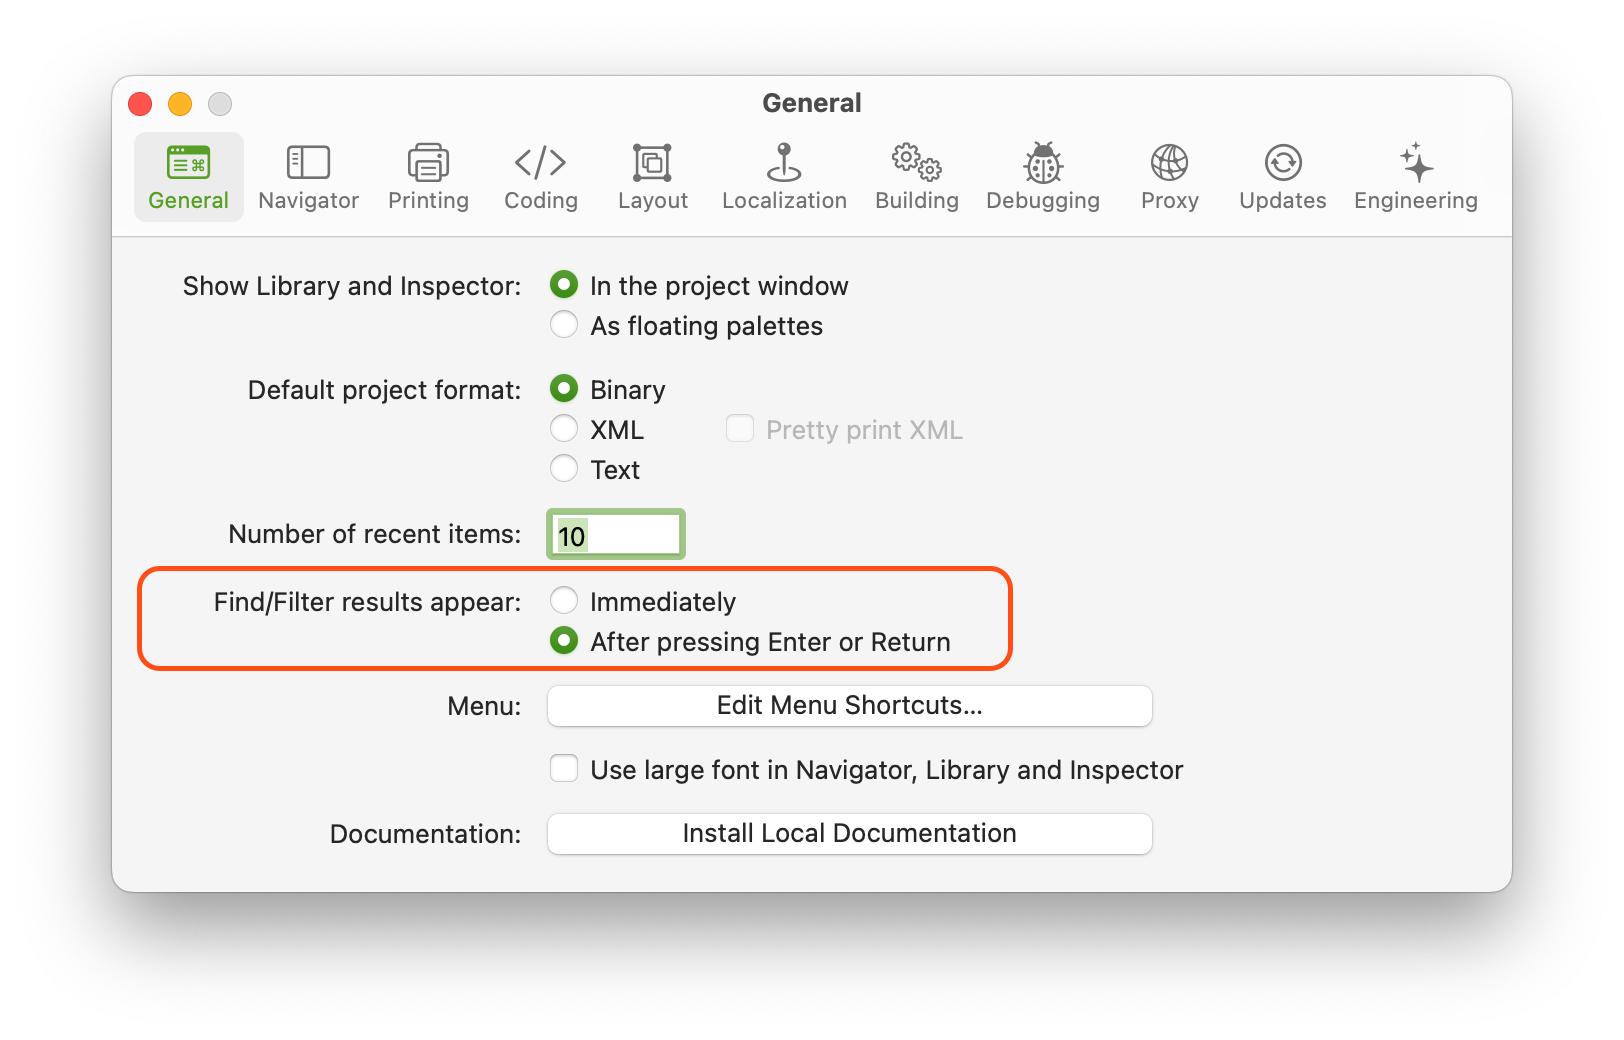
Once you access the Find panel and start typing in the search field, the list below will start to populate with all the matches (by default); but you will probably find it more useful in larger projects to have the list refresh after you press the Return key. To do this, go to the Preferences window and, in the General section, change the “Find/Filter results appear” option to “After pressing Enter/Return”.
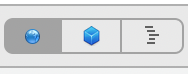
While by default the Find window displays matches found throughout the entire project, there are times when you may want to narrow it down to either the selected item, including any subclasses that may be based on that item, or simply the item in question; you can do this by using the following buttons:
Another added advantage of the search area is that it keeps a history of previously performed searches, thus speeding up the process when you need to revisit a new group of elements. In addition, you can change from simple (textual) searches to the more powerful use of regular expressions (RegEx) when looking for elements in your project.
Of course, this same panel also allows you to replace the searched text with other text on all the matches shown… but be careful before confirming. Make sure that they truly apply to the elements you want and not to others just because they start with the same word entered in the search field!
Bookmarks: Sitting There for You
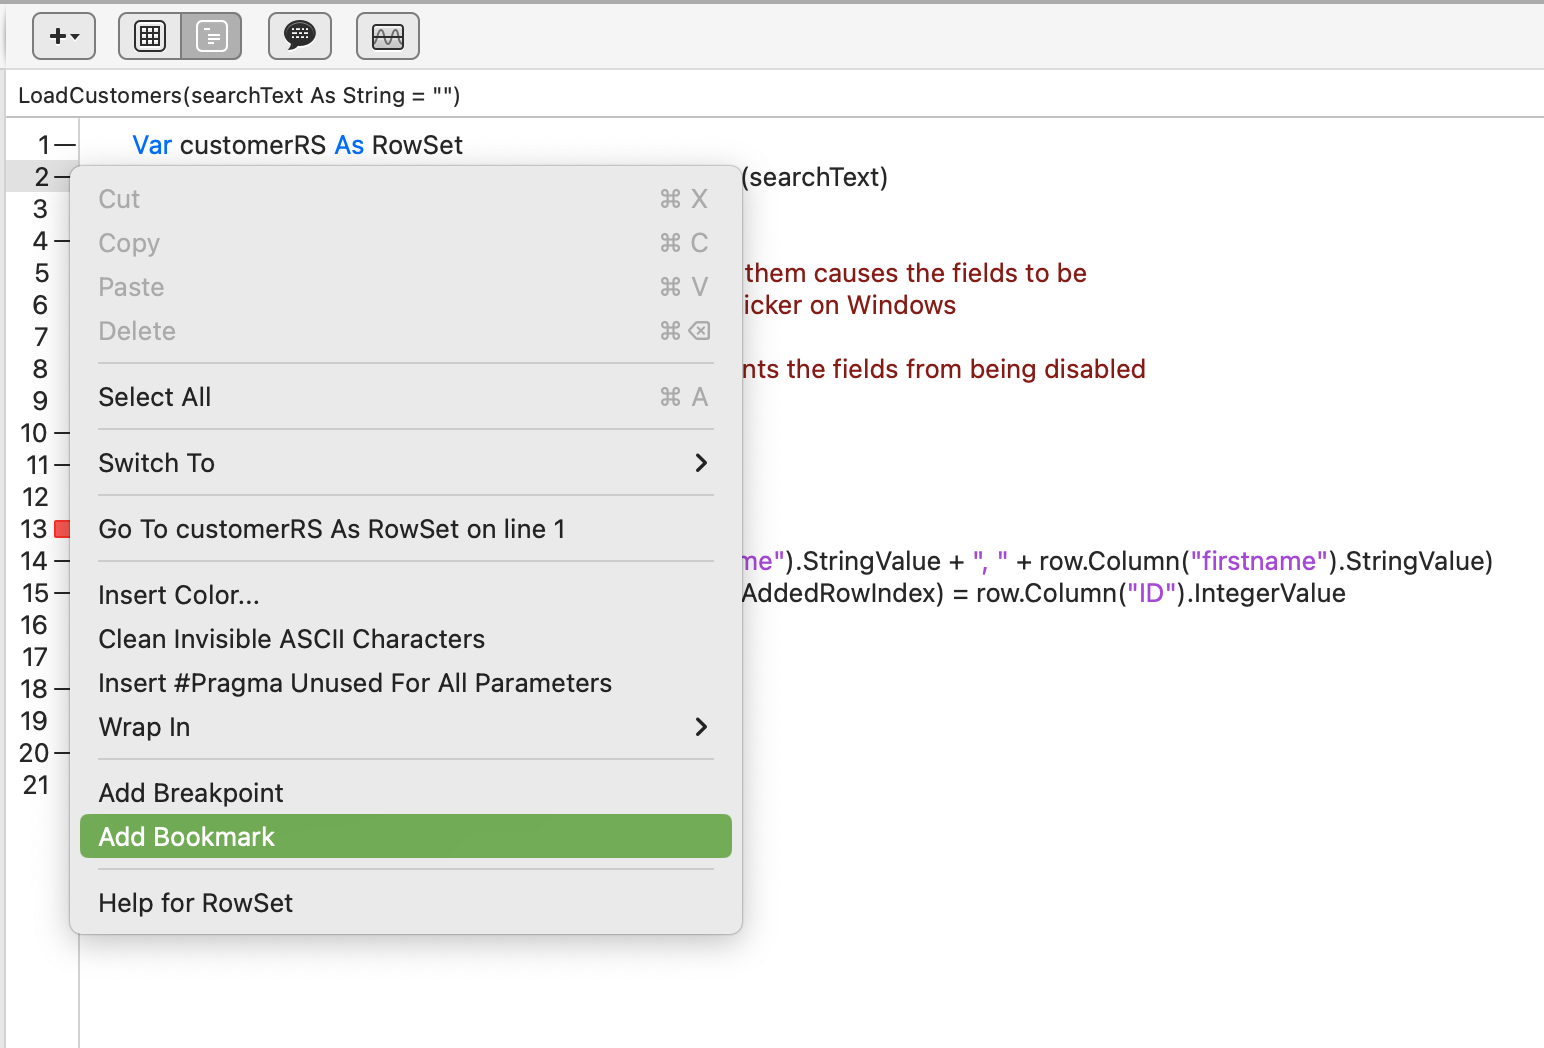
In many cases, you will use the above systems to edit the code in a given method or event; especially if these are areas of code that you visit frequently. If that is the case, then you will find Bookmarks a really useful feature.
You can add or remove Bookmarks in the code editor by accessing the contextual menu from the currently selected line of code. You can also add as many Bookmarks as you need to a single code block, which is especially useful for large blocks of code on a given method, for example.
Once you have all your Bookmarks defined, you will simply need to select the menu option Bookmarks > Show All to have them displayed in the search area where you can select them.
Tip: Use the Preferences > General > Menu > Edit Menu Shortcuts option to assign a keyboard shortcut to the Bookmarks > Show All command. This will make it quicker to update the bookmarks listed in the Search area when they are not listed.
Tabs and Workspaces
Sometimes it is preferable to have several items in view when working on a large project, so that you can switch between them quickly; or to have the Layout Editor and the Code Editor for the same object. This is where Tabs and Workspaces are extremely useful.
By default, the Xojo IDE window has a single tab that displays all the elements added to the project, but you can open as many tabs as you need, and these tabs will be preserved when you close and reopen the same project, just as Workspaces will.
So, if you need to focus on a particular module or class, you can double-click on the item in the Navigator to open it in a new tab. Want more clarity, especially if your tabs bar is overcrowded? In that case, you can drag the tab in question outside the window boundaries to open it as a new IDE window (a new Workspace). Of course, you can also use keyboard shortcuts to move between open tabs in a single IDE window.
As you can see, Workspaces are new IDE windows for a single project. In fact, you can have as many as you need using the New > Workspace menu option. However, this option is only recommended if your setup has a high-resolution screen or multiple screens connected to your computer.
Conclusions
As we have seen, using filtering, searches, bookmarks, tabs and even the “Go To Location” command, among other options mentioned, will greatly speed up navigation when you are working on large projects.
What other IDE techniques do you use? Share them with us on the Xojo Forum or on social media.
Happy programming with Xojo!
Javier Menendez is an engineer at Xojo and has been using Xojo since 1998. He lives in Castellón, Spain and hosts regular Xojo hangouts en español. Ask Javier questions on Twitter at @XojoES or on the Xojo Forum.