
As part of Xojo’s 2025 Year of Code initiative, February’s theme is databases—a perfect fit for my recent work on the Open Source CubeSQLPlugin. This article shares insights into automating its build process with GitHub Actions Workflows.
Xojo plugins are add-ons that extend the functionality of the Xojo development environment, allowing developers to add additional features, integrate third-party libraries, and much more.
Write a Xojo Plugin
This article assumes familiarity with the Xojo Plugin SDK and focuses on automating plugin builds. If you’re new to plugin development, check out the resources in Xojo’s “Extras” folder, YouTube tutorials, and the Xojo Forum.
It builds on my previous blog post Xojo Github Actions and involves Docker, which has also been a part of a previous blog posts (Docker, Database Servers and Xojo, Running Xojo Web Applications in Docker). So read up there on what a GitHub Actions workflow is, what the .yaml files in the Folder .github/workflows are used for.
Build a Xojo Plugin
Since Xojo is a cross platform development environment, a Xojo plugin needs to be built for all the supported platforms (Windows, macOS, Linux) and all their architectures (Intel/ARM, 32/64Bit).
All the plugin parts (the Windows .dll‘s, .macOS .dylib‘s and Linux .so‘s) are being packaged into a .xojo_plugin file.
One of the challenges is to have an environment to build all that. At the first glance it seems that one would need a Mac, a Windows machine – as well as some Linux environment (any of which could also just be a virtual machine). And one would first think that there will be a lot of manual steps involved – building the plugin source on various machines, copying all the built plugin parts together to finally assemble the resulting .xojo_plugin.
However – all that is not required. You can build a Xojo plugin without your own machine being involved, fully automated. GitHub Actions provides all we need.
Example: CubeSQLPlugin
Let us have a look at this existing Open Source Plugin.
CubeSQLPlugin is an extension for the Xojo programming environment that allows developers to use CubeSQL, a fully featured and high performance relational database management system built on top of the SQLite database engine.
The plugin is being used in the Open Sourced Administrations Tools for CubeSQL, which are both written in Xojo: CubeSQL Web Admin and CubeSQL (Desktop) Admin.
Internally the plugin uses LibreSSL for TLS Connections of Database Clients to CubeSQL Server. This means that first the LibreSSL libs need to be built for all build targets. Only then can the plugin source be built again for all build targets. And finally, all the plugin parts need to be assembled into the Xojo plugin structure for the final .xojo_plugin.
We have automated the whole build process of the plugin using GitHub Actions by having created three workflows. You’ll find their source in the folder .github/workflows. All workflow executions you’ll find on GitHub in the tab named Actions (as long as they have not been deleted or removed).
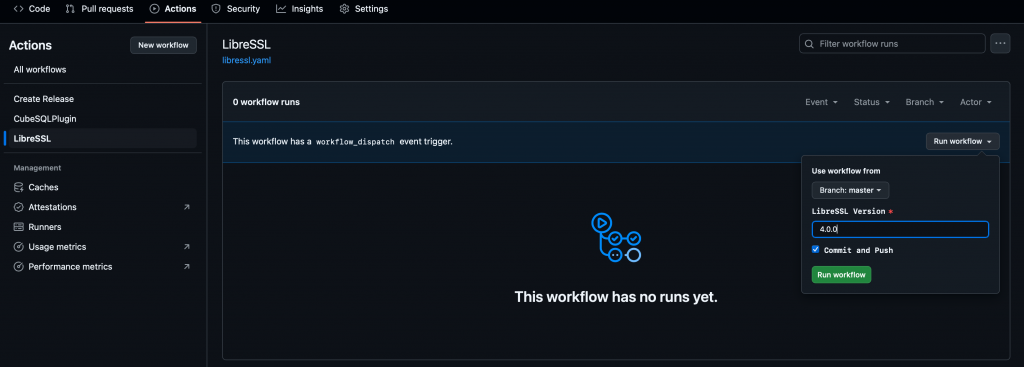
LibreSSL
This workflow will download the LibreSSL Source, and build it for all needed build targets. It needs to be run only once, e.g. if a new LibreSSL version is available that should be included for the next plugin build. That’s why it’s a workflow that can be run manually. It asks which LibreSSL version should be built and whether the built libraries should be committed and pushed to the repository.
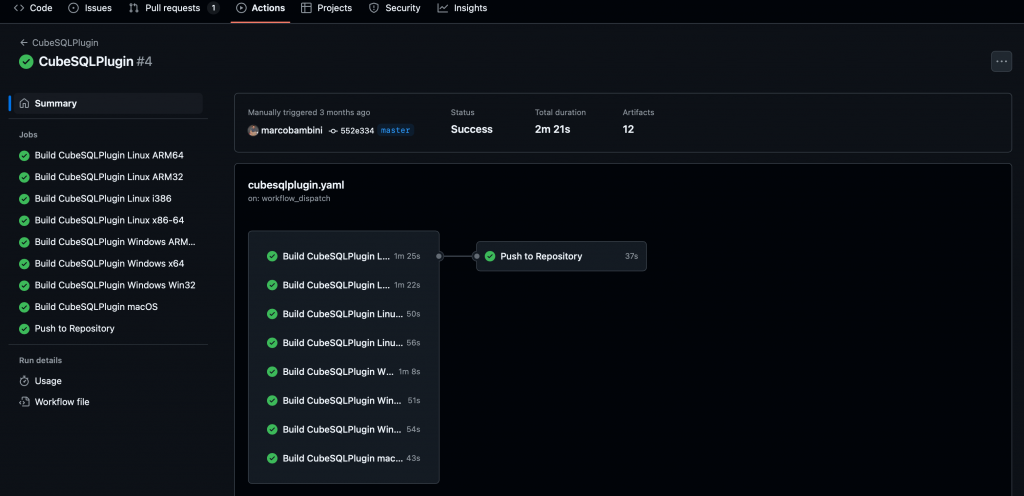
CubeSQLPlugin
This workflow will build the CubeSQL Xojo Plugin for all build targets using the currently committed LibreSSL libs in the repository. It will commit and push all the built .dll‘s, .dylib‘s and .so‘s to the repository.
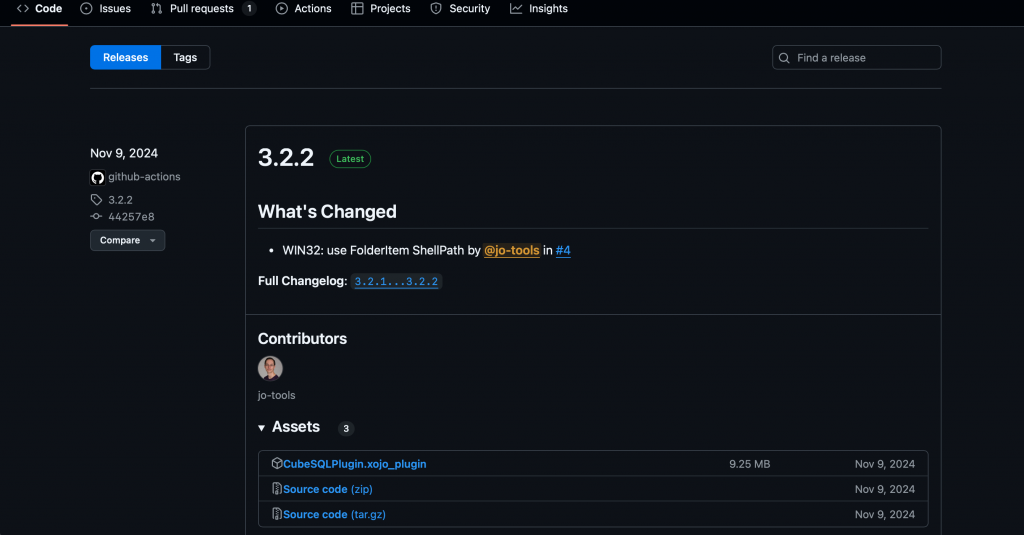
Create Release
That one is pretty obvious, right? It builds the structure of the final .xojo_plugin and creates a new Release in the repository with the final Xojo plugin – ready to be downloaded.
Build for all Platforms and Architectures
The two workflows “LibreSSL” and “CubeSQLPlugin” are similar in their approach to building for all the supported platforms (Windows, macOS, Linux) and all their architectures (Intel/ARM, 32/64Bit).
GitHub offers hosted virtual machines to run workflows. All virtual machines contain an environment of tools, packages, and settings available for GitHub Actions workflows to use.
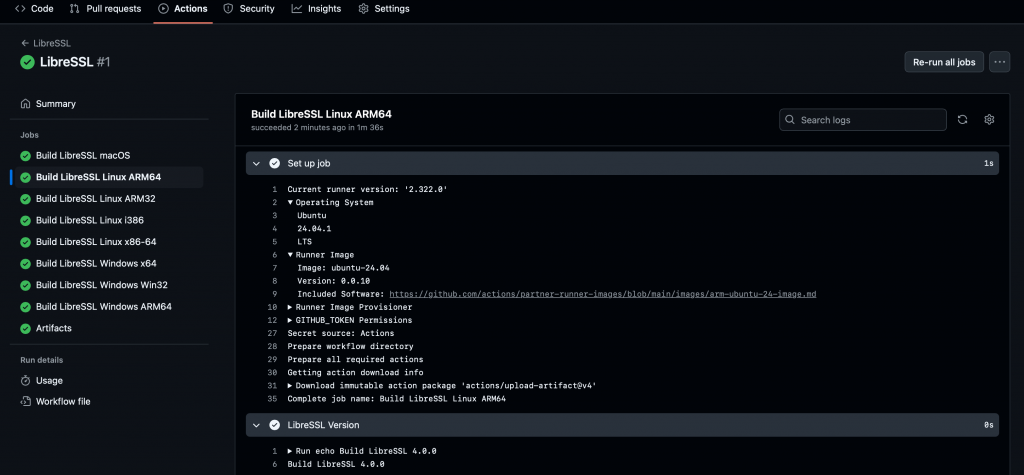
So our workflows can simply use these environments. The workflows consist of several steps, each of which can be executed on a different runner. Remember that I’ve written: “You can build a Xojo plugin without your own machine involved”?
In the following ScreenShot we’re seeing that the Linux-ARM64 plugin part is being created on a Ubuntu 24.04.1 ARM machine.
macOS
- Runs on a GitHub macOS virtual machine.
- Uses the preinstalled Xcode command line tools to build “Intel x86_64” and “ARM64” and combine the two to a universal binary.
- CodeSigns with credentials added as repository secrets.
Linux
- ARM32, ARM64
- Runs on a GitHub Linux virtual ARM machine.
- To always have exactly the same build toolset (e.g. so that it doesn’t matter if GitHub updates to a newer Ubuntu version) it leverages a Docker container (e.g. arm64v8/gcc) – and actually builds the source inside the Docker container.
- i386, x86_64
- Runs on a GitHub Linux virtual Intel machine.
- Also uses a gcc Docker Image to build the source.
Windows
- Runs on a GitHub Windows virtual machine.
- Uses the preinstalled Visual Studio environment to build all “win32”, “x64” and “ARM64”.
How to Build your Xojo Plugin
I’m very well aware that this article can’t help you build your plugin. Each one is individual and needs its own steps and processes.
However, should you consider automating your plugin build process. You might want to look in more detail in the open-source plugin source and the workflows which are building CubeSQLPlugin for all required targets and architectures.
How to Transition from Manual to Automated
While creating a plugin, one doesn’t think of its build process in the early stages, maybe not even for the first few released versions.
Plugin building is usually a manual process, requiring manual execution of a lot of steps and commands on various machines. It is tedious and prone to errors. It takes time, which adds up the more you build. There’s a point when one should think about streamlining and automate the process, allowing for building new versions without too much effort.
In addition, it’s certainly a good idea to have a consistent build environment other than your own development machine as you could install and change things on there which could impact the builds. That’s why building inside a Docker container is an interesting approach – it will remain exactly the same each and every time, even if the host machine is changed (e.g. by being updated to a new operating system version).
All that used to be like that before having written the GitHub workflow.
How can you transition from a manual to an automated process for your own project? I won’t be able to provide all answers. But, I’d like to give a few ideas of possible steps, with no intention of them being complete or the best choice for your project.
- Use a version control system.
- Git and GitHub are (for many use cases) free.
- Using a Cloud solution serves as a backup should something happen to your machines.
- You can additionally benefit from other services such as the GitHub Actions workflows mentioned in this article.
- Everything that is only in your head should go into some written form. Once you don’t need to do something for some time, you might forget or miss something.
- Start with documenting all steps, commands, and actions.
- Try to get rid of manual steps. Are you copy-and-pasting several commands to a terminal each and every time?
- Put them in a shell script, so that you only need to run one command.
- You can use these scripts later when going to a fully-automated system.
- When initial development is finished and you’re ready to release:
- Don’t do releases from your development machine. It might be defunct, broken, stolen, or you’re installing some new cool stuff and suddenly notice issues with other projects. Having a dedicated build machine is one idea.
- Another is going the “GitHub Actions” way which also has its benefits.
- Runners are virtual machines that are provisioned and “fresh” every time. It’s always the very same environment to start with for each build, no matter what you’re doing during a build.
- You don’t need to maintain many different build machines yourself. This can even solve some security issues, as it’s probably not your main interest of keeping everything up to date. I prefer to focus on programming and not on system maintenance.
- However, the runners might be outdated in a few years – and new runners (with newer operating systems) will be available.
- That’s usually not a very big issue on macOS and Windows since their build tools are usually backwards compatible for quite a long time.
- Especially for Linux we have decided not to rely on the provided host but use a Docker Image and run the builds inside a Docker container. So you can, for example, use a Docker container with an image that perfectly fits your lowest compatibility needs, while the host itself might only have (too) new libraries installed.
- Start putting all your steps and scripts into a workflow – be it just on your dedicated build environment, or using GitHub Actions.
- Certainly separate them per required host (macOS / Windows / Linux).
- Split a long script into smaller parts, e.g: Download LibreSSL, Build x86_64, Build arm64, Build Universal.
- In case of an error, it’s easier to see that “macOS: Build arm64 has failed”, compared to “Build for macOS has failed” (because it’s all in a lengthy script).
- Running the workflows manually is great and likely more than good enough.
Once the project activity grows (e.g. you’re receiving a lot of pull request or have many developers working on it):- Ensure that the build and test workflows are running on each pull request, require them to complete successfully before being able to merge. That by the way has been explained in the previous blog post Xojo GitHub Actions. After all, no one wants to find out after many commits that the build is no longer working, and then have to search the history for what might have caused the problem.
- You’ll notice that once it’s all automated you no longer miss it. It causes no additional effort for you, instead bringing a lot of benefits (such as noticing early when code changes cause oddities in tests and builds).
A Fun Fact
In the early days a build of the CubeSQLPlugin often took a couple of hours – and with personal attention needed so that one couldn’t work on much else during that time.
The first iteration of the workflows reduced the entire build (LibreSSL + Plugin) to about 25 minutes. With no attention and manual interaction needed – which means more time for other work. What took the longest was the LibreSSL ARM builds – they have been run on Intel hardware with QEMU for ARM emulation.
Back to the beginning of this article and Xojo’s 2025 Year of Code initiative – in February I have improved the workflows to use the newly available GitHub Actions runners that run on ARM hardware. Which means that no more emulation is required – and the build time has now come down to about 4 minutes for LibreSSL Libs (required only once per new LibreSSL version) and 2.5 minutes for the Xojo database plugin for all its supported platforms and architectures!
That’s All Folks!
I hope this brief introduction of how to use GitHub Actions workflows and Docker to build a Xojo plugin has been helpful to some, food for thought to others.
Jürg Otter is a long term user of Xojo and working for CM Informatik AG. Their Application CMI LehrerOffice is a Xojo Design Award Winner 2018. In his leisure time Jürg provides some bits and pieces for Xojo Developers.