
I would like to show you how to program a simple but entertaining game that will introduce you to the Xojo programming language. In this game the computer calculates a random number between 1 and 100 and we have to guess it.
Let’s start with the programming. For that we open Xojo and create a new desktop project.
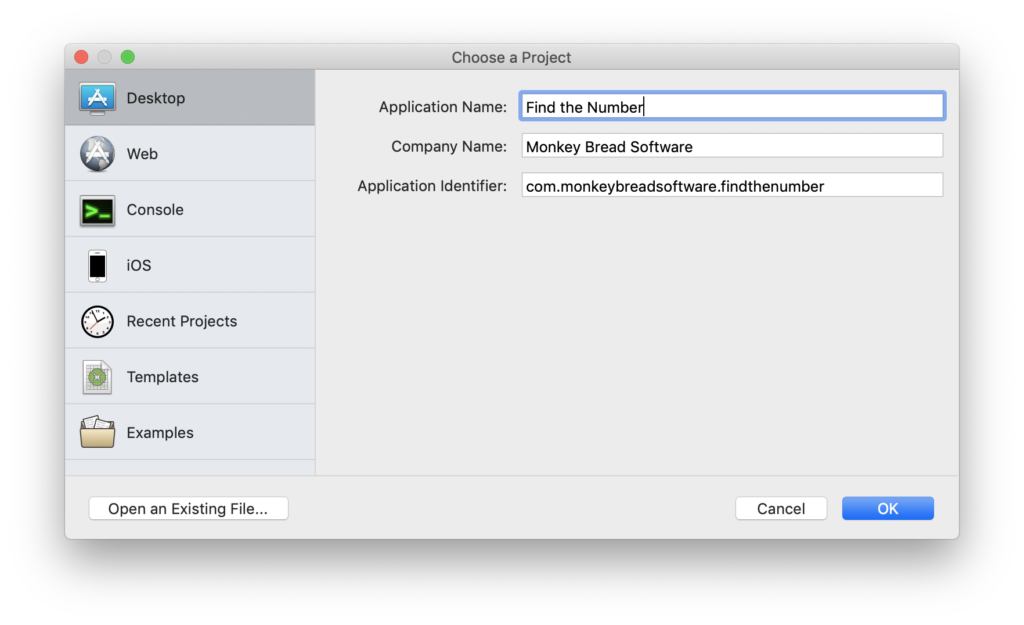
To do this we click on the Desktop tab. In the Application Name field we set the name of our application. If you have a Company you can set its name in the Company field. If we click on OK, the development environment appears. The window is divided into several sections.
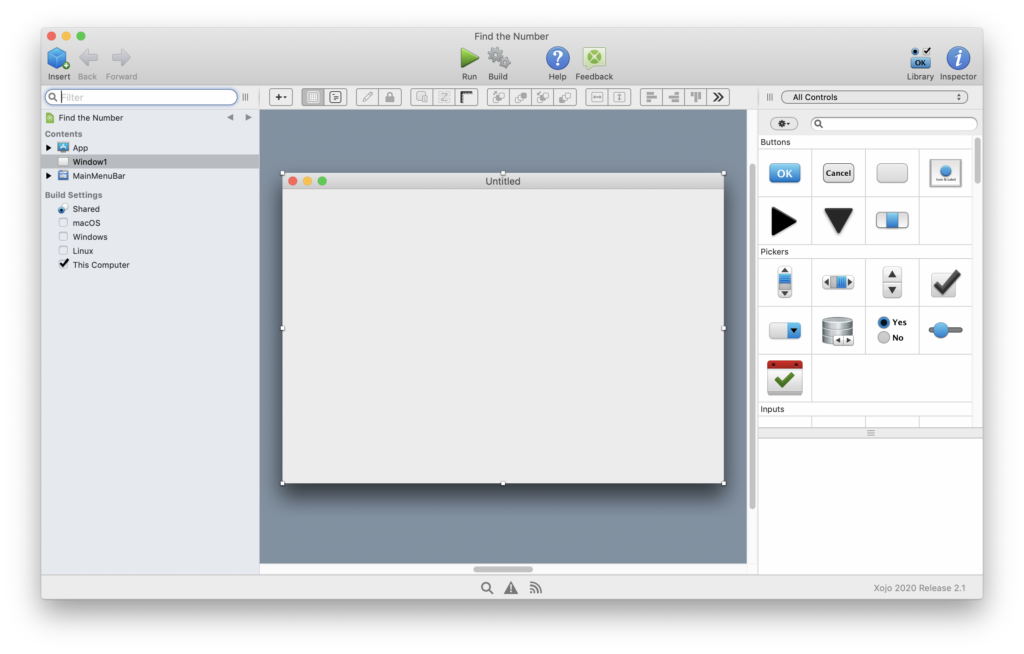
On the left we see a list of all Windows, Control elements, methods and properties that are include in our project. By default, a program window named Window1 is created. In the middle we see this window. At the moment it is still empty. The middle part is our working area where we will write the code. On the right side there is another menu. It contains the controls that can be easily selected with the mouse, dragged into the window and positioned there. If you don’t want to see them, you have to click on the “Library” button in the upper menu bar first.
By default, the icons are sorted by category. Let’s try it and drag a Generic Button into the window (Buttons section, 1st row of 3rd from left). If you don’t know which element you are currently looking at in the library, the window at the bottom right will help you. If you move the mouse over the individual controls in the library, you get a short explanation of the control in this window. If you do not see the window, go to the end of the library and move the grey bar a little bit upwards.
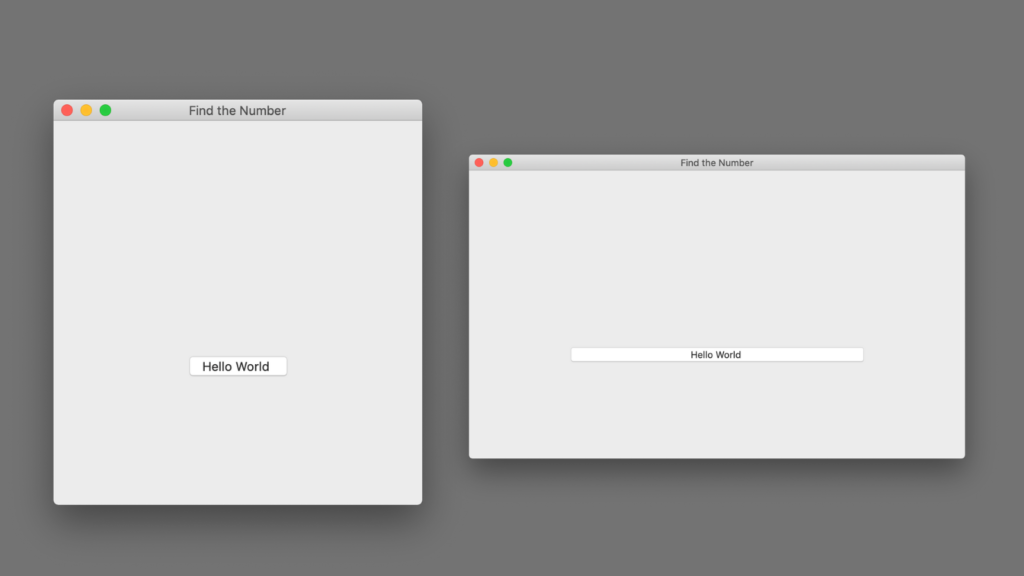
Now we take a look at the button that we have dropped into the window. We can position and adjust it. If we move the mouse over the button, a pencil appears in the lower right edge. If you click on that symbol you can change the title of the button.
Above the library you will find two buttons in the menu. One is the Library button and the other is the Inspector button. If you click on the Inspector, you will see the properties for the element that we have selected in the main window where the library with the controls was before. We can view and change the properties here. For example, we can give the button in our window the caption „Hello World”. Here we can also use coordinates to determine where the button is located in the window and how big it is. You can switch between the Library and the Inspector by clicking on the corresponding button.
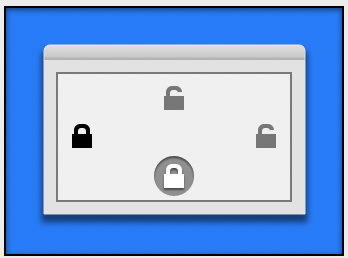
With Locking we can determine what should happen if we vary the size of the environment window. If we click on the locks, we can close and open them. When we close a lock, we can think of it as sticking the edge of the element to that side at that moment. If we close two opposite locks, our control will be scaled in this axis when the windows size changes.
If only one lock is closed in this axis, then when we scale the window, the element will be pulled in one direction, in the locked direction.

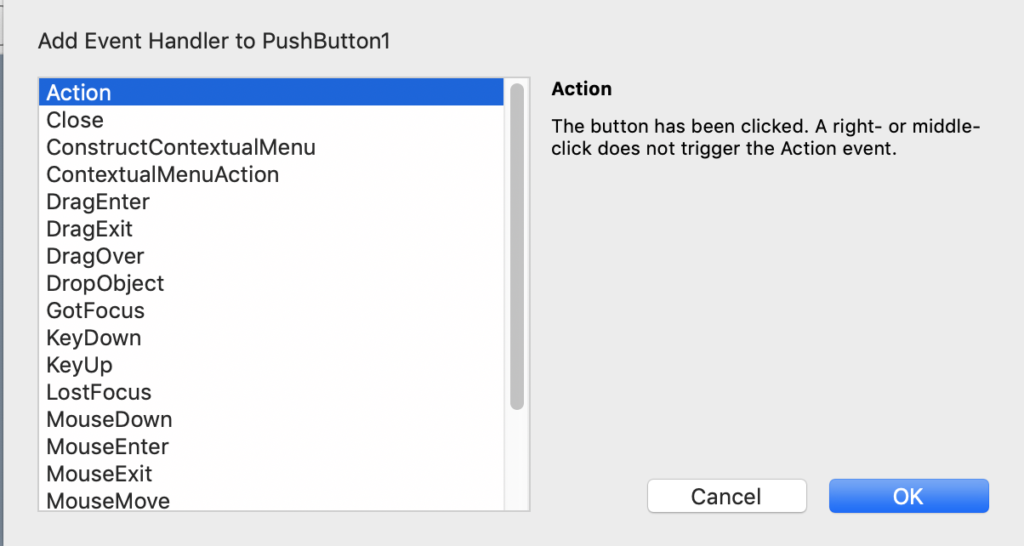
Above the main area of the development environment there is a menu bar with several icons. Click on the small plus. This opens a submenu. In this submenu we click on the first entry Event Handler. A list with several selection options opens.
To the right of the list we see a small description of the events. These events are called when something specific happens to this object, e.g. when the button is clicked (Action) or the mouse is over the object (MouseEnter). Then the code that was written before in the ActionEvent is executed.
Select the ActionEvent. This means that we now define what should happen when the button is clicked.
Hello World!
After we have selected the ActionEvent, the code editor opens. Here we write the code that should be executed. As a test we write:
MessageBox "Hello World"
Now click on the green play sign (Run) in the menu bar. This will compile your program and start it.
Compiler:
https://en.wikipedia.org/wiki/Compiler
Compiling means that your program is rewritten by the compiler into a language your computer can understand. That language is machine language, bit sequences of 0’s and 1’s. Now that it has compiled, the computer can understand and execute your program.
Now press the button once and enjoy the moment!
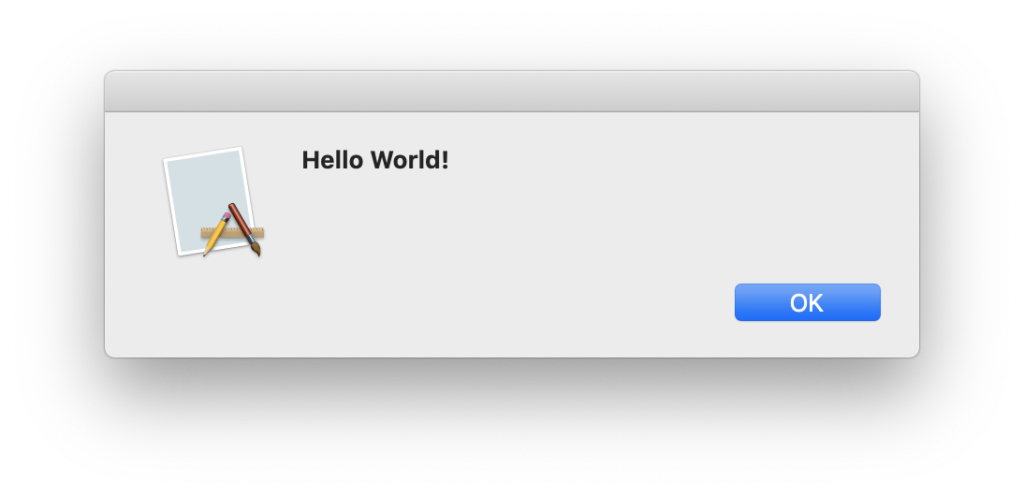
Congratulations!
You wrote your first application! The command MessageBox opens a dialog. The text of this dialog we set in quotes, because it is a string.
The User Interface
AS we have now explored the Xojo environment a bit, let’s really get started with the program. First, we build our user interface.
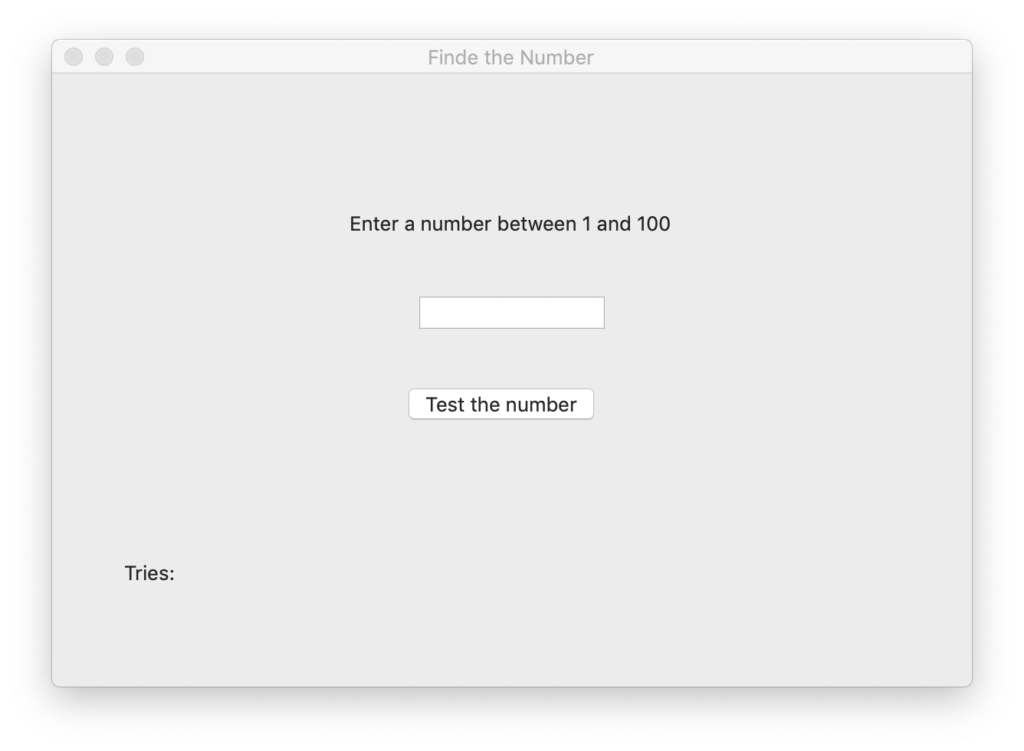
For this we insert an edit field (TextField) from the library. There we will enter the numbers later. We give it the name “Input” in the Inspector. We still need an explanatory label that tells the user what to do. For this we take a label from the library and enter the following text in the Inspector: Enter a number between 1 and 100. We name the button in the Inspector “Test” and give it the title: “Test the number”.
Two labels from the library are positioned under this button. Their content will be deleted. In the Inspector, we give the upper label the name “Info” and the lower label the name “Tries”. Next to the lower label we place a label with the text „tries:“. Your window should now look similar to this.
Variables: King of Context
The action in the program is started when the user enters a number and presses the button. That means we need the action event. This action event should first read the data from the window and store it in a variable. Our number, which we get in the input, is to be stored in a variable “InputNumber” of the type Integer (integer).
Variable:
https://en.wikipedia.org/wiki/Variable_(computer_science)
A variable is a place where we can store any value. This value can then be used in different places without knowing it exactly. For example, if we have a calculation x + 5 = result, then the result changes depending on what value x has. If x = 3 then the calculation would be interpreted as 3 + 5 and the result would take the value 8. However, X could just as well be 50, then the result would be 55. There are restrictions in the assignment of variables, because a variable has a type. In most programming languages, variables are distinguished by their type. For this reason, a text is stored with a different type than a number or a date.
For this we declare the variable first, that means we create it. We write in the action event (please delete the old code before you enter this new code):
Dim InputNumber as integer
Now we also want to assign the value to this variable, because we only told the program until now that there should be one. The value assignment different from what you may be used to and goes from right to left. That means, the variable which should get the value stands on the left side of the equal sign. The expression that returns the value is on the right.
Because we use a text field for the input, the entered number is interpreted as text and is available to us as a character string. In order to work with it in the right way, we have to convert it from a string to a number first. This is done by the ToInteger method. ToInteger converts a text into an Integer Number. If we want a number of type double, that means a decimal number, we would use the ToDouble method.
InputNumber = Input.text.toInteger
With the previous command we assigned the correct value to „InputNumber”. Input.text addresses the Input control and accesses the property „text“ there.
At some point everyone has to make the decision
Now we want to test once whether the user has entered anything at all. We do this via a condition. In normal language we would say: If the input is empty, then say: “You must enter something”. That’s similar to how it is in programming.
If Input.Text="" Then
  MessageBox "You must enter something"
  Return
End If
In this case we actually have to look again at the string we read from the input field, because this way we can check if it is empty. The structure of a condition looks like this:
If Condition Then
Code that is executed when the condition is fulfilled
End If
The condition can decide not only whether two things are equal, but also, for example, whether they are larger or smaller. In the code we already recognise the command for the text output in a dialog box, because we have already used the message box.
The “Return” makes sure that we return to our window and can make another input. When “Return” is called in a code, the program returns to the place where it was called. Any code after a Return is no longer evaluated.
Now we want to test if the entered number is between 1 and 100. For this we need again an if-condition. We want to decide: If the entered number is less than 1 or the entered number is greater than one, then we want to indicate that the number is outside the valid range. For this we add the following lines to the code of our ActionEvent:
If InputNumber < 1 Or InputNumber > 100 Then
  MessageBox "Enter a number between 1 and 100"
  Return
End If
As in language, there is also an OR in programming. It checks whether at least one of the statements is true. We can visualise the OR with an example: I have to decide whether I have to go to work or not. I don’t have to go to work if it is a national holiday or if I am on vacation. In which cases do I have free time?
1. I have no vacation and it is not a holiday => false OR false => false=> have to work
2. I have vacation but it's not a holiday => true OR false => true => I have free time
3. I have no vacation but it is a holiday => false OR true => true => I have free time
4. I have vacation and it is a holiday => true OR true => true => I have free time
Except for case one, I have time off. By the way, if the first statement part is already true, the program jumps to the code part that is executed. It doesn’t even look at whether the other conditions would have been true as well.
In our case the condition is only not executed if the number is between 1 and 100.
Let’s give chance a helping hand
In order to check whether the entered number matches the random number, we must first create this random number. We need the random number only once per game. That means it has nothing to do in the ActionEvent of the button, because the button is triggered several times during a game. But we should use another event. The OpenEvent of the game window is suitable. We open the menu handler in the window and select the OpenEvent. This event runs as soon as the window is opened, in our case directly at the start.
Now we have to figure out how to make it possible to create the number in the OpenEvent and still have access to it from the button’s ActionEvent. We can’t do this with a simple variable, as we have seen so far, because it is a local variable and you can only access it in the ActionEvent or method in which you created it. Therefore we need another way to store the number.
We add the property to the project and name it randomNumber.The type should be integer again, because we only want to guess integers.
Property
A property is a variable that is bound to the window in which it was created. This means that it can be read and assigned values by all events or methods of the window. The names of methods, variables and properties must be a single word string. I like to use the camel case. This means that for multiple words you write the words together and capitalise the first letters of each word. For Example: randomNumberGenerator
Now we open the OpenEvent again and enter the following line there:
randomNumber= Rnd*100+1
The function rnd returns us a number with a lot of decimal places, which lies between 0 and 1 (0 is a possible value). Because we want to have a number between 1 and 100, we multiply it by 100 so that the number can take values from 0 to 99 and then +1 so that the number is not 0 and our value range is now between 1 and 100. Because our number is of type integer, all decimal places are truncated and we don’t have to care about them. An example clarifies it:
Rnd gives us the number 0.0123919
Rnd * 100 would be 1.23919
Rnd * 100 + 1 would be 2.23919
Integer cuts off the decimal places, it is the number 2.
The random number is stored in the RandomNumber property after it is calculated. Now we can make further queries in the ActionEvent of the button. There we continue to query what happens if our entered number is not our random number. The character for unequal is <>. This is easy to remember because the number must be smaller or larger.
If randomNumber <> InputNumber Then
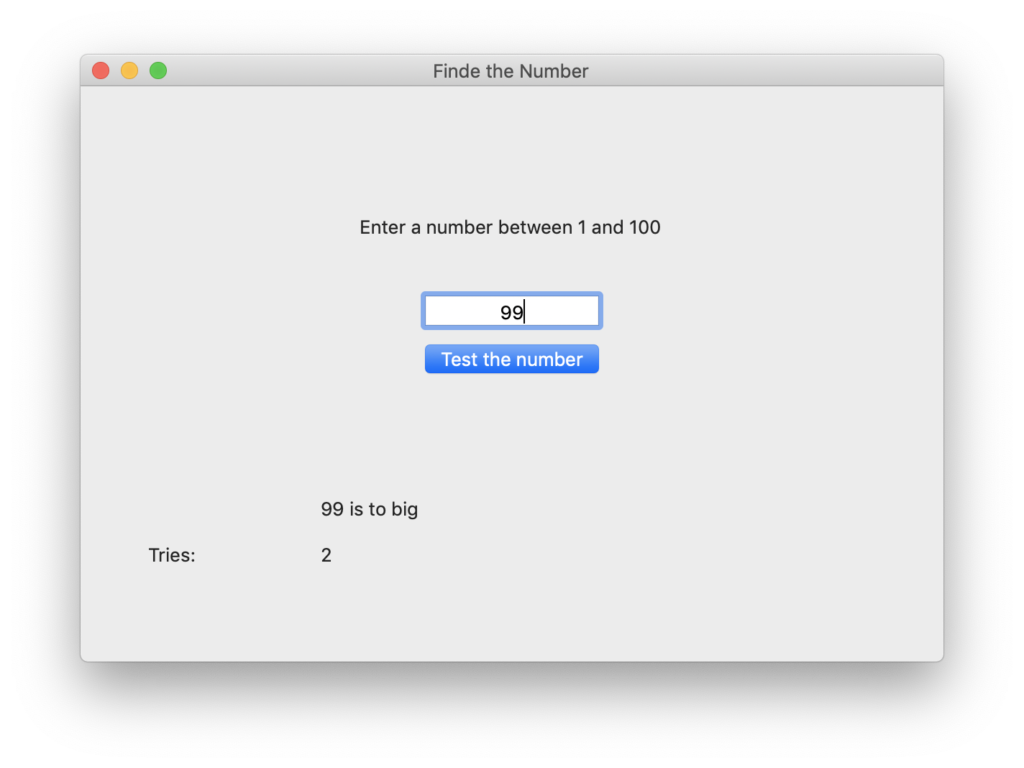
In this condition we have to make a distinction again, because we want to inform in the info text whether our input number is larger or smaller than the random number. For this we build an If-condition into the execution area of the If-condition. We want to display the input number in the label with the name “Info”, in addition to the message whether a number is larger or smaller. For this we can write e.g. the following line.
info.Text=InputNumber.ToString+" is to big"
We convert our number back to a string using ToString. The + concatenates two strings. Here we have to pay attention to the fact that the space is also a character and therefore has to be written.
So we can write:
If randomNumber <> InputNumber Then
  If InputNumber > randomNumber Then
    info.Text=InputNumber.ToString+" is to big"
  End If
   If InputNumber < randomNumber Then
    info.Text=InputNumber.ToString+" is to small"
   End If
End If
What else
In language usage, there is not only an if then but also an else. Example:
If I go to the theatre then
        I put on a great dress
Else
        I put on a jogging suit
You can already see from the way it is written down that we can almost use the idea behind it one by one in our program.
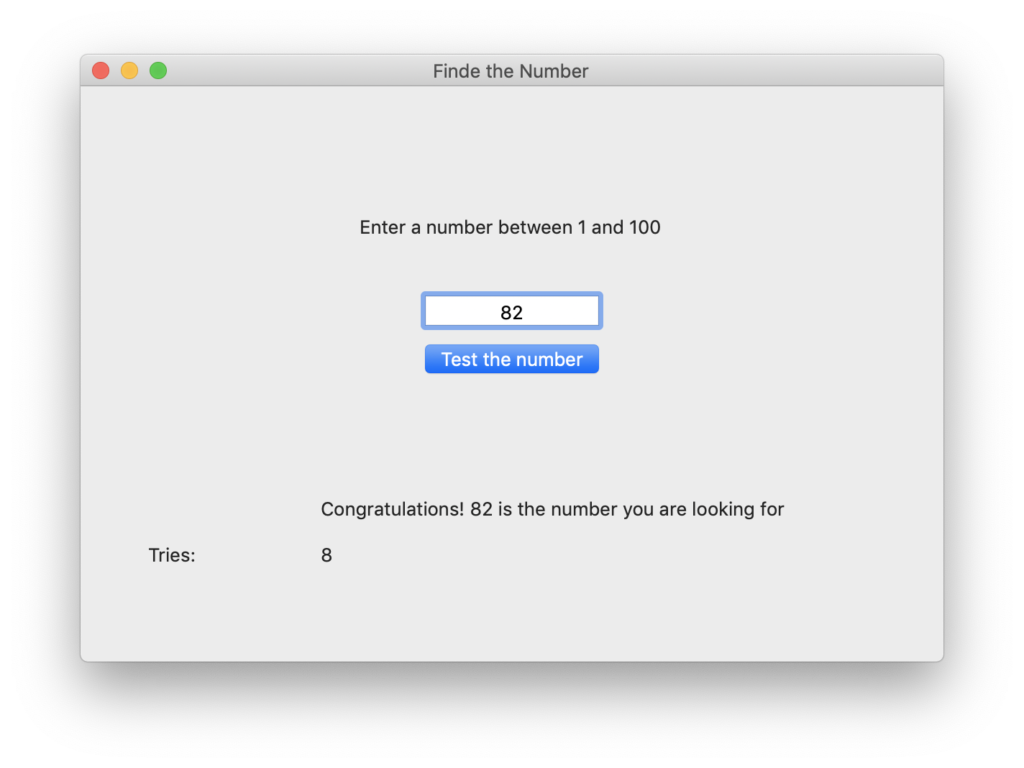
We have already handled the case where the random number and the input number are not equal. We are still missing the case that the two are equal.This we can now simply put into an else part of this condition, because if it is not unequal, then it must be equal.That’s why the whole statement now looks like this:
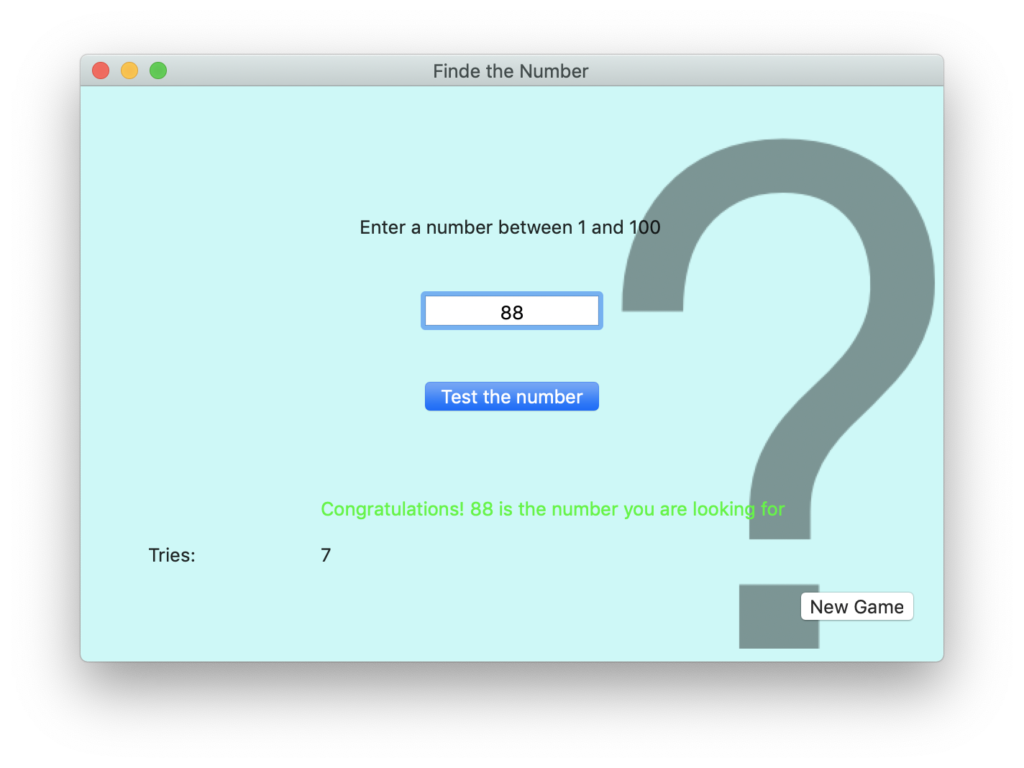
If randomNumber <> InputNumber Then
  If InputNumber > randomNumber Then
    info.Text=InputNumber.ToString+" is to big"
  End If
  If InputNumber < randomNumber Then
    info.Text=InputNumber.ToString+" is to small"
  End If
Else
  info.Text="Congratulations! " + InputNumber.ToString + " is the number you are looking for"
End If
Cosmetic Corrections
Now we start the game!
It works! Congratulations 🙂
But before you get addicted to your own program, we should make the program a bit more attractive and user-friendly.
How many tries did I need?
To do this, we first specify how many attempts we needed to find the number. We want to display this in the label with the name Tries.
We want to increase the number by one over the duration of the game over and over again, exactly when a valid number was entered, so we have to create a property again. This property is of type Integer and is called “NumberOfTries”. The type is again Integer. As we want this to be listed when the entered number is valid, we write:
NumberOfTries = NumberOfTries + 1
Tries.Text=NumberOfTries.ToString
Empty the field and test the number with Return
Now we would like to make the input field empty again when we have tested a number. Therefore we write at the very end of the ActionEvent
Input.Text=""
This will overwrite the text of the input with an empty string.
Next, when we have entered a number, we want to be able to simply press Enter to confirm without having to press the button over and over again. For this reason, we set the button as default button. That means that when we press enter the button is clicked and the code runs. For this we switch on the property Default in the inspector of the button.
Then confirming the number with Enter will work.
Now add color to the game
You can now also polish the layout a bit. To change the appearance of a text you can change settings of the individual labels in the inspector. You could change the text color depending on whether the number is greater than, less than or equal to the number you are looking for. You can do this with this line directly in front of the respective output.
info.TextColor = RGB(0 , 0 , 255)
The color values are given as RGB, this would now color the text in blue for example.
You can also change the background color of the window. For this you can select a Background Color in the Inspector of the window under Background. For the background color to be displayed, you have to activate Has Background Color. In the Backdrop you can add a graphic to the background.

New game <> new window?
Now we don’t want to have to close the window every time we want to start a new game. Therefore we add a button to the layout. We call this new game. When this button is pressed, a new random number should be generated, which is then stored in the Random Number property.The tries should be set to 0, the info window is flushed and the input is cleared.
Because we have already written the code to create a random number in this area and we want to save ourselves duplicate work when programming, we go to the OpenEvent from the window and select the code. Then we click on it with the left mouse button. In the context menu we will be offered some options on what to do with the selected code.
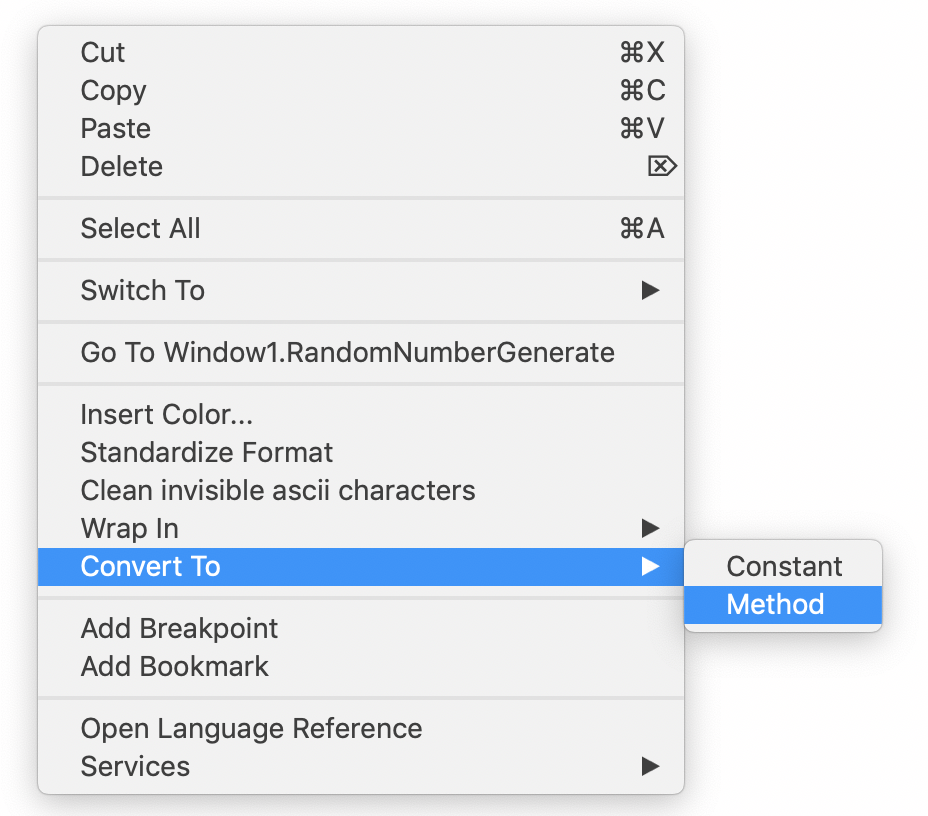
We click on Convert to Method.
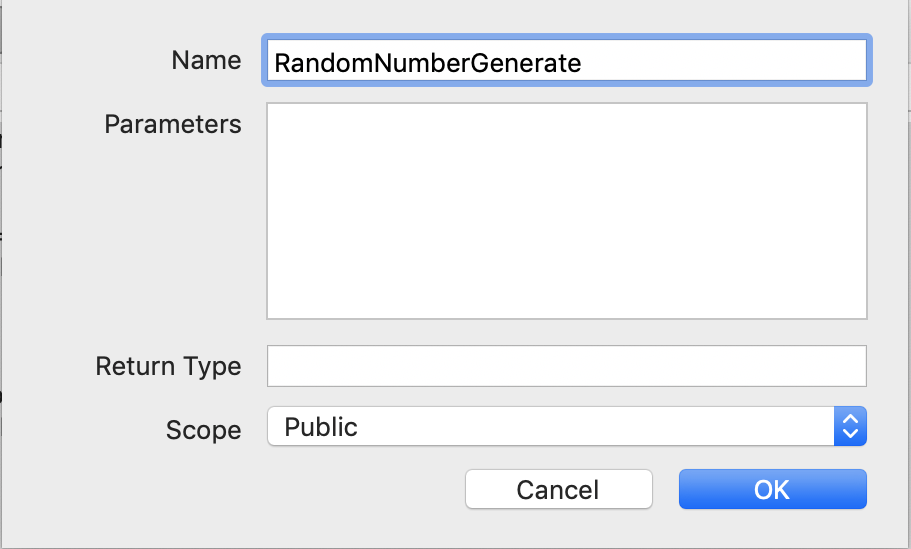
A new code window opens. Under Name we enter RandomNumberGenerate.
Now in the OpenEvent we can read the following line: RandomNumberGenerate()
This is the call of our own method. A method is a snippet of code which could be inserted at this point, but since we need it several times, we have source out so that we don’t have to type so much and so the program text is more tidy.
We now see the method on the left side menu. We can click on it and see the original content of the old OpenEvent again.
Now we can also insert the function in the ActionEvent of the new button, so that it now looks like this.
Input.Text=""
Info.Text=""
NumberOfTries=0
Tries.Text="0"
RandomNumberGenerate
In the call RandomNumberGenerate we can remove the parentheses.
Now our game is ready.
I wish you a lot of fun and success with your programming!
Stefanie Juchmes studies computer science at the University of Bonn. She came in touch with Xojo due to the work of her brother-in-law and got a junior developer position in early 2019 at Monkeybread Software. You may have also read her articles in Xojo Developer Magazine.