
The DrawText method from the Graphics class offers a simple way to left-align text at the given X and Y coordinates, even applying a wrap value to wrap every line of the text block at the provided width value. Wouldn’t it be great to be able to do the same thing while aligning blocks of text to the right and center? Continue reading and I will show you a technique you can use as the starting point which you can fine-tune to your specific needs.
Graphics Extensions
To start, and because we want to provide this ability to any graphic context, it makes sense to include all our logic in a Module. Let’s name it GraphicExtensions (as usual you can opt to use any other name). Start a new Xojo project and add a new Module to it using the following values in the Inspector Panel:
- Name: GraphicsExtensions
Next, and with the GraphicsExtensions item selected in the Navigator, add a new method to it using the following values in the associated Inspector Panel:
- Method Name: DrawText
- Parameters: Extends g As Graphics, value As String, x As Double, y As Double, wrap As Double, alignment As TextAlignments = TextAlignments.Left
- Scope: Global
As you can see, it nearly replicates the standard DrawText method from the Graphics class. Some things to note here, we are using the Extends keyword in combination with the first parameter to instruct the compiler that this method will “extend” the existing functionality of the Graphics class, so you’ll be able to invoke it using the usual dot notation on any instance created from the Graphics class.
The second thing is the last of the parameters “alignment As TextAlignments” TextAlignments is a global enumeration that we are going to use to learn the text alignment the user wants to apply to the block of text.
Next, type the following snippet of code in the associated Code Editor for the method:
#Pragma DisableBackgroundTasks
#Pragma DisableBoundsChecking
#Pragma NilObjectChecking False

value = value.ReplaceLineEndings(EndOfLine)

Select Case Alignment

Case TextAlignments.Default, TextAlignments.Left

  g.DrawText(value, x, y + g.TextHeight, wrap - x)

Case TextAlignments.Center, TextAlignments.Right

  Var tOutput() As String = PrepareOutput(g, value, wrap, x)

  Var tx, ty As Double
  ty = y + g.TextHeight

  Select Case Alignment

  Case TextAlignments.Center

    For Each s As String In tOutput

      tx = If(Wrap = 0, ((g.Width - Wrap) / 2 - g.TextWidth(s) / 2) + (x / 2), (wrap / 2 - g.TextWidth(s) / 2) + (x / 2))
      g.DrawText(s, tx, ty)
      ty = ty + g.TextHeight

      If ty > g.Height Then Exit

    Next

  Case TextAlignments.Right

    For Each s As String In tOutput

      tx = If(Wrap = 0, (g.Width - g.TextWidth(s)) + x / 2, (wrap - x) - g.TextWidth(s) + x)
      g.DrawText(s, tx, ty)
      ty = ty + g.TextHeight

      If ty > g.Height Then Exit

    Next

  End Select

End Select
As you can see, this code looks into the value of the Alignment parameter to see the approach to apply. If the Alignment equals to Default or Left we simply call the standard DrawText method on the received graphics context represented by the “g” variable. If not, we need to do some stuff to the received block of text to create the required chunks (or lines) that do fit the available width plus the received wrapping value. This is done in the PrepareOutput method.
Once we have all the lines with the apropiate widths in the Output array, then we only need to do some basic maths in order to calculate the final TX coordinate for every line, incrementing the TY coordinate on every new line to draw. As you can see, and in order to speed-up things a bit more, we check if the calculated TY coordinate is beyond the visible area of the graphic context and, if it is the case, we exit the function (it wouldn’t make much sense drawing text that is not going to be visible and whose processing consumes time).
Of course, the calculation of the TX and TY coordinates depends on the value of the Alignment parameter; that is, if the block of text is going to be drawn right aligned or centered.
Calculating Every Line Width
Now add the PreapareOutput method to the GraphicsExtensions module using the following values in the associated Inspector Panel:
- Method Name: PrepareOutput
- Parameters: g As Graphics, value As string, wrap As Double, x As Double
- Return Type: String()
- Scope: Private
And typing the following snippet of code in the associated Code Editor:
#Pragma DisableBoundsChecking
#Pragma DisableBackgroundTasks
#Pragma NilObjectChecking False

Var totalWidth As Double = If(wrap = 0, g.Width - x, wrap - x)

Var Input() As String = value.ToArray(EndOfLine)
Var output() As String

For Each s As String In Input

  If g.TextWidth(s) <= totalWidth Then
    output.Add(s)
  Else
    AdjustWidth(g, s, totalWidth, output)
  End If

Next

Return output
Once again, the first lines are some pragmas put in place to speed-up things, then the totalWidth variable will store the required maximum width value for every line. The Input array is going to store every paragraph from the source text, while the Output array will store every processed line and, the one returned to the method calling PrepareOutput.
Then we need to iterate every entry in the Input array and check if its width meets the totalWidth requirement. If it does, then that entry will be added to the Output array; if not, we still need to split the “paragraph” into as many chunks of text as needed that meet the expected maximum width. That is something that’s going to be done by the AdjustWidth method.
Splitting Chunks of Text … Recursively
Add the third, and last required, method to the GraphicExtensions module using the following values in the associated Inspector Panel:
- Method Name: AdjustWidth
- Parameters: g As Graphics, s As String, width As Double, ByRef output() As String
- Scope: Private
Next, type the following lines of code in the associated Code Editor:
#Pragma DisableBoundsChecking
#Pragma DisableBackgroundTasks
#Pragma NilObjectChecking False

Var n As Integer

If g.TextWidth(s) <= width Then
  output.Add(s)
Else

  // This can be improved pre-calculating the initial value for "n"… so it's
  // left as an exercise for the reader :-)

  While round(g.TextWidth(s.Left(s.Length - n))) > width
    n = n + 1
  Wend

  output.Add(s.Left(s.Length - n))

  AdjustWidth(g, s.Right(n), width, output)

End If
As you can see, if the width of the received string is less than or equal to the expected width, then it is added to the Output array. If not, we are using a really less than optimal technique to calculate the appropriate one, saving the resulting string to the Output array and passing the remaining of the string again to the method. You’ll probably want to change some things here to better pre-calculate the initial value of the n variable.
Testing It
We have everything in place, so let’s test it! Start by adding a new constant to the Window1 window and name it kSampleText. Use the associated Inspector Panel to assign the block of text you want to use for testing (personally I like to use the https://www.lipsum.com website for getting sample text).
If you prefer, you can download the complete Example project from this link.
Add next the Opening Event Handler to the Window1 window and type following snippet of code in the associated Code Editor:
Var p As New Picture(612, 792)
Var d As New PDFDocument

Var g As Graphics = p.Graphics
g.FontName = "Helvetica"
Var gPDF As Graphics = d.Graphics

g.DrawText(kSampleText, 40, 10, 570, TextAlignments.Right)
gPDF.DrawText(kSampleText, 40, 10, 570, TextAlignments.Right)

Var tH As Double = g.TextHeight(kSampleText, 570) + g.TextHeight * 4
Var tPH As Double = gPDF.TextHeight(kSampleText, 570) + gPDF.TextHeight * 4

g.DrawText(kSampleText, 40, th, 570, TextAlignments.Center)
gPDF.DrawText(kSampleText, 40, tPh, 570, TextAlignments.Center)

CustomDesktopCanvas1.Image = p
d.Save(SpecialFolder.Desktop.Child("PDFTextAlignment.pdf"))
As you can see, I chose the “Helvetica” font, but you can change it to any font that is available in your OS. The point here is that we are feeding our “extended” DrawText method with the sample text and the alignment we want to use in for drawing it both in the graphic context of a Picture and the one from a PDFDocument instance. Also, CustomDesktopCanvas1 is a simple Canvas subclass with an “image” property added to it as a computed property, so when a new value is assigned it will refresh itself and the Paint event will draw the picture centered in the canvas.
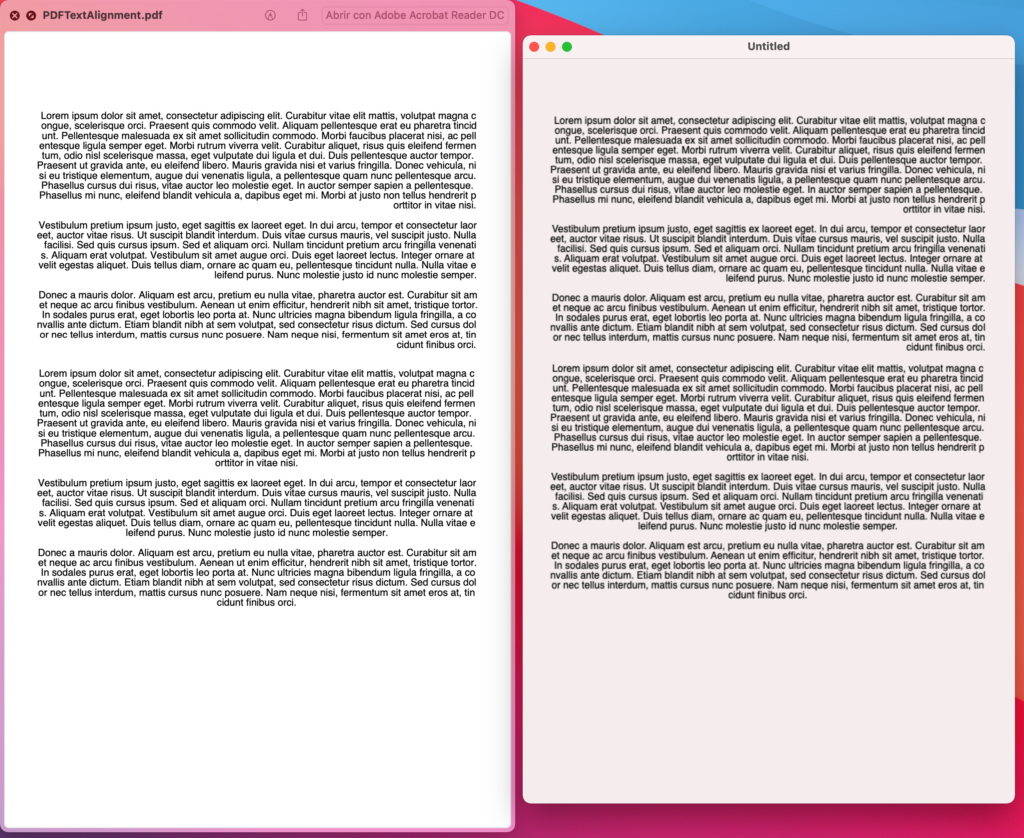
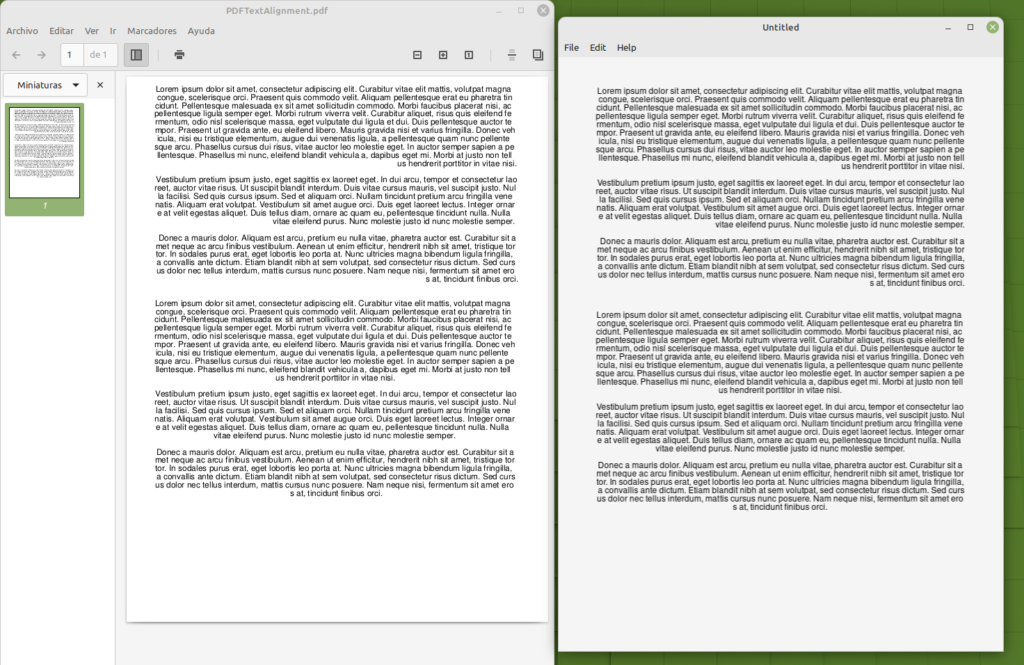
Run the example project and you should see something similar to the result displayed in the screenshots. Of course, there are still some details to take care of, for example when a line is split so the last letter goes over to the next line and things like that but, as mentioned in the beginning of this post, this is just a starting point. Adapt and improve upon it as needed.
Have fun!
Javier Menendez is an engineer at Xojo and has been using Xojo since 1998. He lives in Castellón, Spain and hosts regular Xojo hangouts en español. Ask Javier questions on Twitter at @XojoES or on the Xojo Forum.