
On July 1st, 2022, Microsoft withdrew the Web Platform Installer and plans to remove it and its catalogues from servers on December 31st, 2022. You can read more about this at IIS Team Blog – Web Platform Installer – End of support and sunsetting the product/application feed. The following instructions show you how to continue to host Xojo Web Applications behind IIS.
There are four parts to this article: Part 1 prepares the server for reverse proxy, Part 2 installs the Web Application and create a Windows Service for that app, Part 3 configures the Web Site and, finally, Part 4 looks at setting up the DNS record.
These instructions have been tested on Windows 2016, 2019 and 2022 servers.
Part 1: Preparing the Server for Reverse Proxy
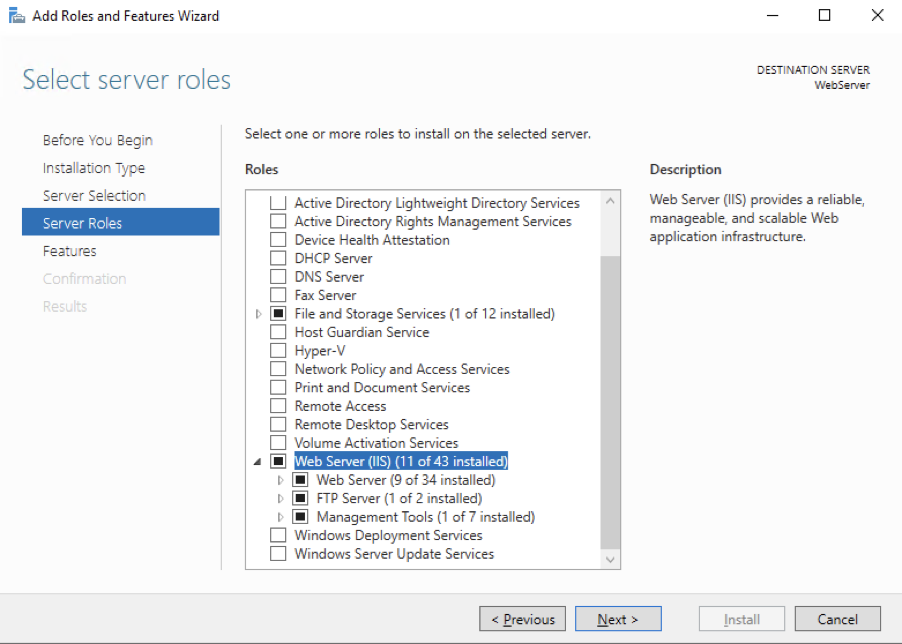
- Add the Web Server Role to your server. This is done through the Server Manager application. Default selections have been used.
- Download the URL Rewrite component from https://www.iis.net/downloads/microsoft/url-rewrite and install it.
- Download the Application Request Routing (ARR) component from https://www.iis.net/downloads/microsoft/application-request-routing and install it.
Your server is now ready to host Web Applications behind IIS.
Part 2: Installing the Web Application and Configuring the Windows Service
As Xojo built applications are stand-alone, it is simply a matter of copying the application to the server. Typically, the location will be C:\Program Files\<Your Company Name>\<Your Application Name>.
To create the Windows Service, you’ll need to run CMD As Administrator and enter the following commands. I have used Demo Company and Demo Application.
SC Create Demo binpath= “C:\Program Files\Demo Company\Demo Application\Demo Application.exe –port=8080” Start= auto
SC Description Demo “Demo Web Application”
SC Failure Demo actions=restart/2000/restart/2000/restart/2000 reset=10
SC FailureFlag Demo 1
SC Start Demo
SC Create creates the service setting the path to the binary (executable file) specifying Port 8080 and configuring the service to start with the server.
SC Description sets the long description for the service and is optional
SC Failure configures how the controller will handle service crashes. In this case the service will be restarted after 2seconds for the first, second and subsequent failures. The failure count will be reset after 10 seconds.
SC FailureFlag configures the service to treat app crashes as service crashes. Without this the controller won’t execute the failure actions set previously
SC Start simply starts the service.
Part 3: Configuring the Web Site
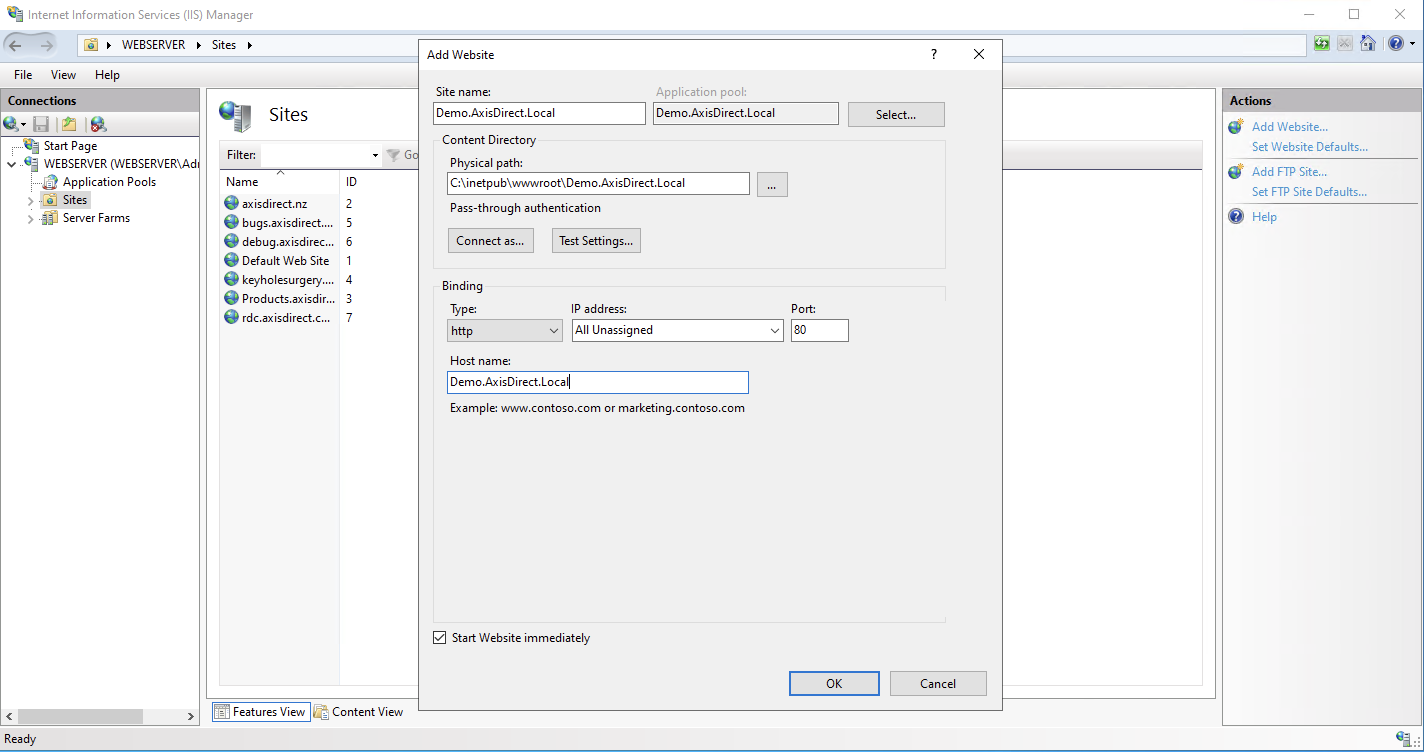
First, you’ll need to create the website using Internet Information Server Manager:
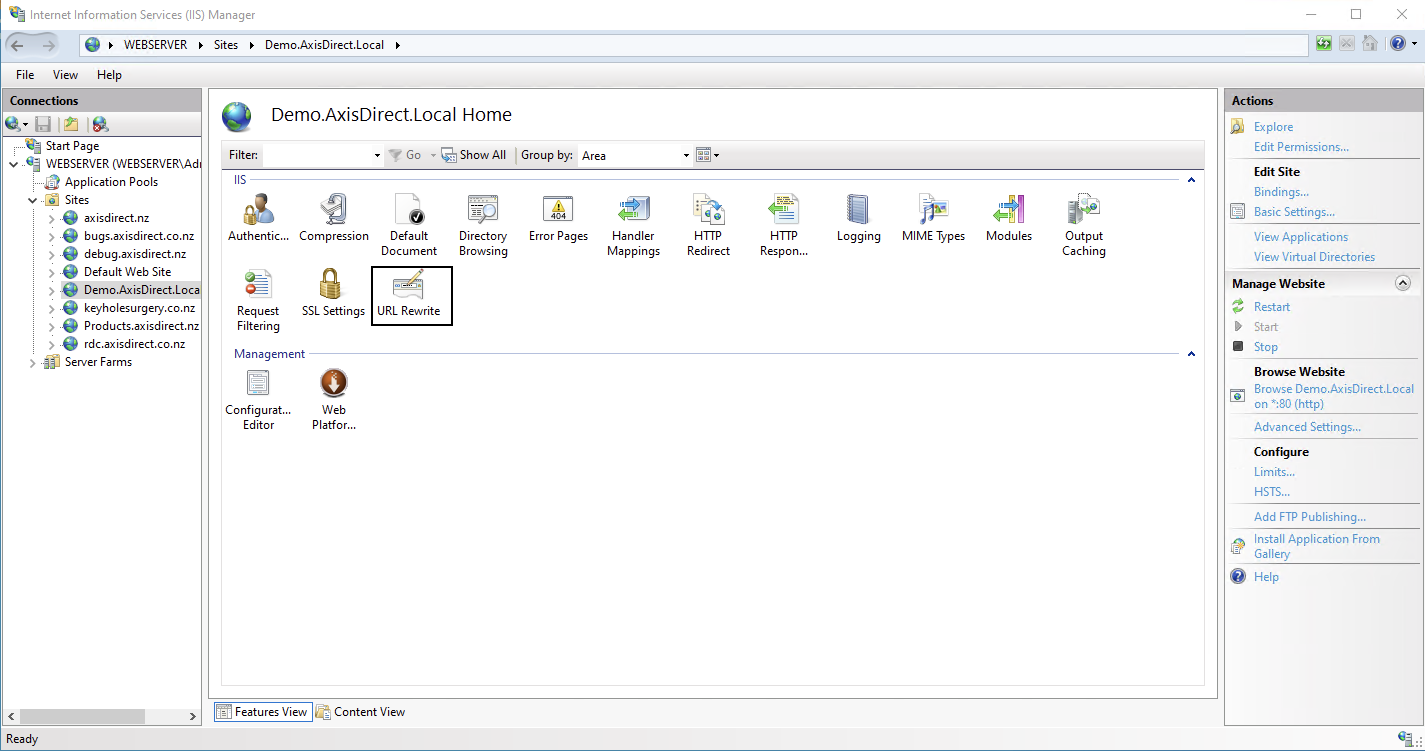
Next, you’ll add a reverse proxy rule using the URL Rewrite function:
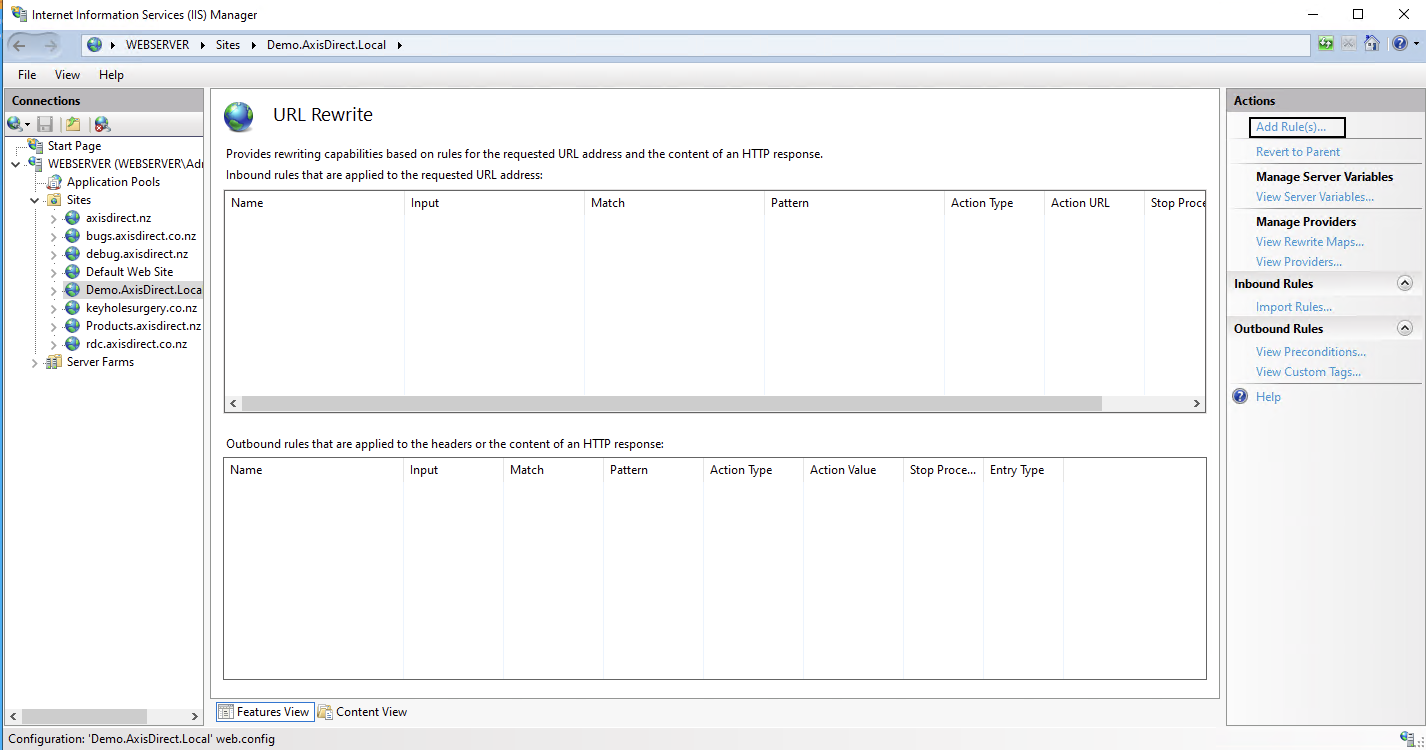
Select Add Rule:
Select Reverse Proxy:
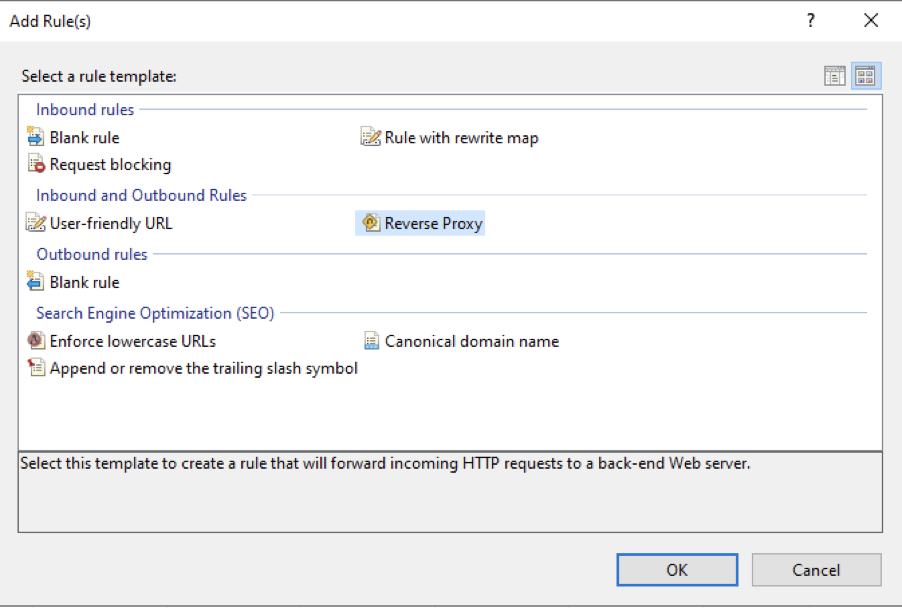
And finally configure the rule:
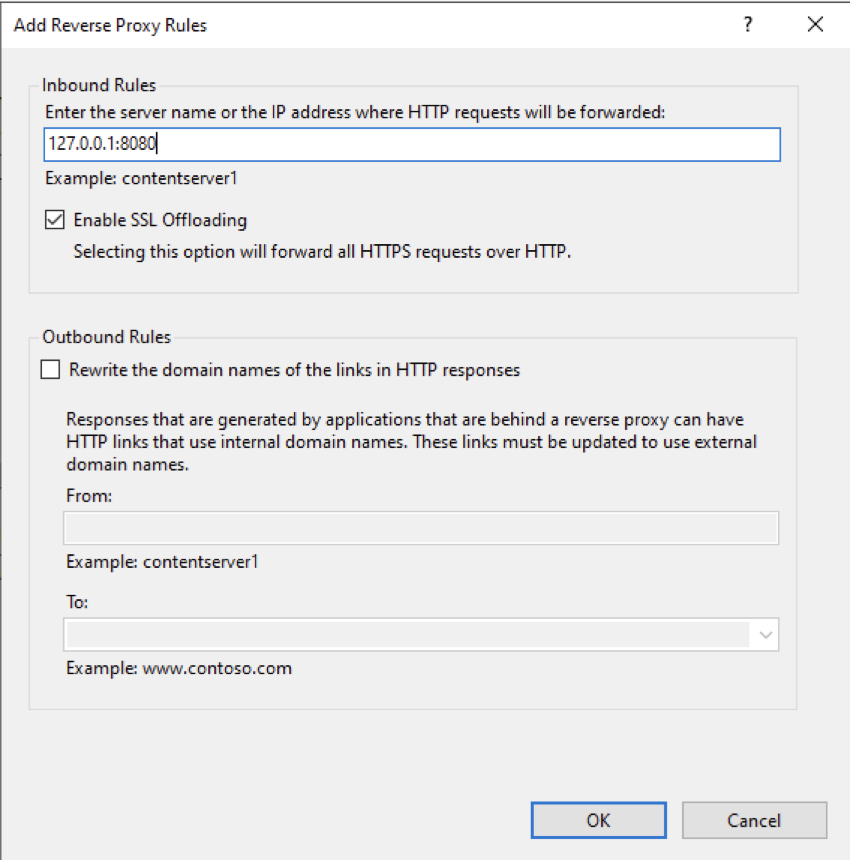
127.0.0.1 is the local machine and 8080 is the port configured in the service.
Part 4: DNS
For the client browsers to find the site you need to add a record to your Domain Name Server.
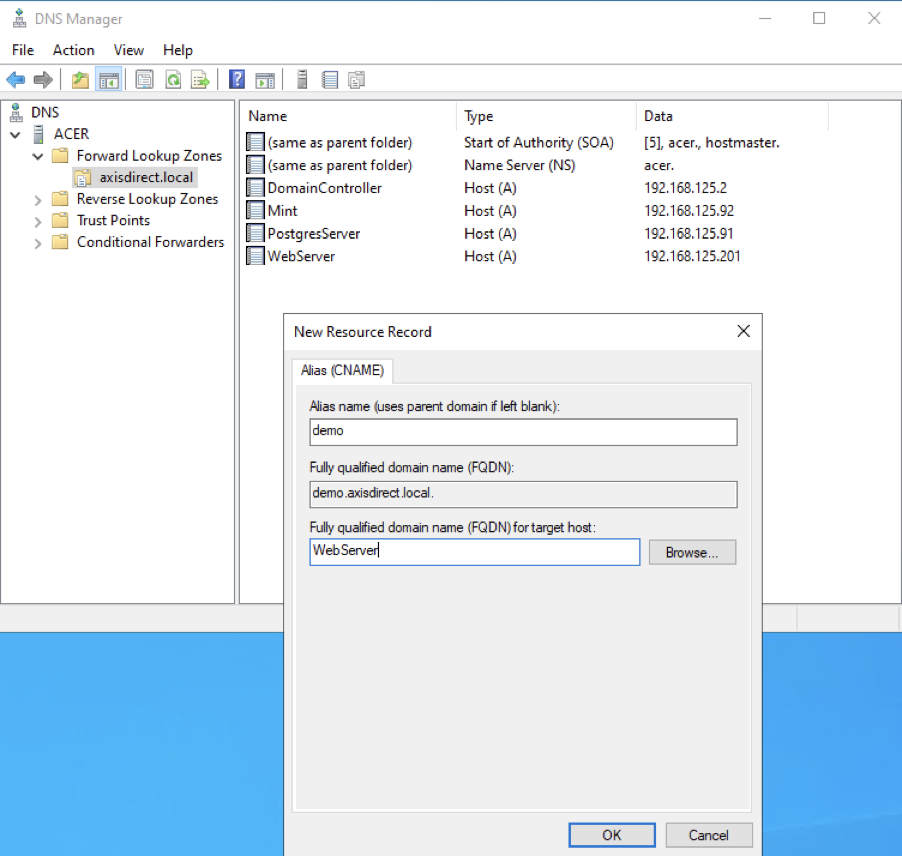
You can see here I’m adding a CNAME record to the DNS Manager. The fully qualified domain name matches the website name, and the site is hosted on a machine called WebServer. We use a CNAME record which is an alias of the WebServer A record so that if the WebServer ip address was changed all the sites would automatically follow.
Wayne Golding has been a Xojo developer since 2005 and is a Xojo MVP. He operates the IT Company Axis Direct Ltd which primarily develops applications using Xojo that integrate with Xero www.xero.com. Wayne’s hobby is robotics where he uses Xojo to build applications for his Raspberry Pi, often implementing IoT for remote control.